
DIY Cone Christmas Trees Tutorials
My DIY Cone Christmas Trees Ideas and Tutorial features a number of different cone trees to make with inexpensive materials. These small Christmas trees are a fun Christmas craft and best of all, they’re easy enough to make that you can whip up a few while watching your favorite Christmas movie. Let’s learn how to make a cone Christmas tree DIY!

Where To Buy Cones For DIY Cone Christmas Trees
You can buy paper mache cones or styrofoam cones online or at craft stores. They are a little more expensive than making a cone out of paper, but if you want to keep them around for years, buying a form will help them last longer.
Before you buy a cone, consider whether it will stand alone or if you intend to attach it to a base. If you plan on sitting it on a tree stand or base, you may need to consider a styrofoam Christmas cone tree since they have a solid bottom.
If you’re making a cone out of paper, you can glue a circle of cardboard inside the bottom to make a base. I had a hard time finding paper mache cones with a bottom so I chose the styrofoam.
How To Make DIY Cone Christmas Trees
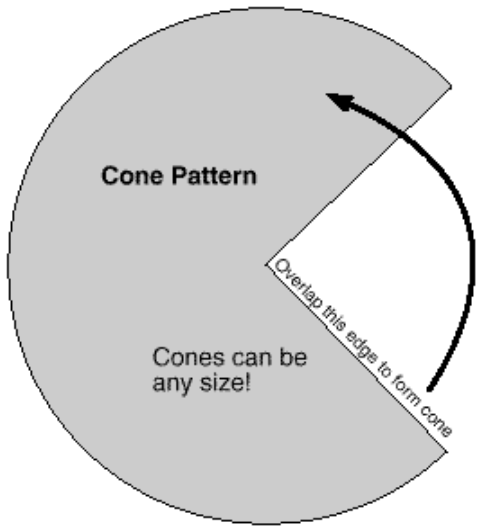
How to make a cone out of paper or cardstock. Making a cone shape is pretty easy. I generally use card stock since it’s thicker than regular paper. When I make taller trees I use poster board or a roll of wrapping paper (double-thickness). I’ll warn you that these don’t last long. They can crush or dent quickly but if you need a quick or cheap party decoration, they’re great.
To make the cone I used the method learned in grade school. I found the center of my paper and made a dot. I tied a string to a pen and then held the pen in one hand and held the loose end of the string on the dot in the center of the paper with the other hand and drew a circle. I cut out the circle and then cut a wedge out of the circle and just rolled it up into a cone shape. If it’s not perfectly level, you can trim the bottom with scissors.
How To Make Cone Tree Slipcovers
Ok, what? I know, sounds crazy right?! I make so many cone trees but they are so hard to store so I started making slipcovers for cones out of old socks. I just take a piece of waxed paper and wrap it around the cone and tape it in place. This is to catch glue that seeps through the sock.
Slide an old sock over the tree. Cut out the heel and tape the cut shut. Trim the bottom if necessary. You have to secure things with a bit more glue so when you take the slipcover off, yarn or whatever you’re using doesn’t flop off. I’m also careful about how much glue I use. The first time I tried this, I didn’t use the paper at first and glue went through the sock and stuck to the cone. The paper helped with this.
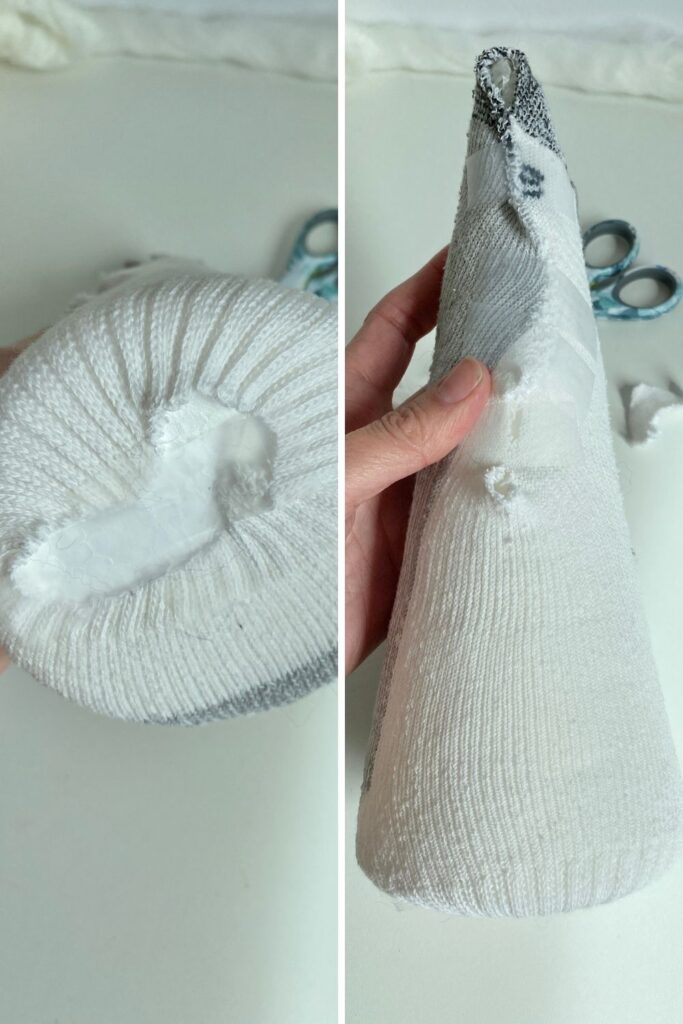
When you take off the cover, gently work the cover off slowly in case you have a couple of places that are stuck. Now you can flatten cone tree covers and store them in a container and reuse the cones. Genius, right?! lol. Here are a few cone tree ideas for you.
DIY Christmas Cone Trees With Drop Cloth Fabric
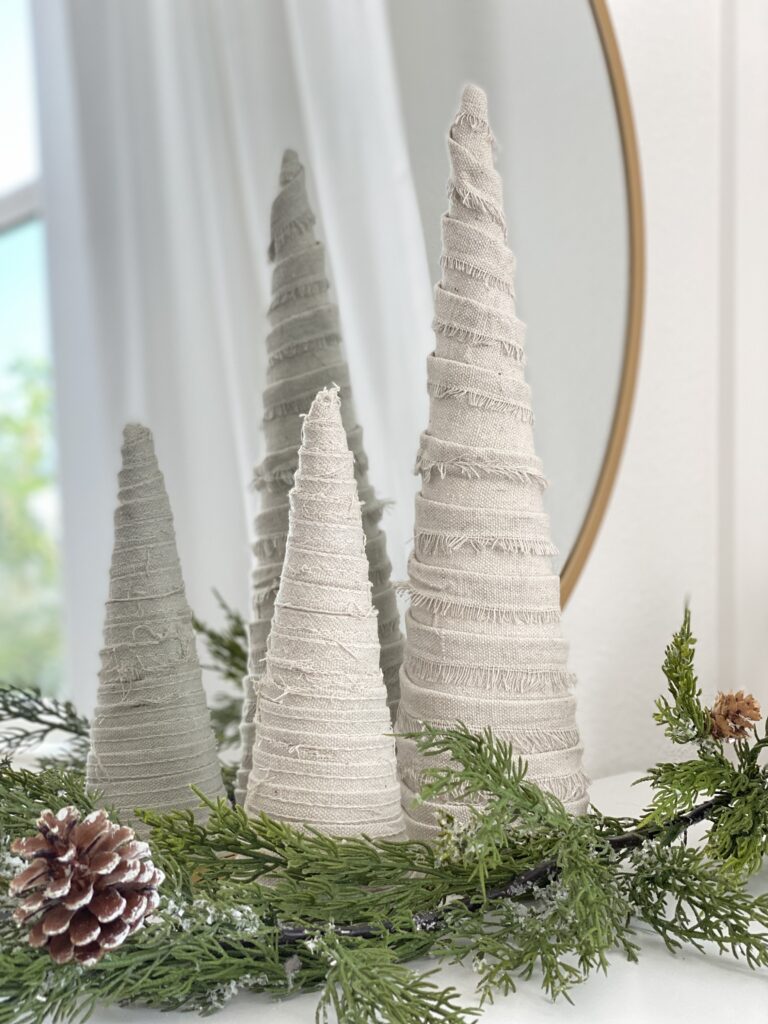
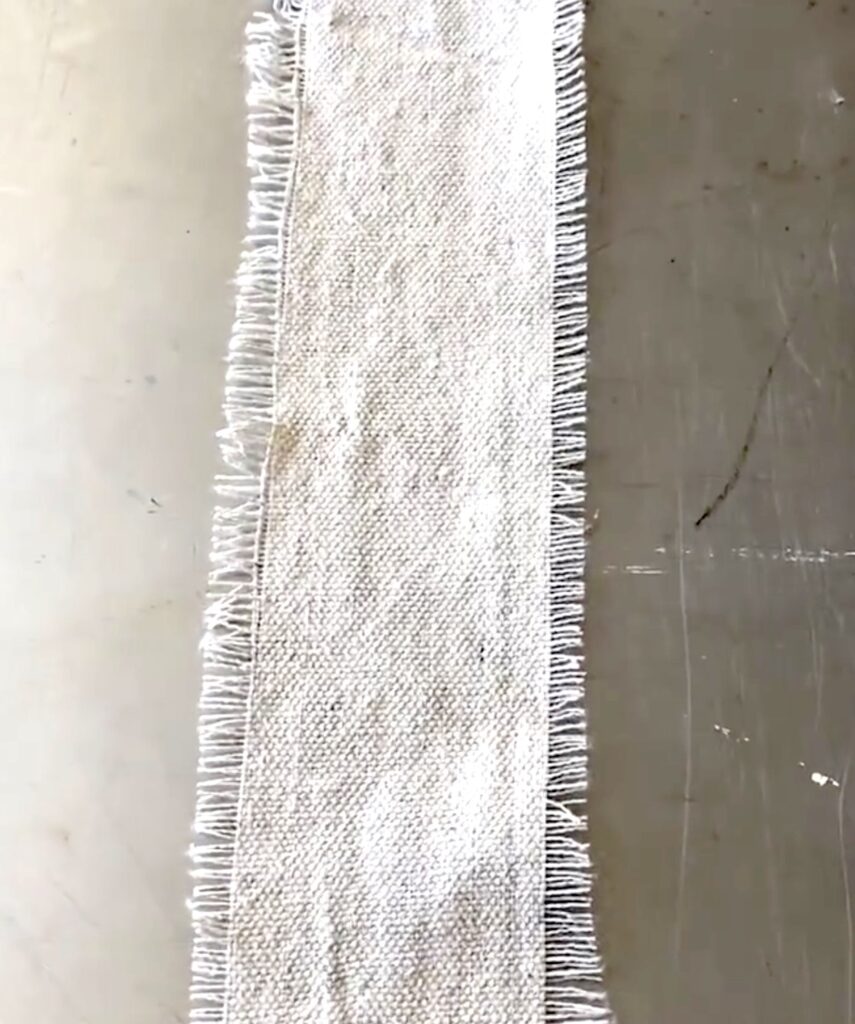
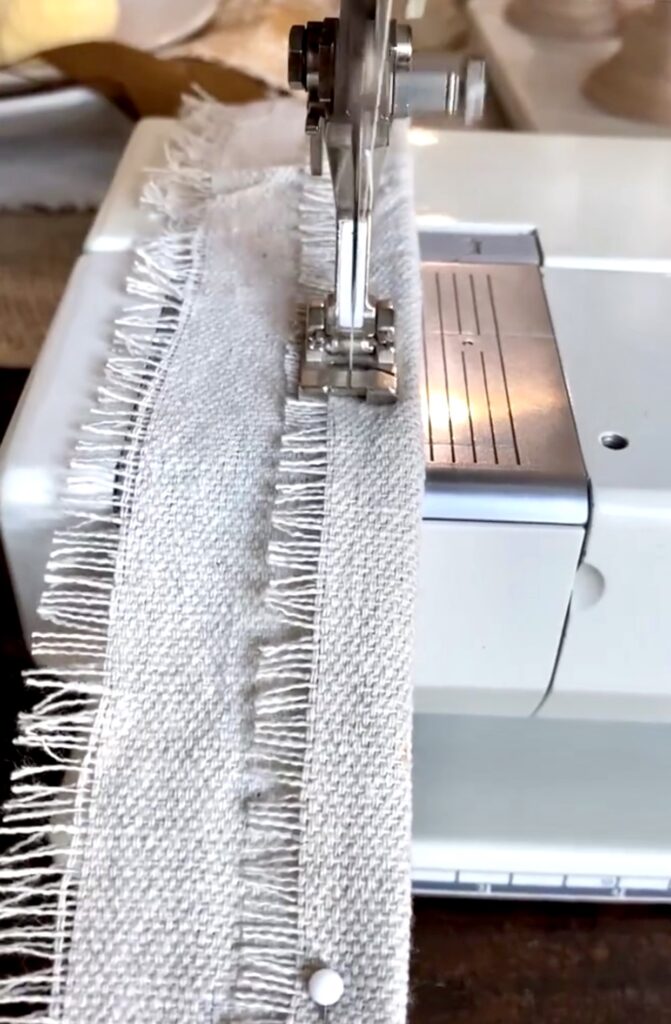
When making this fabric cone Christmas tree DIY, I cut a very long 3″ wide strip from a large painter’s drop cloth. The strip was probably 9 feet long by 3 inches wide. I think this is my favorite cone Christmas tree I’ve made.
I then frayed the edges on both of the long sides by pulling out long pieces of the drop cloth. I folded the strip about 1/3 of the way over and sewed it down so it would create a two-tier look. I love the texture it created on the tree.
Hot glue could have been used, but I happened to have my sewing machine out so I just sewed it down quickly.
I started at the top of the cone and glued the strip at an angle to the top of the tree and then kept gluing the strip to the cone working my way down the tree until I reached the bottom and then trimmed off the excess.
The second tree in this picture was made from the edges of the drop cloth that I had cut off. I just can’t throw anything away. It turned out pretty cute, too!
DIY Cone Christmas Tree Made With Paper
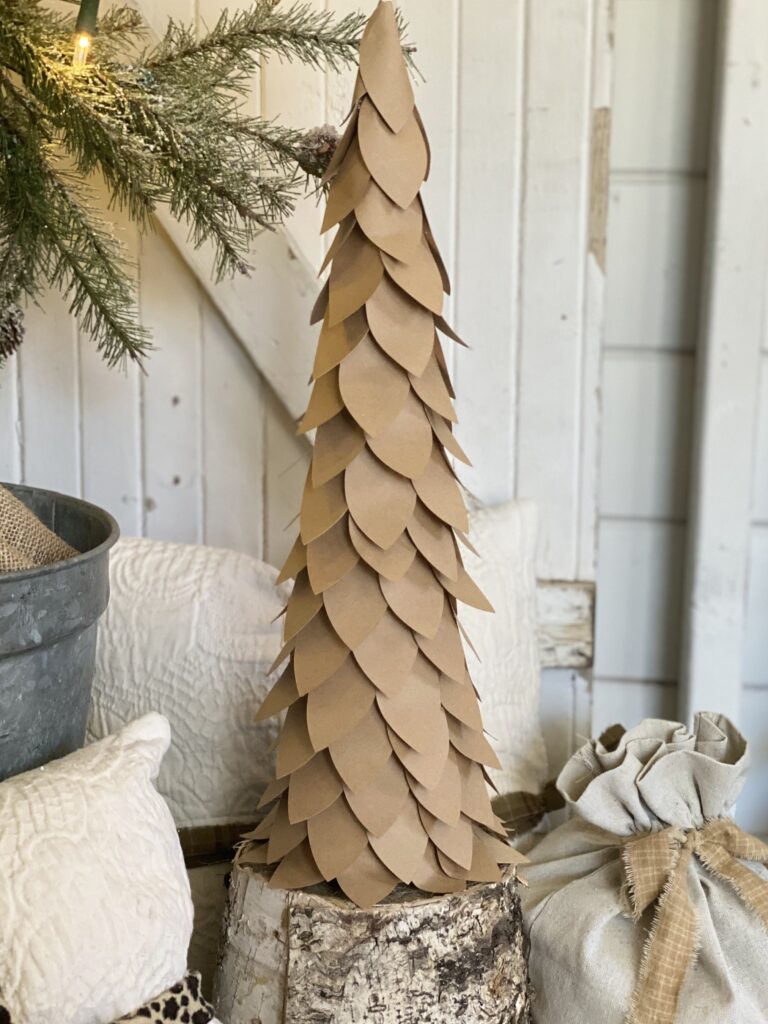
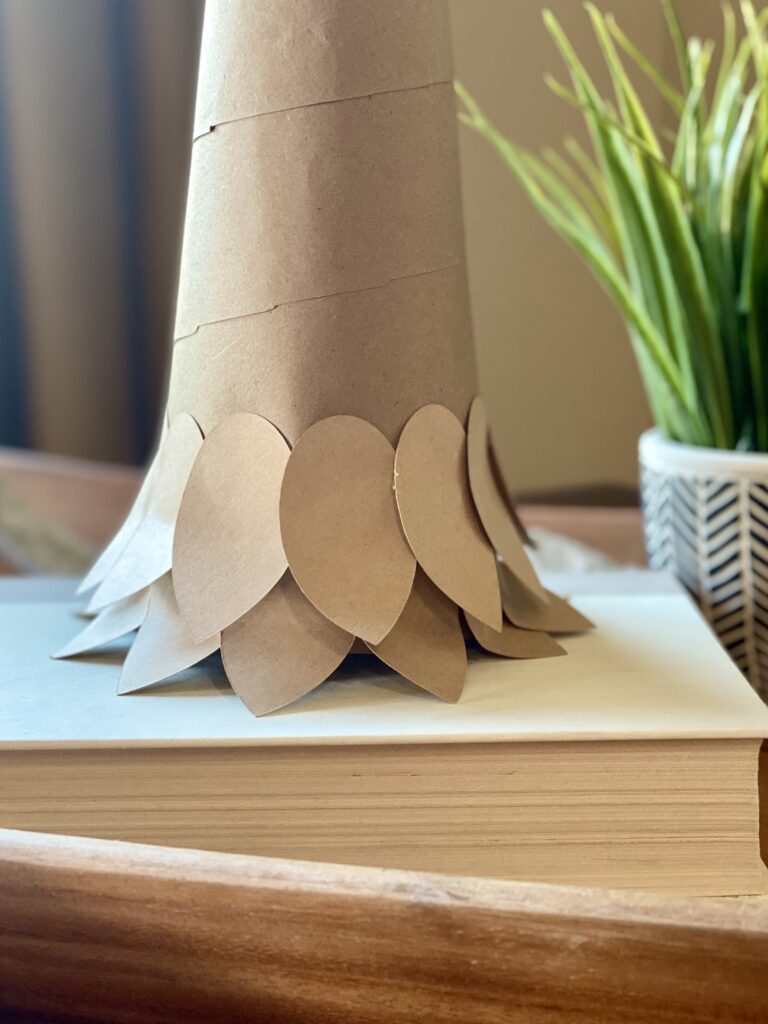
For this paper cone Christmas tree DIY, I used my Cricut to cut all of the leaf shapes out of kraft card stock. You can cut them by hand as well.
I then used a round pen to run each leaf along to create a nice little curl. I just hold the leaves against the smooth part of the pen and curl it slightly.
This gave the tree dimension and the curl gave me something to hang onto when gluing. I’ve seen people mist these paper trees with Christmas tree flocking and it looks so pretty. Book page cardstock would be beautiful, too!

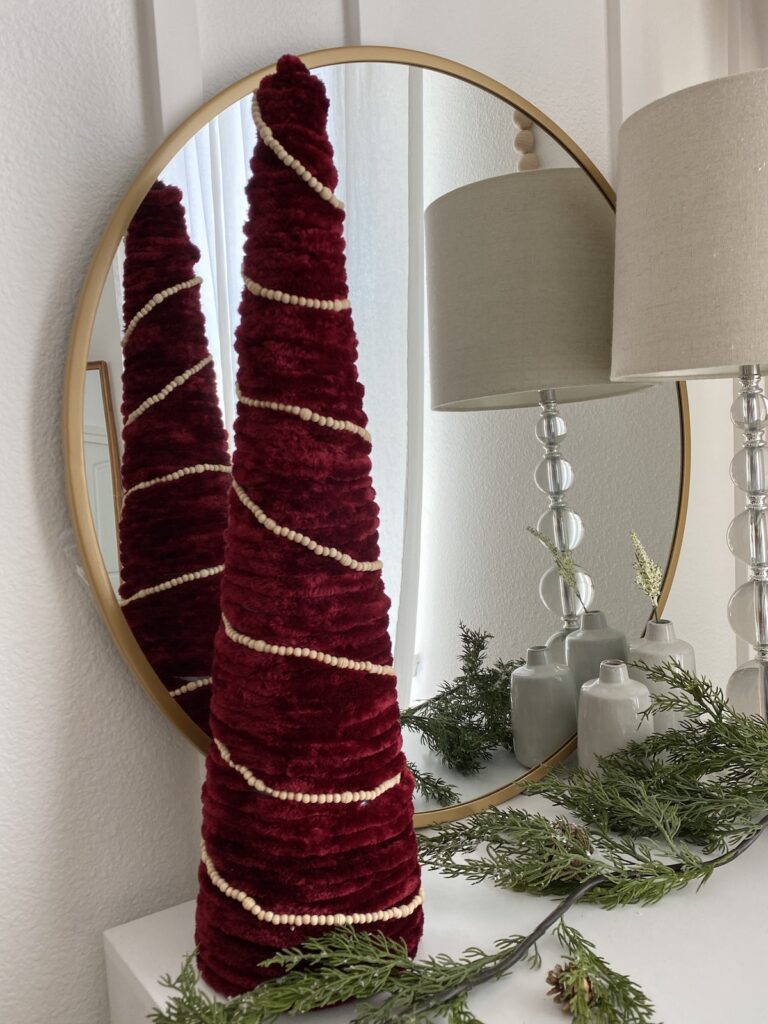
DIY Yarn Cone Christmas Tree Tutorial
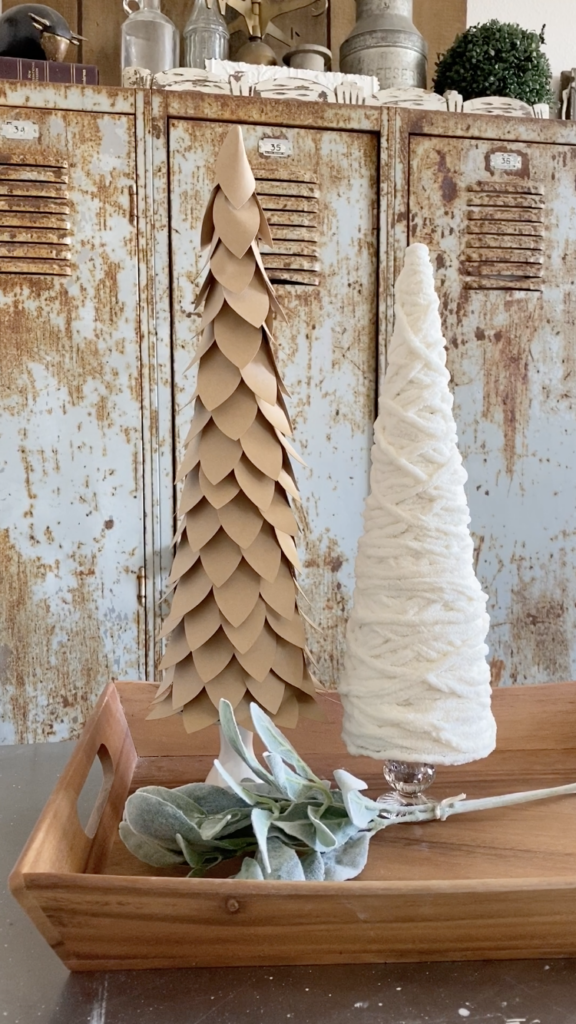
The DIY Cone Christmas trees made with yarn are so pretty and probably the easiest cone Christmas trees to make. In the picture above, I used this yarn. I just wrap the yarn in random patterns until the paper cone is completely covered.
I glued a round base to the bottom of the tree using more card stock and then attached a small glass candle holder that I got at Dollar Tree to make a stand.
The paper Christmas tree is pictured with a mini cake stand on the bottom. I’ve also made some with vintage wooden spools as stands as well.

I used chunky blanket yarn to create this DIY yarn tree and made a beaded garland out of wood beads.
DIY Cone Christmas Tree With Quilt Batting Or Felt

I fell in love with the way this tree turned out. It’s so soft and plush-looking. You can buy what I used here. I achieved this look by cutting three-inch strips and gluing them in half. I used scissors to cut slits in the fold side not quite all of the way to the top. You could also use felt but it would be a little less plush. There’s a better tutorial for this DIY tree here.
To find out how long you need the strips, measure around the bottom of the cone to get an idea. Each row will be a bit shorter as you work your way up. I glued one row at a time. For the top, I cut a circle and glued it on using hot glue.
DIY Cone Christmas Trees With Felt Leaves
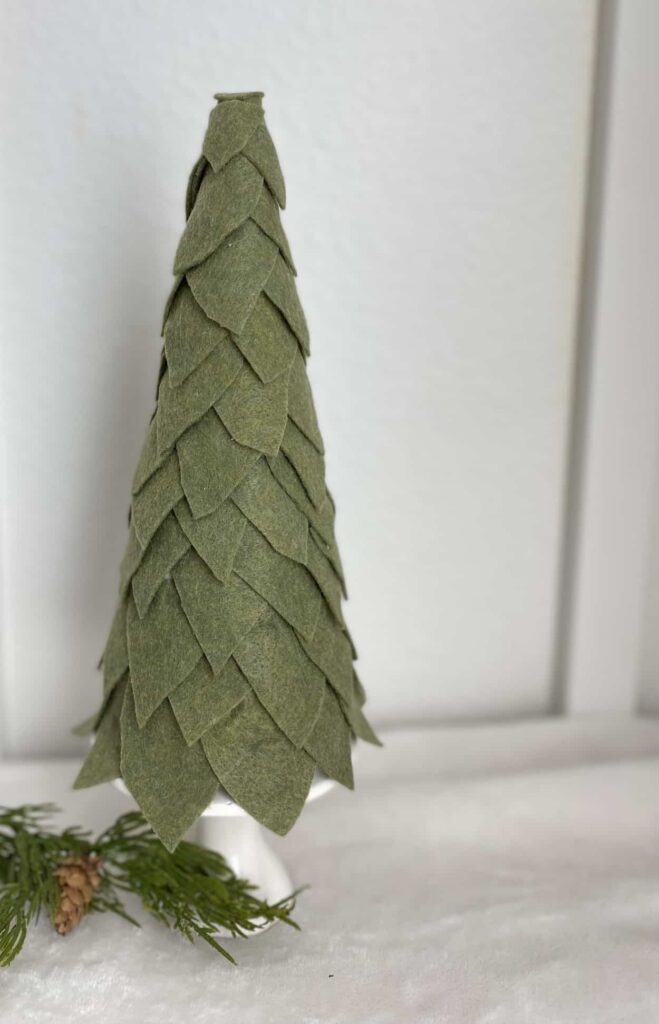
I made this DIY Felt Christmas tree by cutting three-inch felt leaves that were pointy on both ends and then I cut them in half. I let the bottom row overhang the cone a bit and just glued each half leaf starting at the bottom and overlapping as I worked my way up. Make sure the cone isn’t showing as you glue each leaf. I love this felt-leaf tree.
DIY Cone Christmas Trees With Chunky Yarn
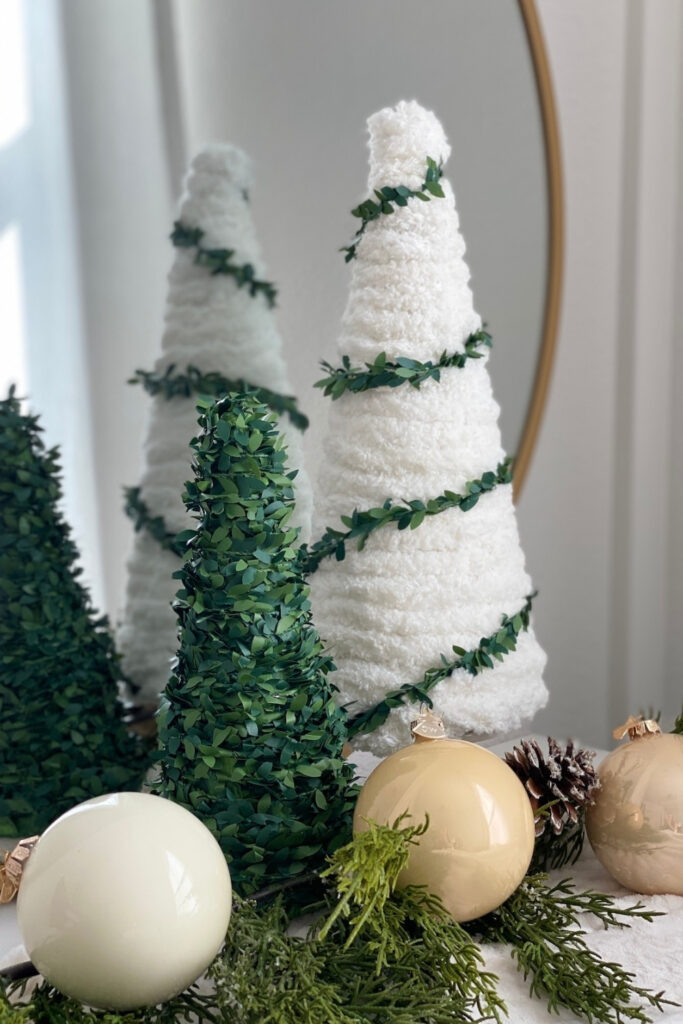
Technically, this is just another DIY Christmas tree made with yarn, but I used this yarn instead. I found some paper leaf garland to add. I can’t find the exact one from my craft stash, but here’s another that would also be pretty.
DIY Cone Christmas Tree With Plastic Spoons

My friend, Lauren, from My Georgian Colonial, made this beautiful Christmas tree cone craft using spray-painted plastic spoons. She just broke the handles off and glued them to the cone. She sprayed them gold and used some pretty embellishments. This is so pretty and I’m definitely making one this year. Such a fun and budget-friendly DIY Christmas craft!
Lauren is the sweetest ever and I love watching her IG stories. Go give her a follow or check out her Etsy shop.
I hope you enjoyed these DIY cone Christmas tree decorations. Before you go, be sure to take a look at my Burlap Tree I made with chicken wire and burlap. It’s another fun Christmas DIY. I have one more style of burlap tree as well.
Until next time…
xoxo,
Denise


When using the glue to make one.Try to cover the cone with cling film first.works really well.does. not matter if sticks to it .it will be inside your finished cone
Thank you. That’s a great idea and I’ll have to try it. Thank you for visiting.
What a great post Denise! Thank you so much for sharing!!❤️❤️❤️
Thanks, Lauren. I appreciate you letting me share your cute little tree!
I just LOVE these! As well as your paper tree. I used a similar technique to make some pine cones for Autumn decor and definitely need to make some trees! Featuring your post when my link party opens tonight!
Thank you so much. I appreciate you stopping by. I’ll check out the link party and I appreciate the invite to participate 🙂
How clever! All of your cone trees are so pretty! I love the cloth-covered one, but the other two are beautiful, too.
Thanks so much! I appreciate you stopping by my little blog. The dropcloth trees are my favorite, too 🙂