Tall Burlap Tree DIY
This post contains affiliate links which means that at no cost to you, I may earn a commission if you purchase using one of my links. For more information view my full disclosures.
~
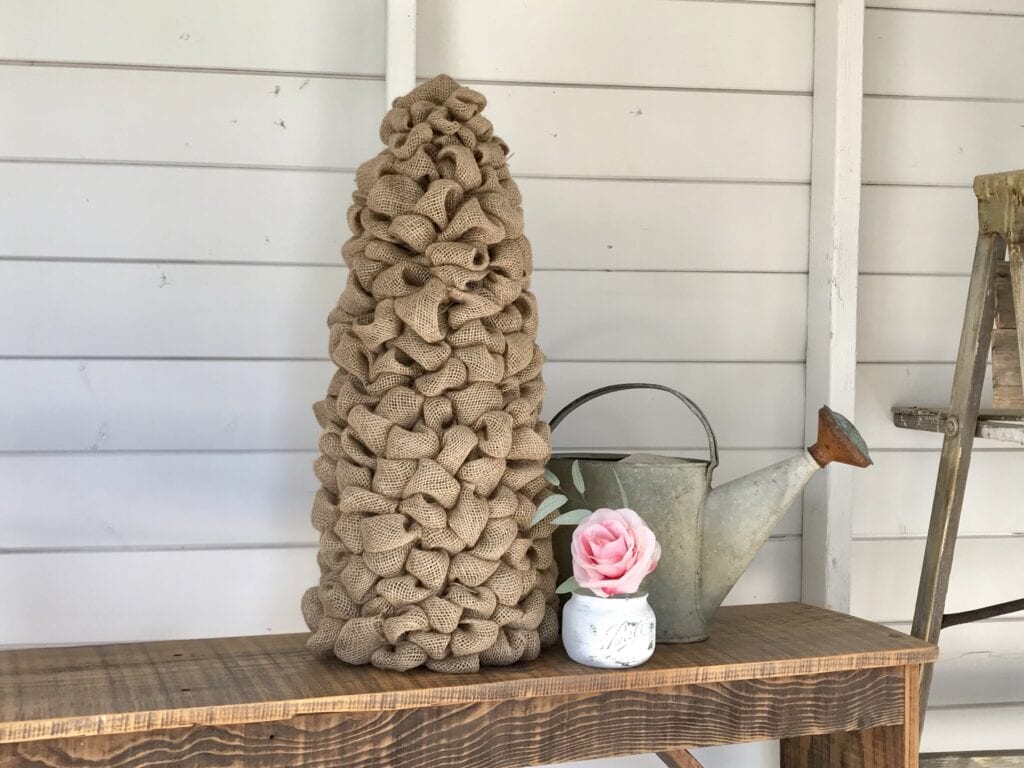
I have a love-hate relationship with this tall burlap tree DIY. I wish I had a video of me cutting the chicken wire and forming the cone shape. You’ll have to picture me sprawled on the floor trying to keep the roll of wire from flying back at me. I had scratches on my arms and legs and got poked several times. For all of those reasons, I’m just going to say that you should wear long pants, gloves, and safety glasses if you attempt this project.
Things you’ll need to make the tall burlap tree DIY:
- Burlap fabric
- Chicken wire with small hex
- Wire cutters and wire
- Scissors and/or rotary cutter and mat
- Hot glue gun and glue sticks
Making the Cone
I’m sorry I don’t have a pattern for forming the cone. I just cut a rectangle and fought it into the shape I needed and secured it with small pieces of wire. If you have any long overlapping flaps, you’ll want to cut those off. Before beginning to assemble the rest, try to fold sharp wires under so you don’t poke yourself later on. 🙂
If the cone shape is not your style, I also made these burlap Christmas trees as well.
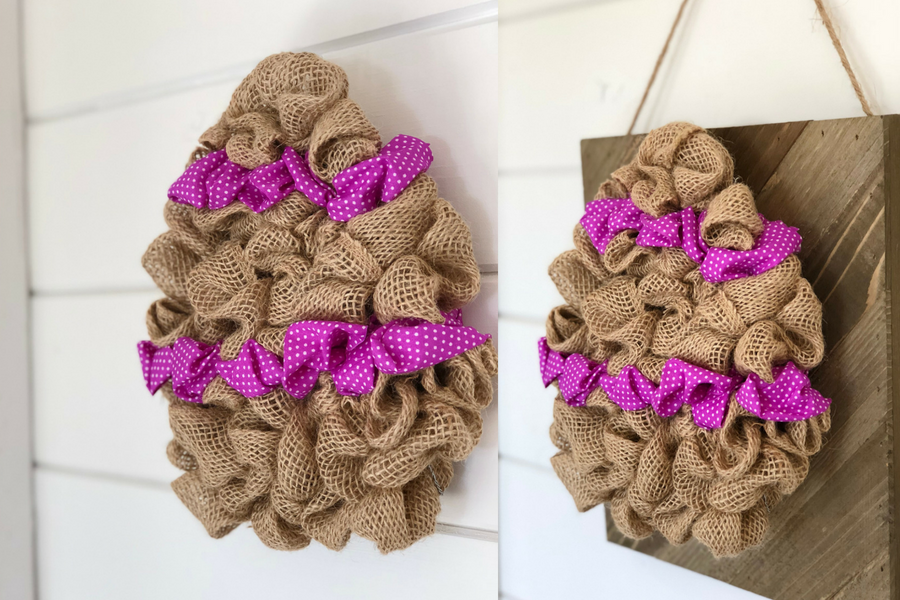
Pre-cutting the burlap
I used wide burlap ribbon for my tree, but about halfway through, I realized that burlap by the yard and a rotary cutter would have been my best friends. If I had it to do over again, I would have cut all of the squares in advance with a rotary cutter and then started the gluing. This would have saved a ton of time and a lot of money.
Attaching the Squares of Burlap
Once you have all of your squares cut, 5 x 5 works best, you’ll take one square and pinch all four corners together, squirt some hot glue on the ends and shove the ends into the first hole in the chicken wire about one inch. The glue is hot so don’t touch it.
I kept a long wooden stick handy in case I needed it to help push the burlap into the hole in the chicken wire. After you get a few rows in place, you can go back through with your glue gun and poke it into a few places that are loose or reach inside the cone and add a little where it’s needed. After the glue dries, you’ll need to go through and tuck the burlap pieces under to form the rounded poofs. Some pieces will do what they’re supposed to and some may need a little extra help.


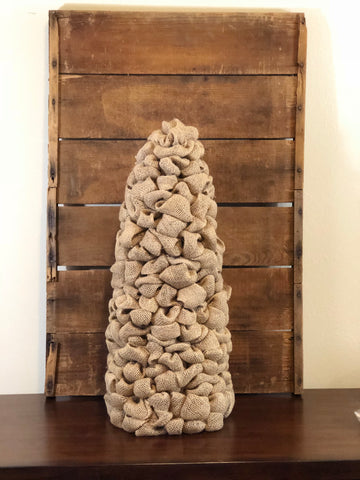
This project isn’t hard, once you get the chicken wire cone made, it’s just a bit time-consuming. I know many of you may be saving this for a Christmas project, but this burlap tree can be used year-round. You can use spring ribbon to make a garland, decorate it for the 4th of July, or any other holiday that comes up.
I also think these would look awesome in a baby’s nursery. I’d love to hear how you would decorate yours! Since you’re probably decorating for Christmas, don’t forget to check out my tutorials for making all different burlap bows.