
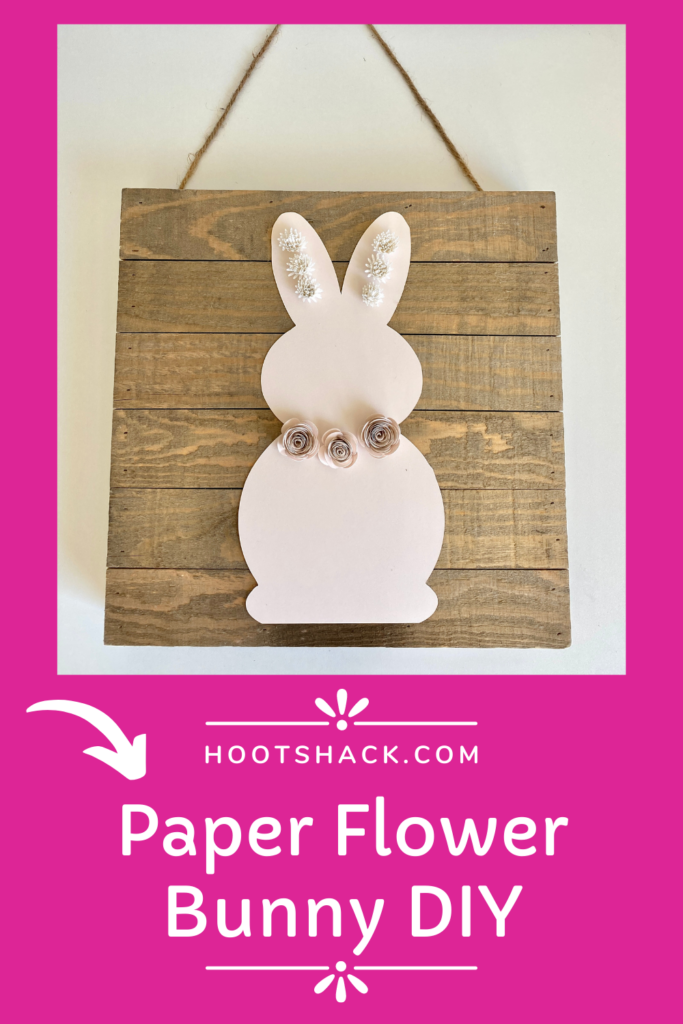
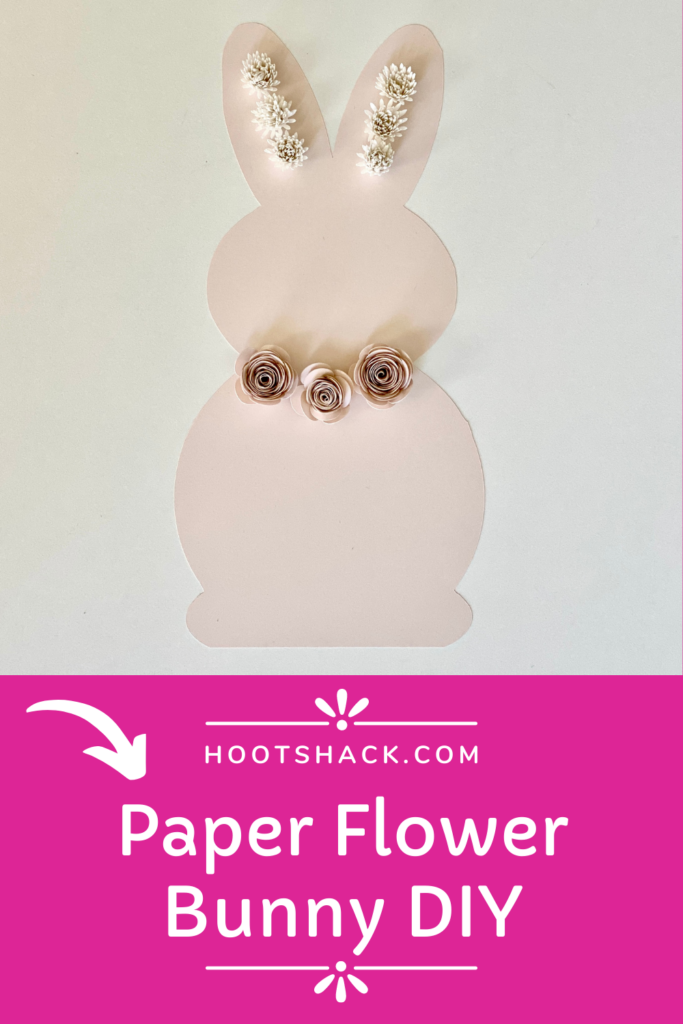
Paper Flower Bunny DIY
I made this simple Paper Flower Bunny today with my Cricut cutting machine. If you don’t have a cutting machine, it is still possible to make it, it will just take longer to cut the flowers by hand. I’ve been challenging myself to learn to make new things with my Cricut lately. I was intimidated when I first got it, but I’m quickly getting the hang of it.
I bought a Cricut a couple of years ago. Just because! You don’t need an excuse to buy one. If it feeds your creativity at times and you enjoy it, then you need it. Sometimes I make 5 or 6 projects on a weekend and other times it sits for a while. Whatever! I love being able to treat myself to simple and creative craft projects when I need to. So if you need a cheerleader to JUST DO IT, I’m your girl!

Paper Flower Bunny Supplies List:
- cardstock to make the paper flowers
- glue or a glue gun
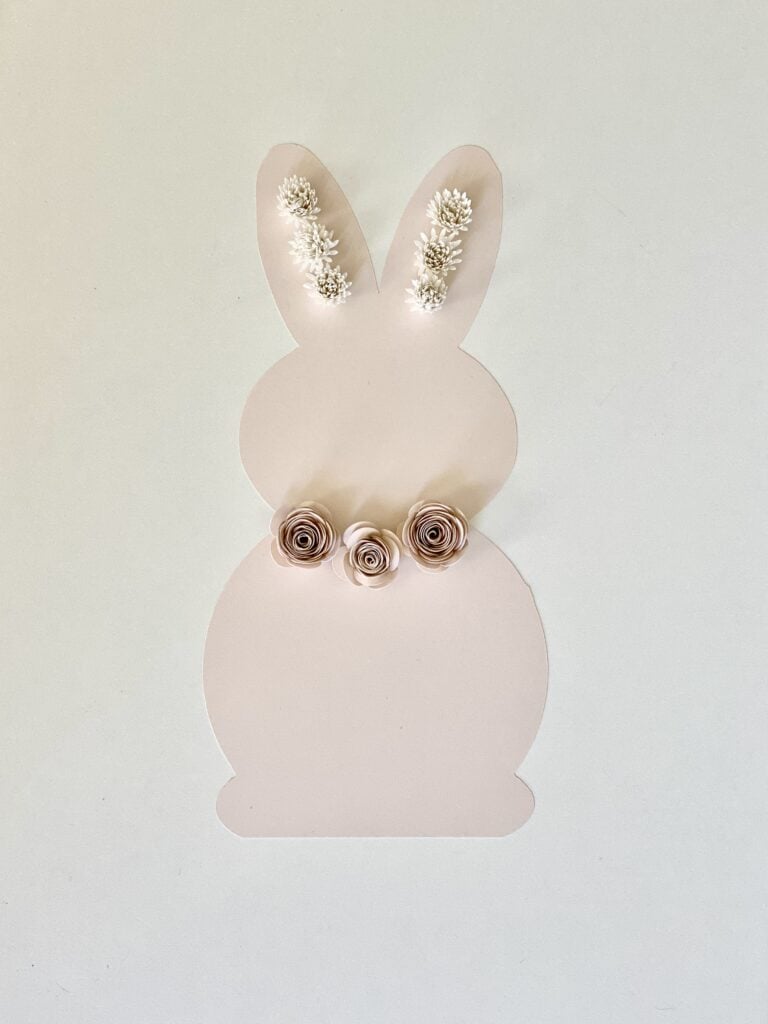
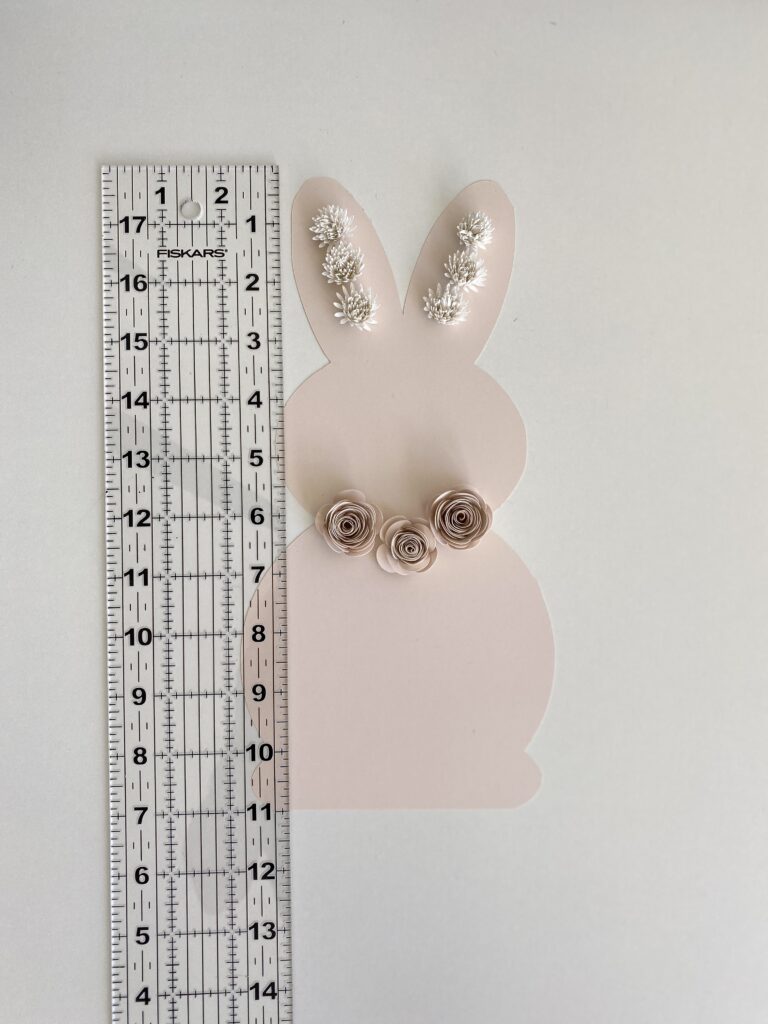
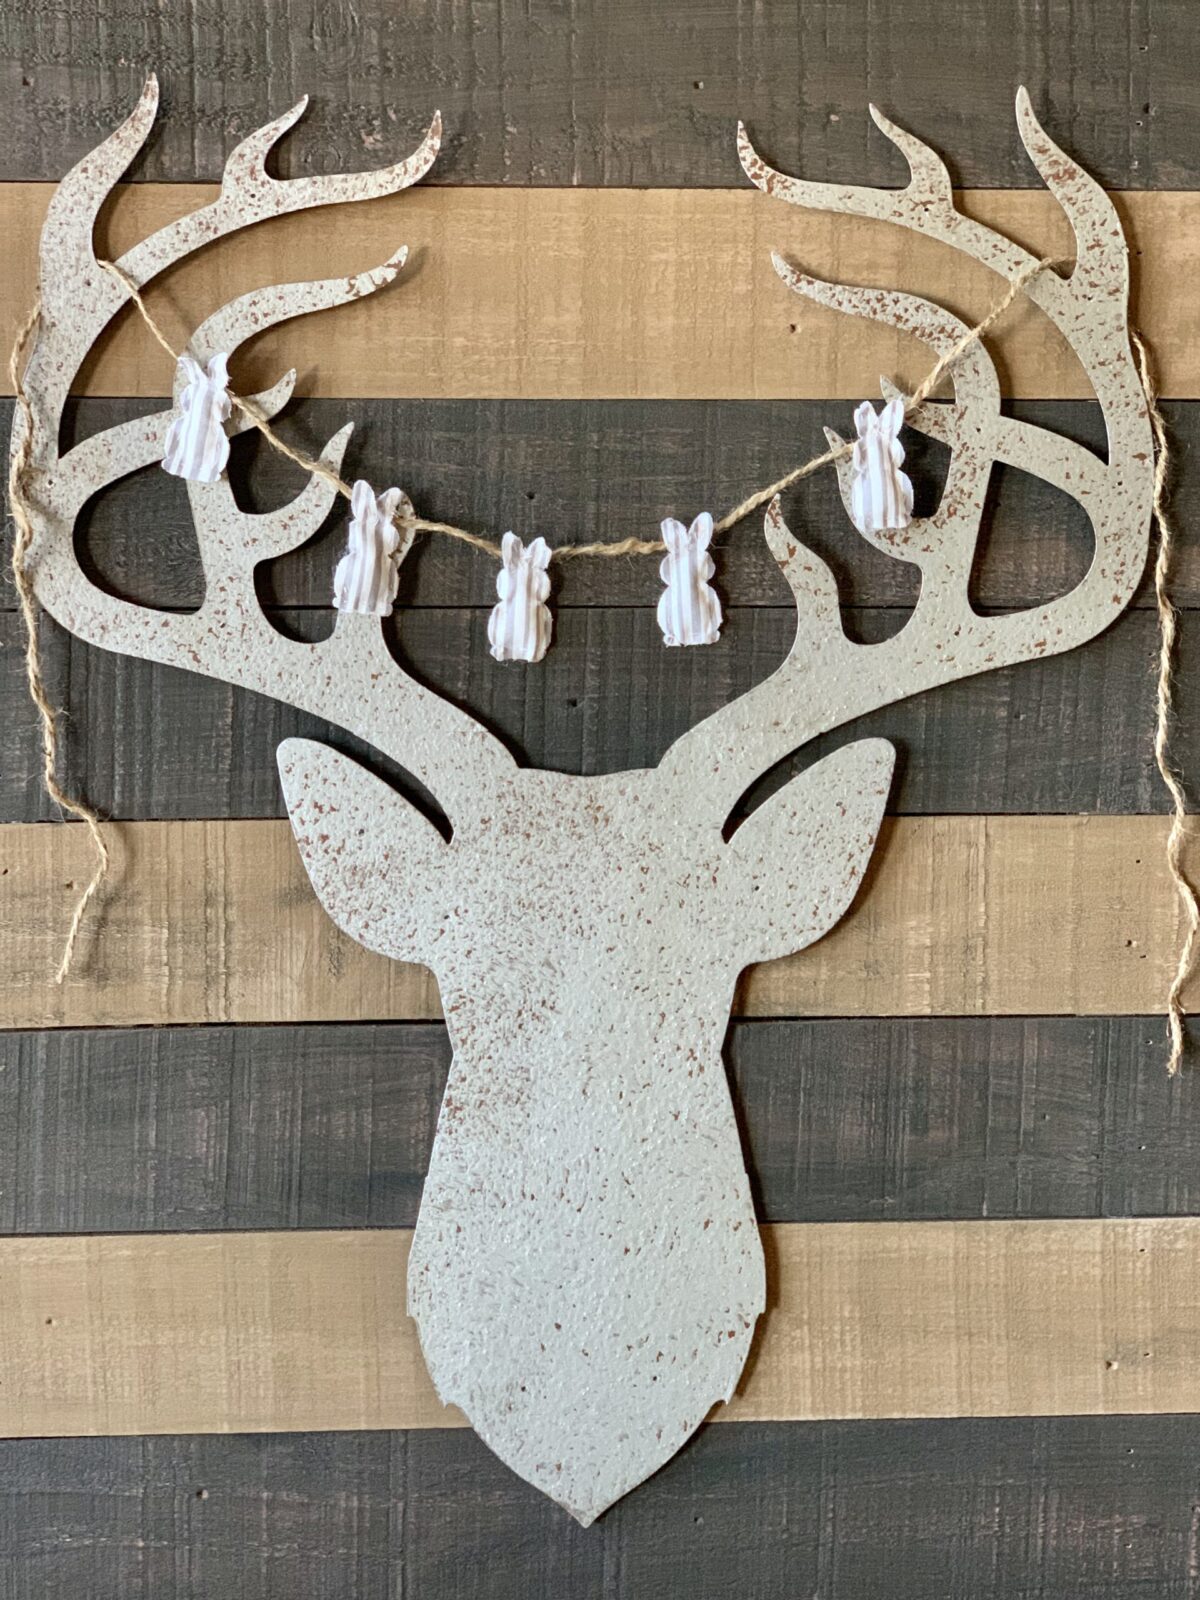
- bunny cutout – mine is 11″ tall because my sign is 12 x 12
- paper flower template
- 6 paper flowers for the ears – I used Number 6 sized at 4″
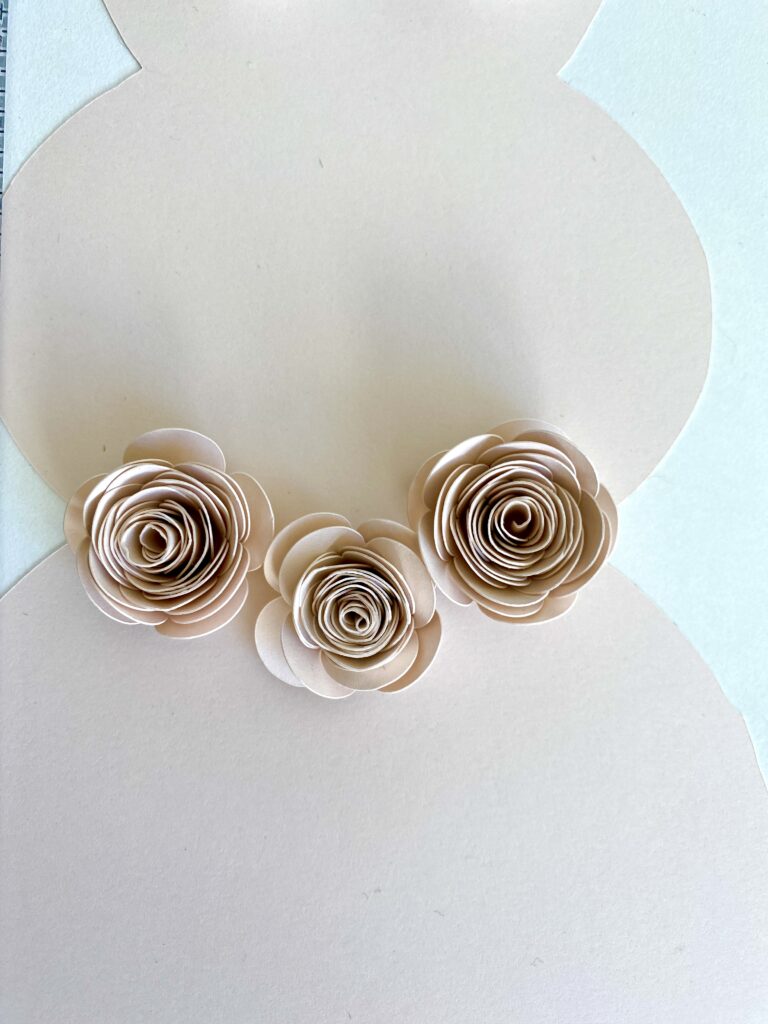
- 3 paper flowers for the neck – I used Number 12 sized at 4″
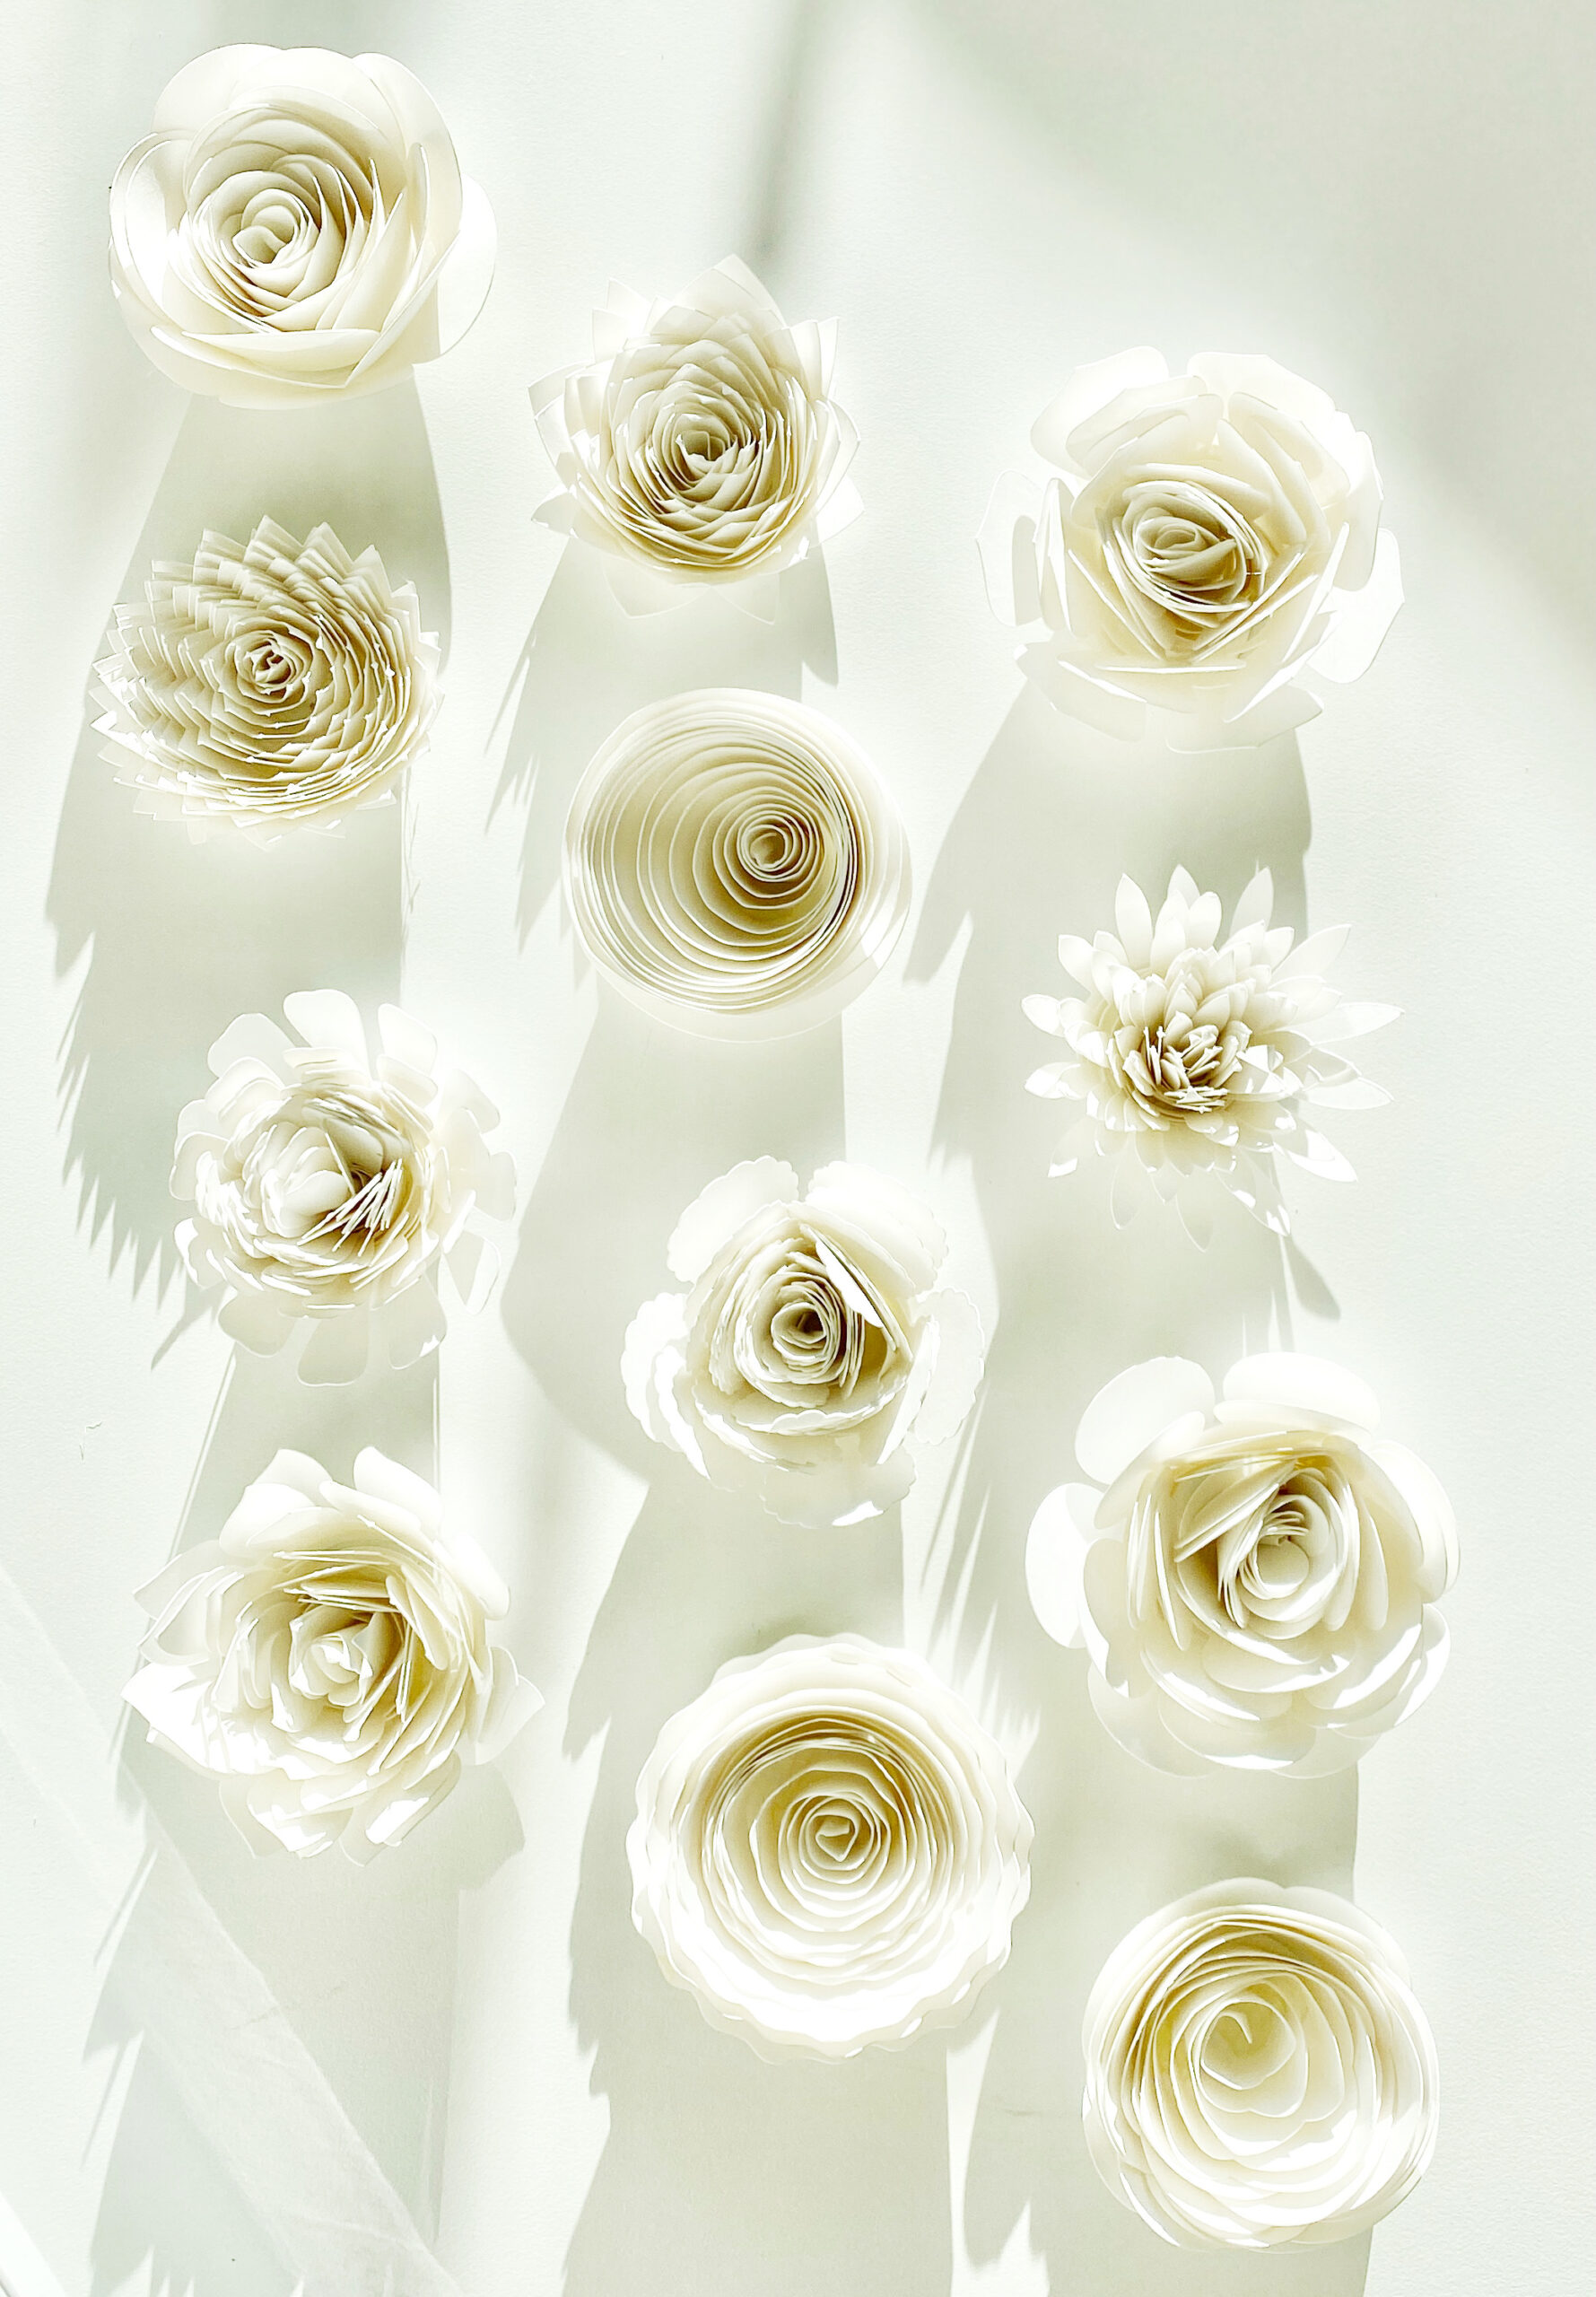
If you don’t know how to make rolled paper flowers, start with this post. There’s a short video that you can watch along with some tips.
Cricut is pretty user friendly as far as importing the cut files you need. I use Canva to create most of my projects because it’s really easy to use. I got the bunny shape from their website. The paid subscription allows you to save files in the right file format to use with your Cricut which is usually an SVG file or a transparent one. Ok, back to the bunny.
For this project, I used this cardstock for the bunny and the flowers. Cut a bunny shape with your Cricut or trace a shape that you find on the internet. I have a 12 x 12 wood sign that I mounted my bunny to, so I cut my bunny at 11″. Cut 6 of the Number 6 flower template cut at 4″ and 3 of the Number 12 flower template also cut at 4″. I used white for inside the ears and the blush color for the body and the flowers around the neckline. You can get creative here and use any colors you like. This bunny can be used for a baby’s room, Easter, or just Spring decor.


Mount your finished design to a wood plaque, an old window, an old picture frame, or whatever you have around the house. I just used regular tape to adhere mine because I’m going to make a new shape for the next season and this is an inexpensive way to change up your decor seasonally. You could even punch a hole in each ear and tie it to twine or ribbon if you don’t have anything to mount the bunny on.
That was a pretty simple project. Just the kind I like! Be sure to also check out the Easy Paper Flower Wreath With Cricut where I show you how to make a small wreath using all 12 flower templates!
Don’t forget to Pin a project picture to Pinterest before you go. This helps me grow this little blog and I appreciate every single one! Thanks for hanging out with me and being creative today!
Happy crafting,
Denise
This bunny is so sweet. What a great idea for Easter or maybe decor for a little girl’s room! Thank you for your wonderful posts and ideas.
Thank you. In a little girl’s room would be so cute.
That is so cute and easy, I love it.
Thank you so much. I hope you’re doing well!