St. Patrick’s Day Garland DIY: Shamrocks
This post contains affiliate links which means that at no cost to you, I may earn a commission if you purchase using one of my links. For more information view my full disclosures.
~
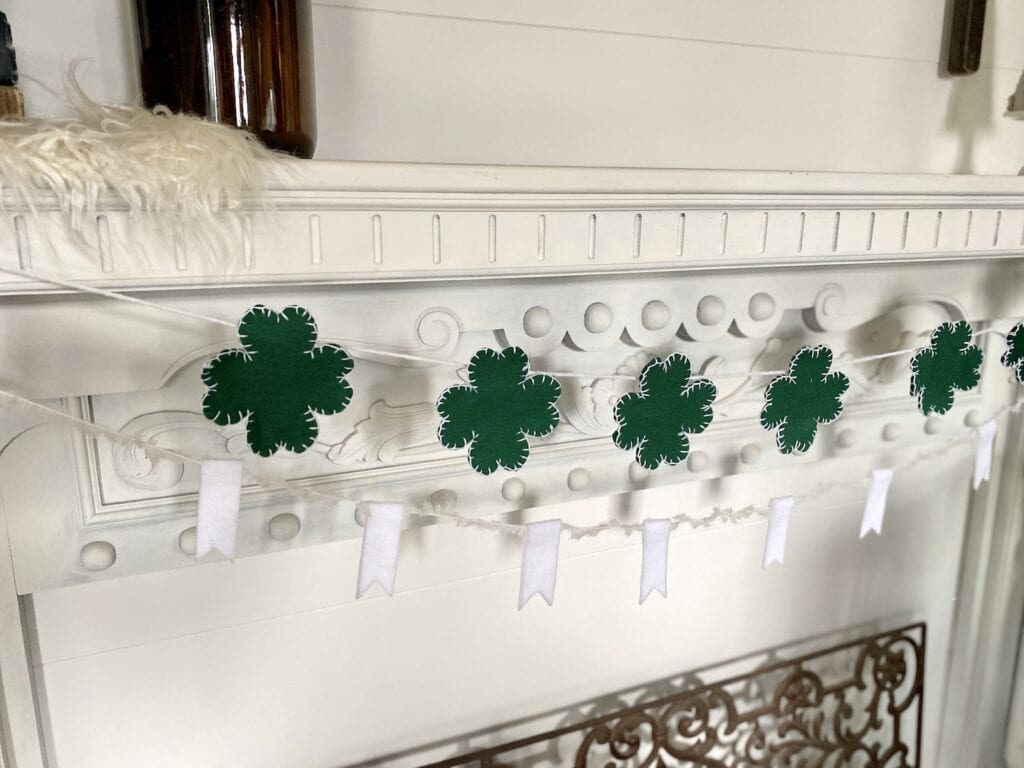
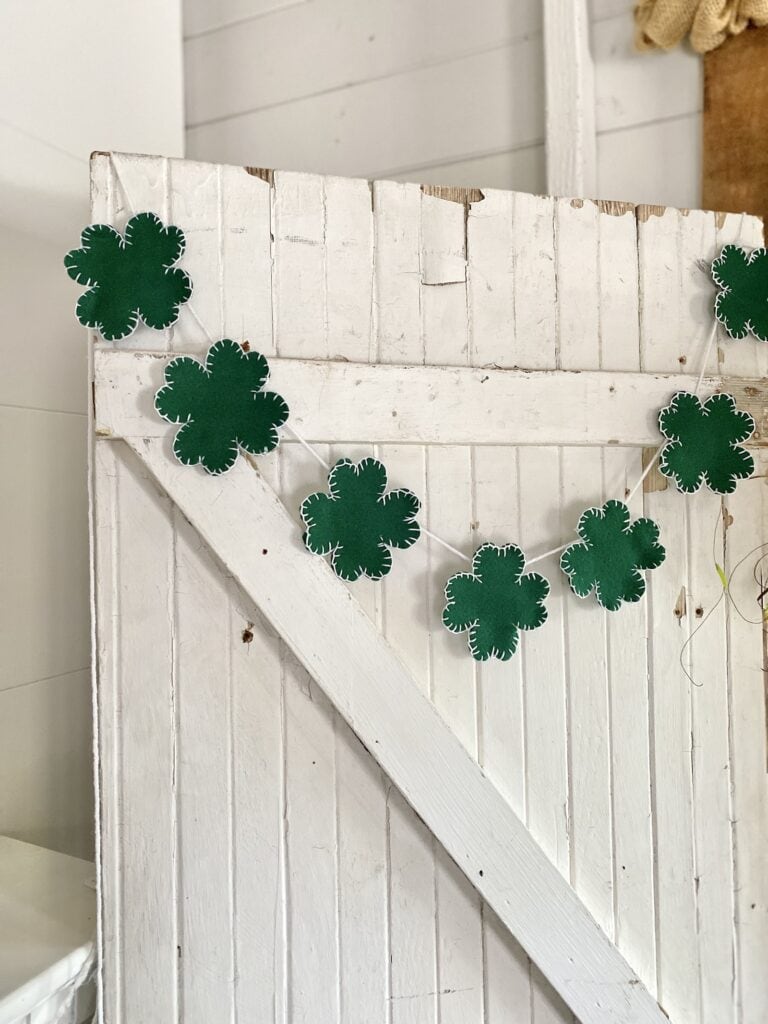
This DIY St. Patrick’s Day garland will look so cute displayed on your mantel, on your coffee station, or mixed in with your other St. Patrick’s day decor. I even have a template for you to use to cut the shamrocks with scissors or use the SVG file to cut them with a cutting machine.
Whether you go all out for this holiday or just prefer a few St. Patrick’s Day decorations, this easy St. Patty’s Day garland DIY will be a perfect addition to your home decor.
You can find all of the supplies at Hobby Lobby, Michael’s crafts, or any other craft store. I hope you enjoy making this felt shamrock garland!
St. Patrick’s Day Garland DIY Supplies:
- felt – I used 4 9 x 12 sheets (standard at craft stores)
- white embroidery floss and an embroidery needle (important notes about this below)
- hot glue gun
- shamrock template or SVG
- twine, yarn, or sting for hanging
- scissors or Cricut Maker
DIY Shamrock Garland Step-by-step Instructions
- Cut all of the shamrocks. I cut 14 because that’s what fit my mantel. They are sewn double-thickness so they don’t flop over when hanging. I have 7 completed shamrocks.
- Sew all of the shamrocks together with embroidery floss in sets of two using a blanket stitch or a running stitch.
- Glue a felt rectangle to the back of each shamrock. Only glue the top and bottom of the rectangle. Leave a space to fit the twine through. (More about the correct position below.)
- Run your string or twine through each rectangle and hang your new garland.
Cutting The Shamrocks
Get The Shamrock But Check Your Spam Folder! Sometimes things end up there.
I used my Cricut Maker to cut the felt shamrocks but they can easily be cut by hand. If you’re using a Cricut maker and have never cut felt, you may want to read How To Cut Felt With Cricut Maker before starting. This is a fun handmade craft or a Cricut St. Patrick’s Day project.
Sewing The Shamrocks
I’m not an expert when it comes to hand-sewing, but for this project, I decided to attempt a blanket stitch. I’ll show you how I did it in the video below. This was my first attempt at blanket stitching.
Be sure to start your needle between two shamrocks so the knot is hidden between the two layers. I hope that makes sense. Unless you don’t care if the knot show’s on the back.
Make sure you pull the thread through slowly, watching the bottom and top for knots. When the thread is especially long, it tends to twist and knot easily. Once you get a tight knot, you have to cut the thread and start again.
If you don’t want to use a blanket stitch or find it too difficult, you can always use a simple running stitch.
Adding The Rectangles For Hanging
This is my secret weapon for making DIY fabric garlands! I’ve even glued shapes together to make a garland entirely no-sew, rather than stitching them shut.
Look closely at the top shamrock in this image to see how it’s done.

You just want to add a bead of glue along the top of the rectangle and along the bottom. Don’t use too much glue because you don’t want it to squeeze in between the two beads of glue making it impossible to slide your yarn or string through.
You also want to make sure you glue the rectangle as far up to the top of the shamrock without showing. If you glue it lower or in the middle, the shamrock will tip forward when you hang it. Ask me how I know…
Happy crafting,
Denise