
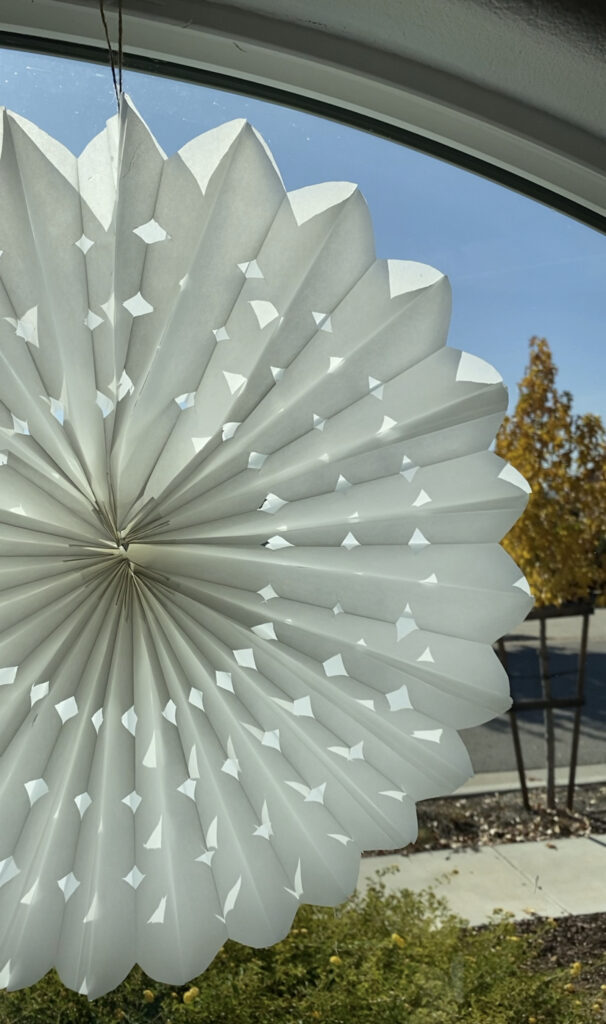
How To Make Paper Bag Snowflakes
Today I’ll show you how to make paper bag snowflakes. Making snowflakes with paper bags is so fun and they make quite a statement in your Christmas or winter decor. There are so many ways to make paper bag snowflakes using different styles of paper bags. Let’s learn how to make a few!
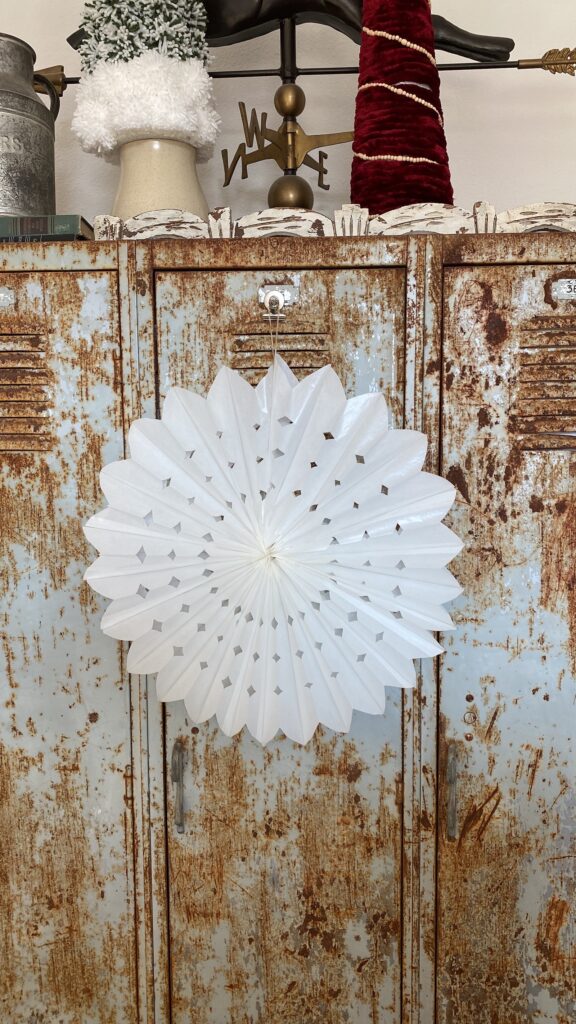
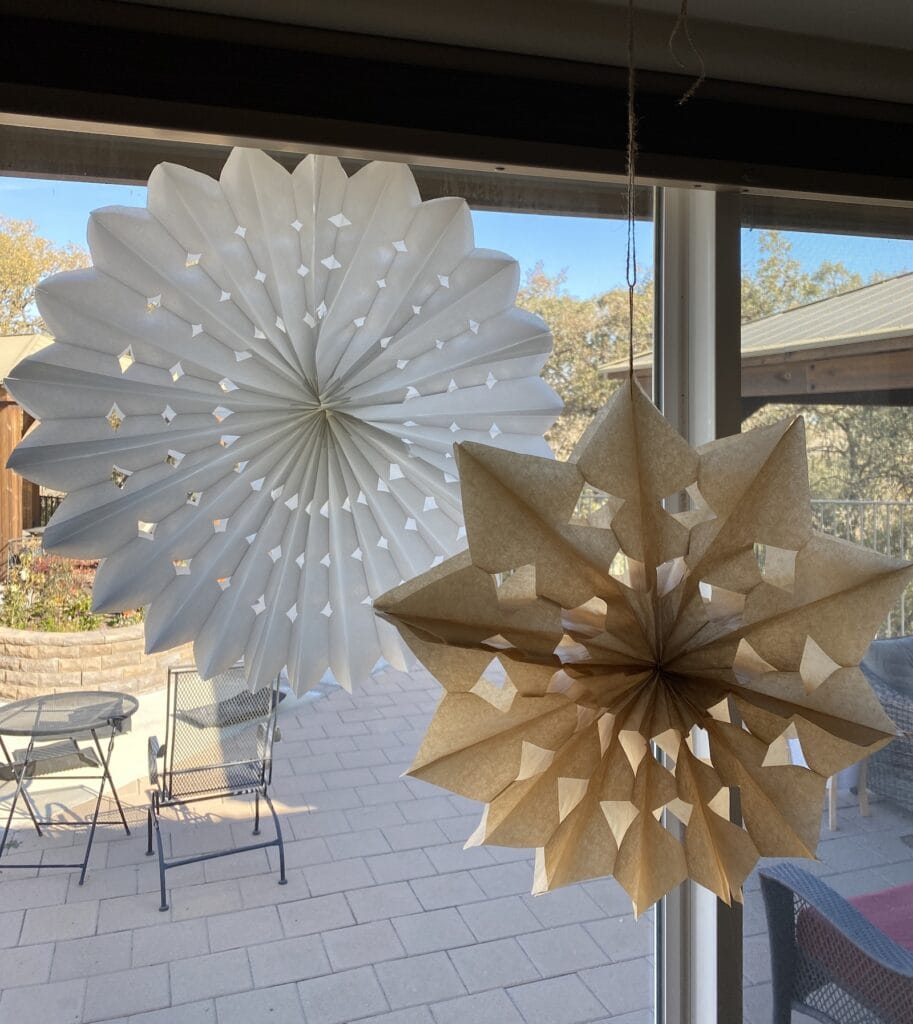
DIY paper bag snowflakes are typically made with brown or white paper lunch bags but there are other options for bags that look even better. We’ll get to those in just a bit. You’ll love this stunning Christmas craft!
When choosing a design, you can cut very intricate designs, or keep them simple by cutting an easy paper bag snowflake pattern.
The intricate designs take much longer to cut, but the results are stunning!
So how do you make snowflakes out of paper bags? First, let’s see how many bags you need to make one and then will go over the step-by-step instructions for making paper bag snowflakes.
This post contains affiliate links which means I may make a commission at no cost to you if you purchase.
How Many Paper Bags Do You Need To Make A Paper Bag Snowflake?
You may be wondering “How many lunch bags does it take to make a snowflake”? If you’re making snowflakes with standard brown lunch bags or white paper lunch bags, I recommend 7 – 9 bags. I also have instructions for making snowflakes with bakery bags.
When using bakery bags (I love the 3 x 10) I recommend 25 bakery bags to make a large, beautiful paper bag snowflake. When using the 6 x 9 bakery bags, 14 work perfectly.
Bakery bags are thinner and they don’t have the gusset at the bottom as a lunch bag does. They make beautiful snowflakes so if you don’t mind investing a bit more, you’ll love them!
Easy Paper Bag Snowflakes Supplies
- paper bags
- glue, glue stick, or glue gun
- sharp scissors
- string or twine for hanging
- a ruler (optional)
How To Make Paper Bag Snowflakes
Here are the step-by-step instructions for making snowflakes with paper bags. You can usually cut a couple of bags at a time:
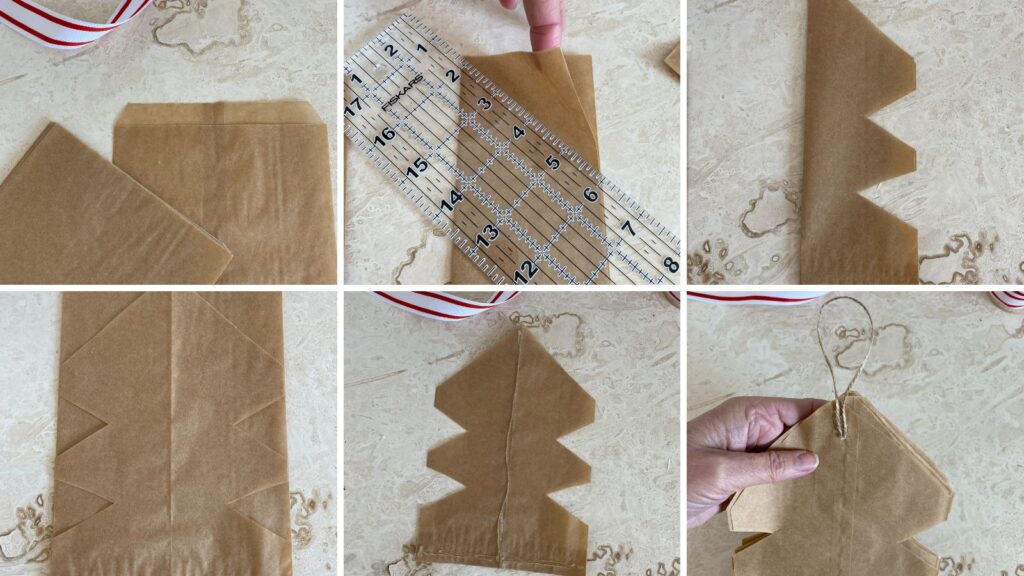
- Use your first bag to make a template by folding the bag in half and cutting it at a diagonal to make a point at the top. I used a ruler to do this. (If you are using bakery bags, first cut the top off. They have two edges that don’t line up at the top.)
- Keeping your bag folded in half, cut diamonds into the sides in any pattern that you’d like. Now you have your template.
- Use the template to cut the same design in all of the bags.
- Put glue down the center of a bag all the way to the bottom and along the bottom of the bag making sure to go all the way to both edges, lay another bag on top, and press them together. Repeat until the bags are all glued into a stack. If you’re using a glue gun, you have to work quickly or the glue can dry before you get the next bag in place. You can also use a glue stick. If you use a glue stick, you may need to let the stack dry longer before assembling the snowflake.
- Cut a piece of twine or ribbon, make a loop, and glue it to the top of the stack for hanging.
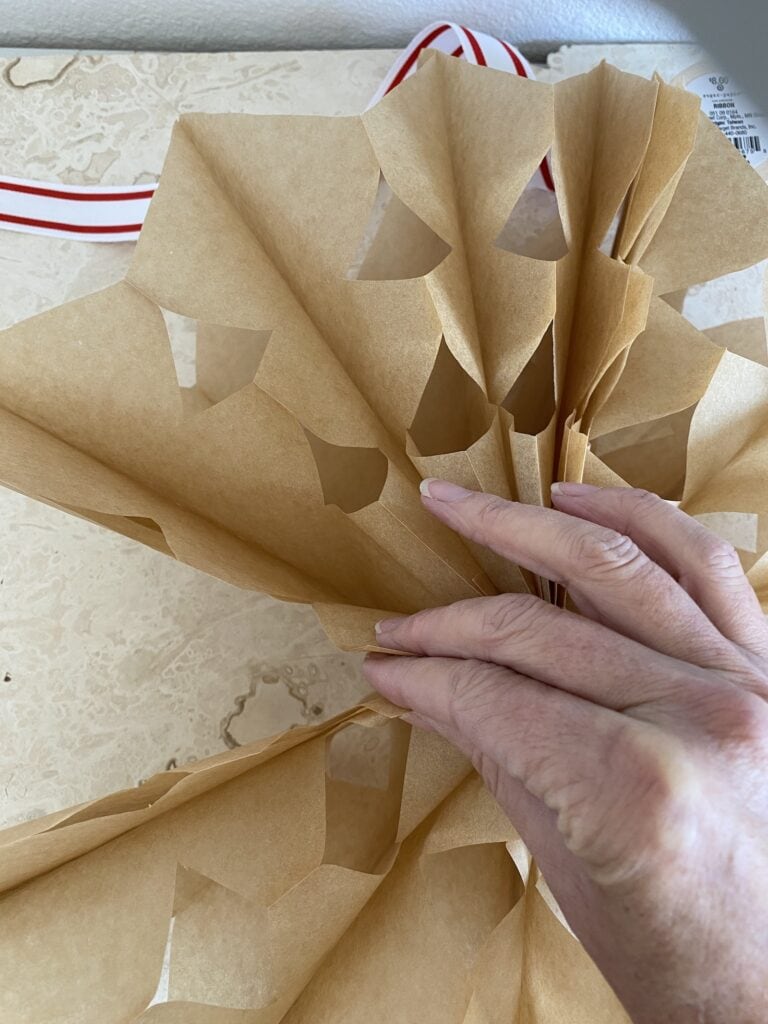
- Put glue all over the top of the top bag and then quickly, but gently pull the top of the stack to fan out the snowflake and glue it together. If you’re using a glue gun, it’s difficult to work quickly on this part, so just secure a couple of small spots towards the inner portion of the snowflake first. This will hold it together so you can add more glue and secure the rest. See the photo below.
- Check for any loose areas and add more glue where needed to make sure all bags are secure.
Other Christmas crafts you may enjoy:
DIY Yarn Gnomes, DIY Cone Christmas Trees, Burlap Christmas Trees
Happy crafting,
Denise
These snowflakes are so pretty and could easily be used year around. I like things like this to hang in my sewing room to enjoy while I’m creating quilts. Thank you for the great idea.