Pom Pom Wreath DIY
This post contains affiliate links which means that at no cost to you, I may earn a commission if you purchase using one of my links. For more information view my full disclosures.
~
This easy pom pom wreath DIY was so fun to make. It took just a couple of minutes to make each pom pom. There’s not a lot of skill involved and you really only need to buy yarn and a wreath frame. You can do this! Let’s learn how.

Supplies for the Pom Pom Wreath DIY
- Yarn
- A wire wreath frame
- Scissors
- A Pom Pom maker set to make your life easier – Or you can learn how to make pom poms by hand
Here is the DIY pom pom wreath tutorial for you. Enjoy!
How To Make Pom Poms
I had read several blogs about making pom poms and I was determined to make one without using a pom pom maker because I had this project on my mind and I forgot to order the maker. I tried three different methods to make the pom poms. Bear with me here because you can choose the method that works best for you. I like the look of a combination of all of the methods. (Update: I also wrote this post using a pom pom maker as well! It’s by far my preferred method!)
The basic steps are to wrap around 200 times (this doesn’t take as long as you’d think), tie off in the center with a separate piece of yarn, cut evenly through all of the loops then give the pom pom a haircut. We’ll get to that in a minute.
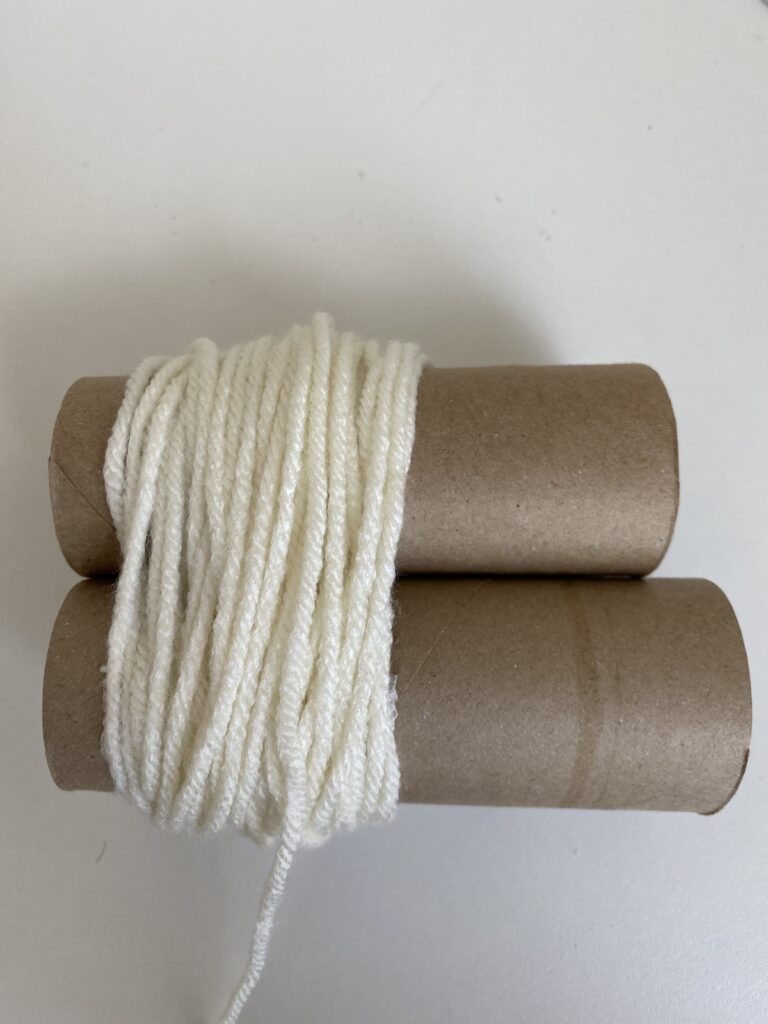
Pom Pom Wreath DIY With Toilet Paper Roll Method
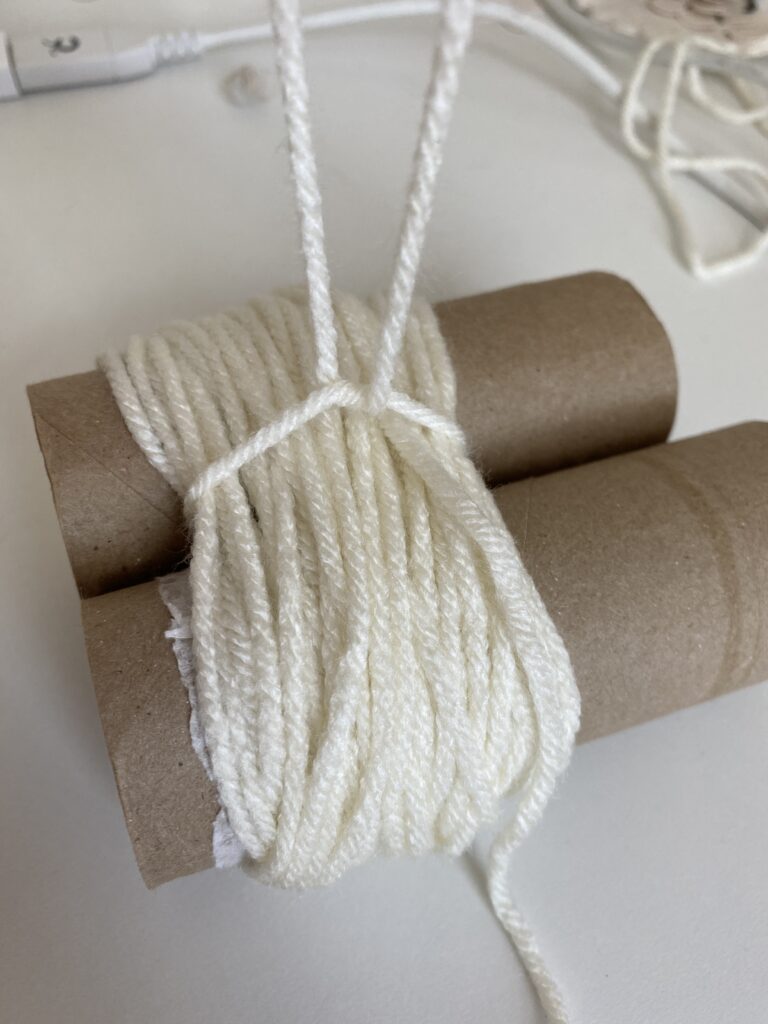
Learning how to make pom poms with toilet paper tubes was pretty easy. This is where you hold two empty toilet paper rolls together with your fingers and wrap the yarn around them both so the yarn is holding the two tubes together. I know what you’re thinking but don’t tape the tubes together! In the images, this is the white yarn and was also a cheaper yarn without a lot of body to it. The result was a larger shaggy, loose pom pom and I love the look.
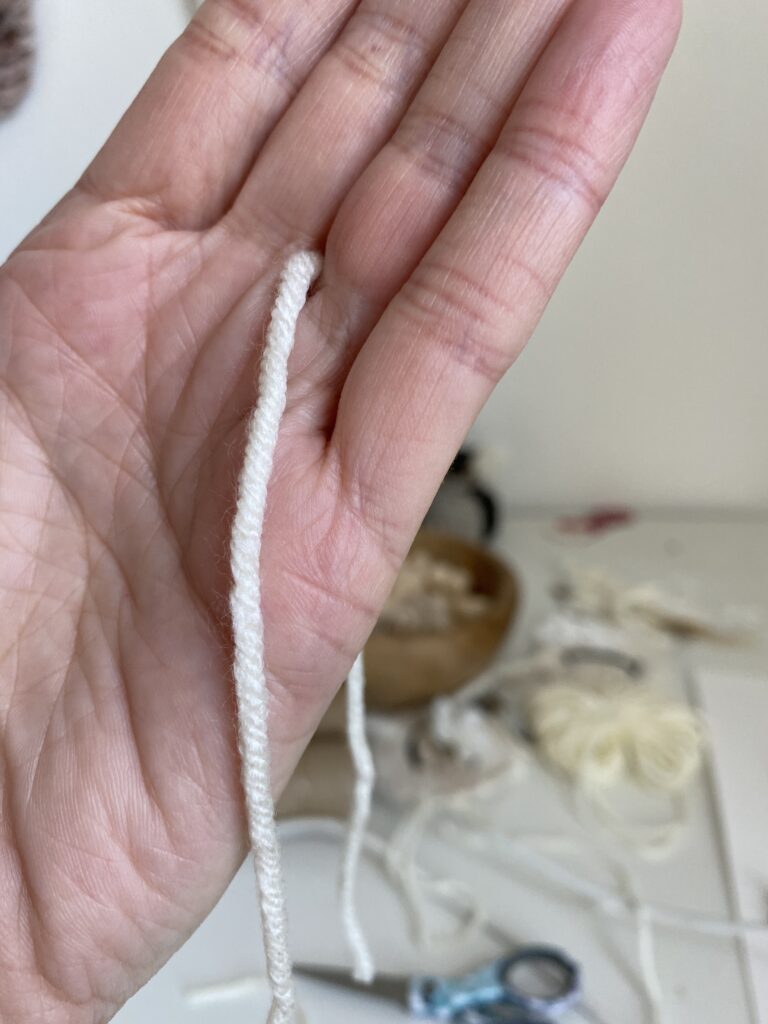
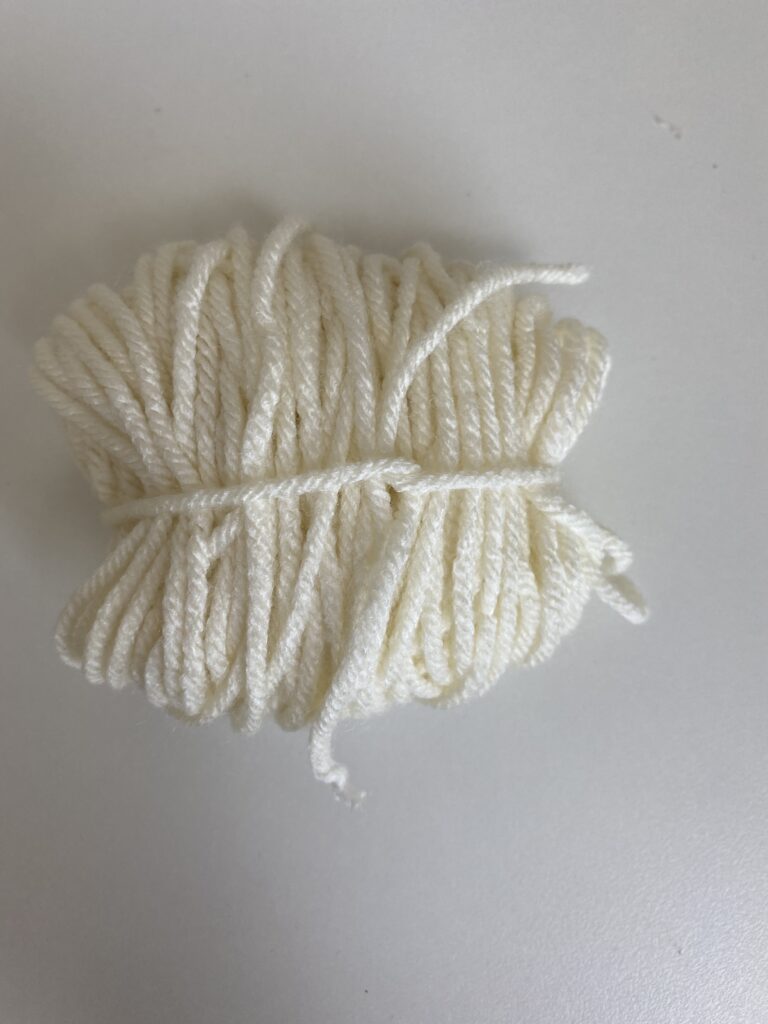
After wrapping the yarn, you take about an 8″ – 12″ piece of yarn and lay it down. Lay the yarn-wrapped toilet paper rolls on top. Slide the 12″ piece of yarn between the two toiled paper rolls (not through the tubes, between the two rolls) and start to tie things off tight-ish, slide the toilet paper rolls out while carefully holding all the loops in place then tie things tighter and make a knot. You’ll have two long tails that you’ll use later so don’t cut them off.
Pom Pom Wreath DIY – The Four Finger Method
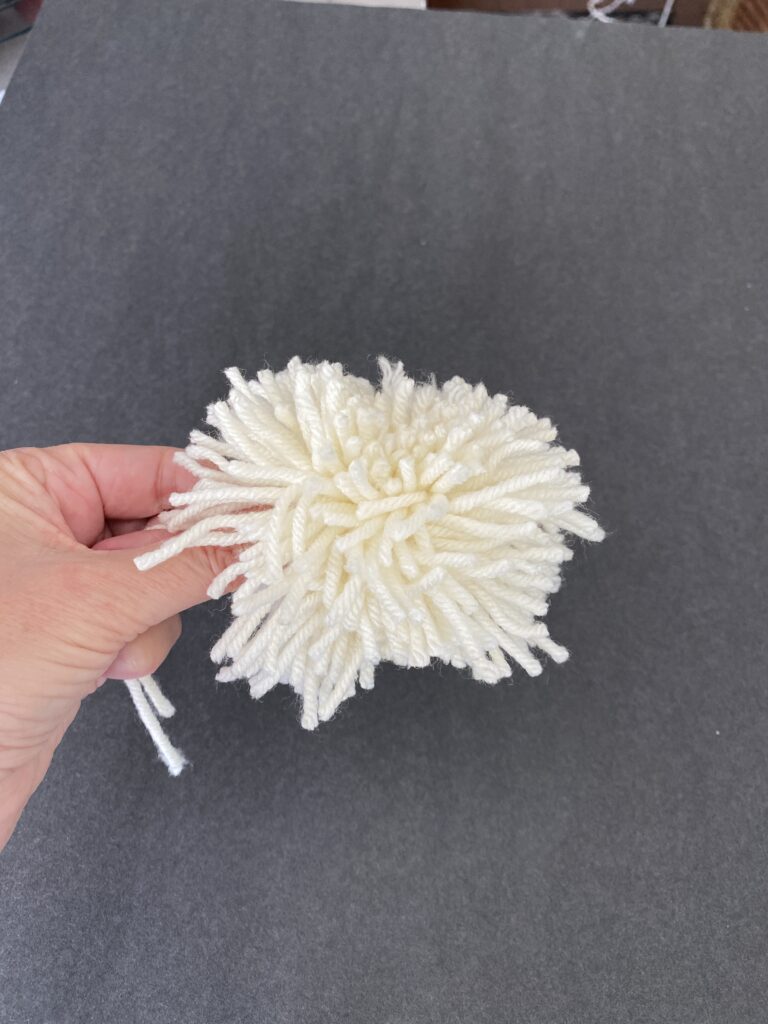
The second method was to figure out how to make pom poms with your fingers. First I cut a 12″ piece of yarn and slid it between my ring and middle finger and let it hang on both sides of my hand. This is the string you’ll use to tie things off at the end. I spread my fingers out a bit and just wrapped the yarn around my four fingers. I used 200 yarn wraps again taking time to make sure the yarn didn’t slide off my pinkie finger. This is the off-white yarn.
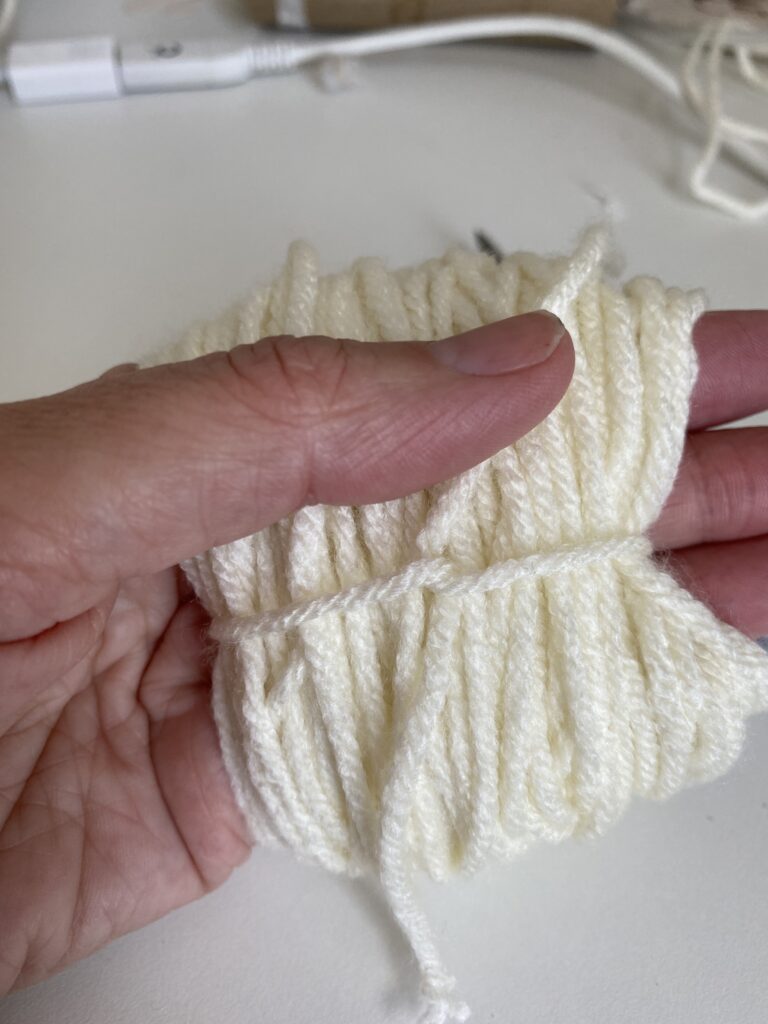

Using my hand was the easiest way to wrap, but a little harder to tie. Having someone available to help tie it off is helpful but I did manage to do it by myself and was just careful when sliding the yarn off of my hand. With this method, I used a softer yarn that had a lot more body to it and it made a more full and soft pom pom.
My wreath frame is only 8″ so you’ll have to adjust the number of pom poms according to the size of your wreath. I used 8 pom poms. They were a mix of sizes and pom pom making methods.
The Wide Ruler Method
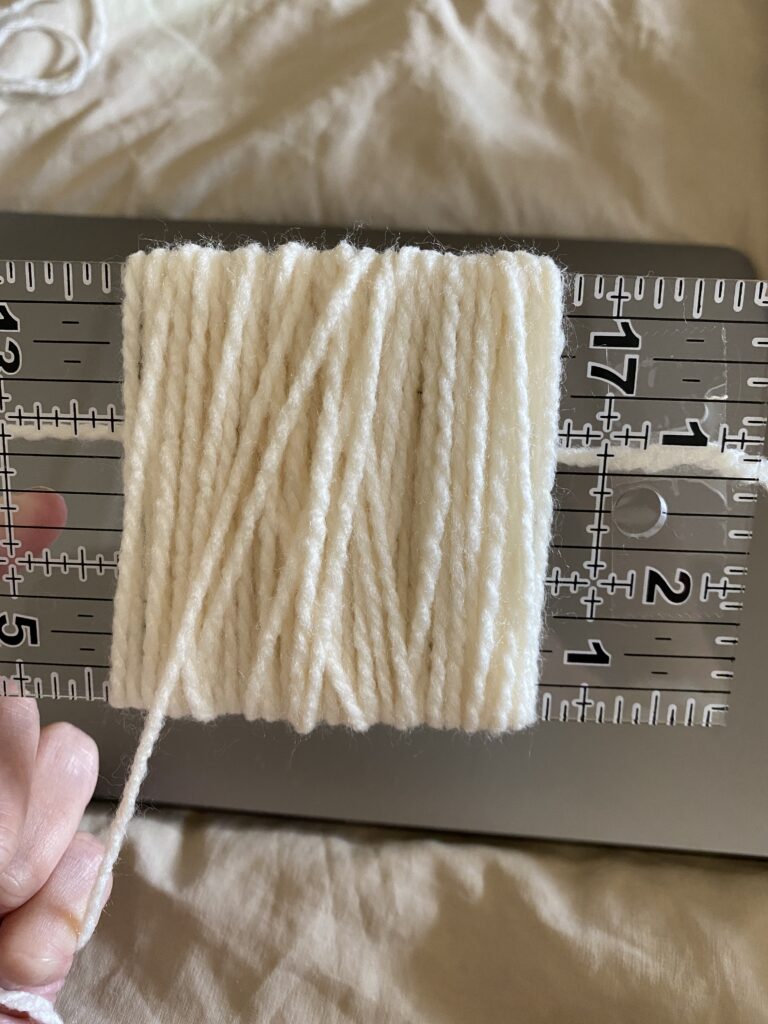
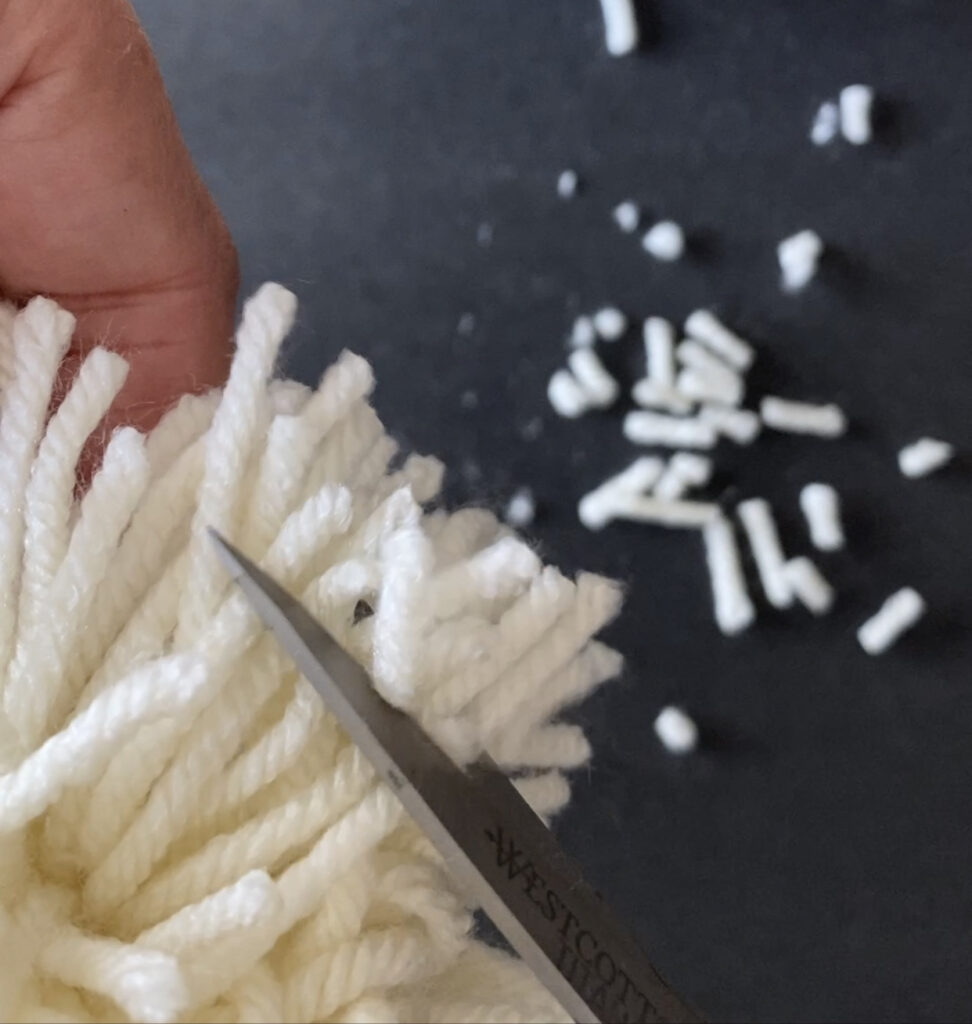
Once you get the wrapping and tying done, you slide your scissors through the loops and put a little tension on the yarn with the scissors so you cut the loops evenly. You’ll end up with a very strange shaped pom pom. Don’t get discouraged, your pom pom needs a trim.
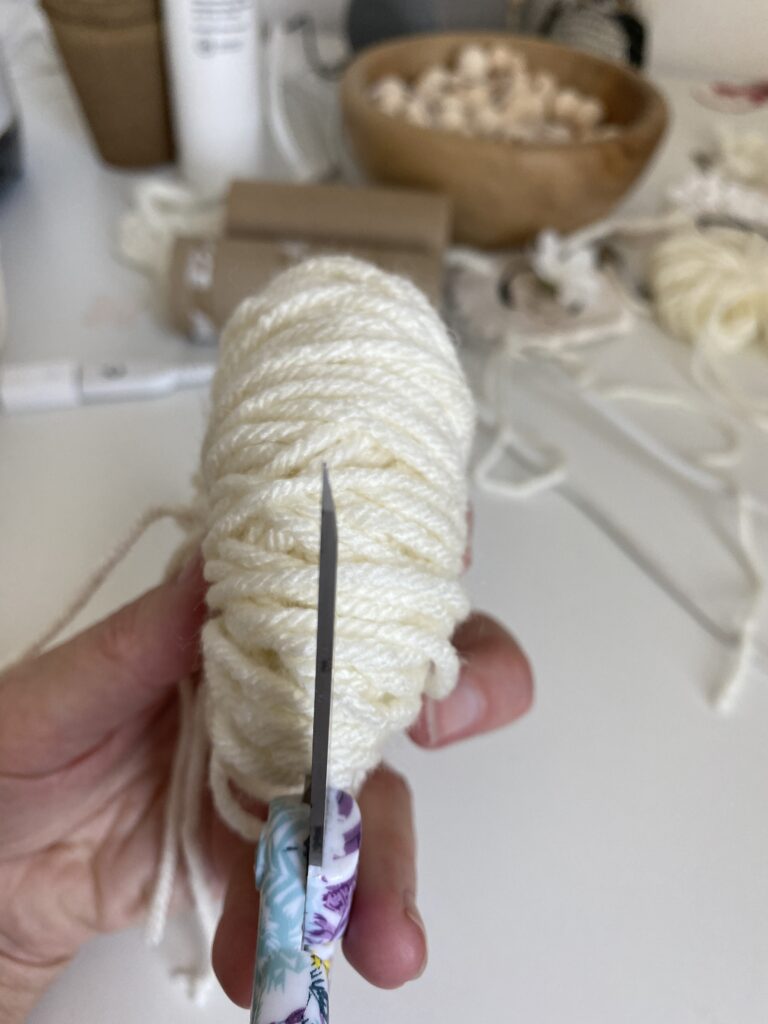
Shaping the Pom Poms
In order to get an actual pom pom, you need to give it a haircut. I just held mine over a trash can and trimmed loose ends. Turn the pom pom frequently and cut it into a round shape. I had to cut as much as an inch off of some areas to make things even.
Be sure to keep your two long pieces out of the way because those are what you’ll use to tie the pom pom to the wreath frame. Just keep pulling those two pieces out of the way while you trim your pom pom. Since this is a wreath, it really doesn’t have to be perfect. If you were making a pom pom garland, you might want to spend more time and cut more carefully.
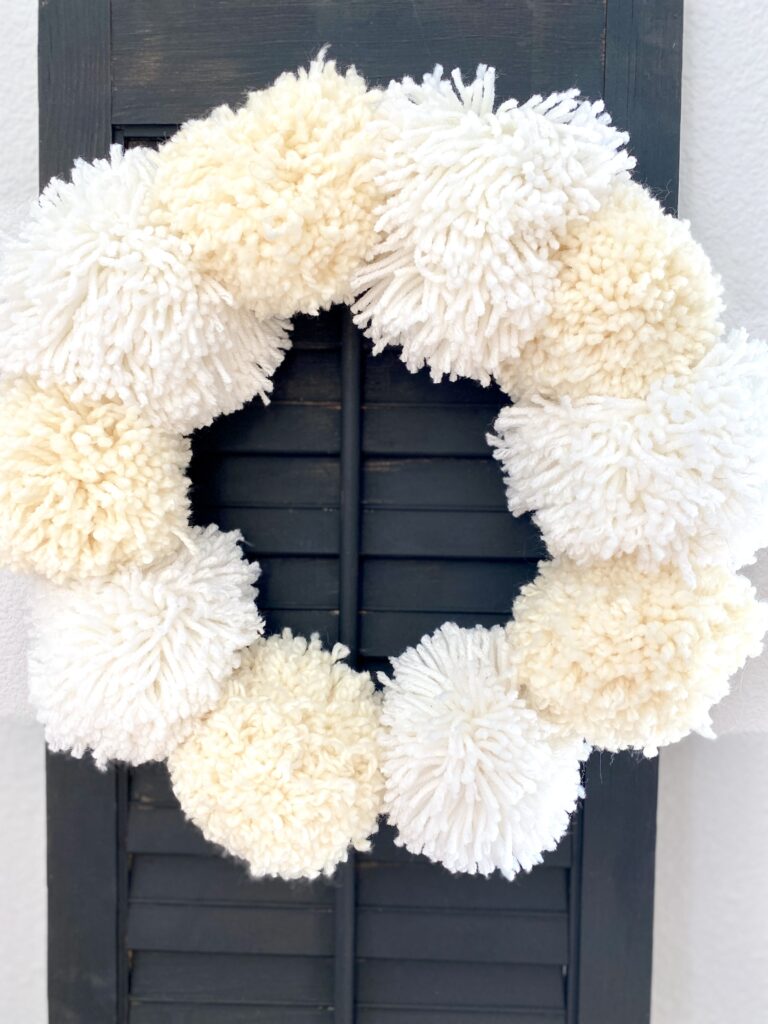
Once you have all of your pom poms made, tie them all onto the wreath frame and you’re done! I used one single layer and tied each pom pom around all three rows of the wire wreath. I love the mix of colors and textures of this Pom Pom Wreath DIY. It looks so cute in our guest room. I’ve updated this post to include Clover Pom Pom Maker Tutorial. Let me know in the comments below how you like to make pom poms.
Happy crafting,
Denise