Repurposed Yogurt Jars
This post contains affiliate links which means that at no cost to you, I may earn a commission if you purchase using one of my links. For more information view my full disclosures.
~
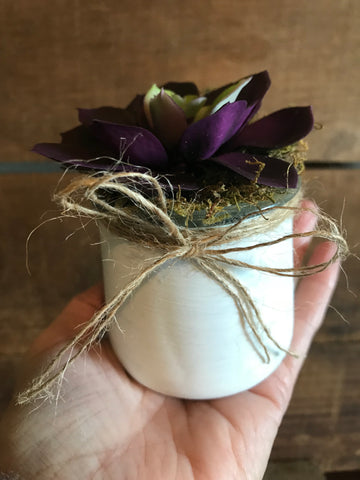
These repurposed yogurt jars make the cutest vases
Repurposed Yogurt Jars are great for crafting. My mom had been eating yogurts that came in glass jars and, since I’m always making things, she started saving them for me. I had them in my cabinet for a couple of months and pulled them out the other day. I have many other projects in mind, but I’ll save those for another post.
Things you’ll need to make the vases:
- Glass yogurt jar or other desired jar
- Rubbing alcohol and cloth
- Foam paintbrush
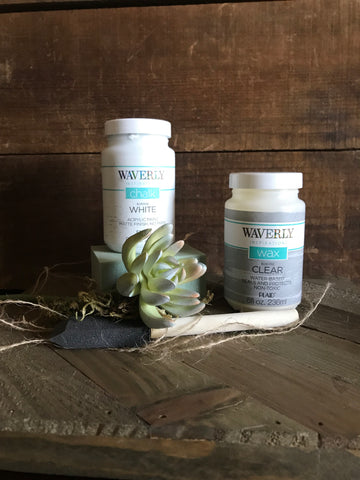
- Chalk paint – I use this one
- Paint sealant – I use this one
- Florist foam
- Twine – optional
- Moss
- Silk succulent
- Craft glue
- Scissors
Cleaning the yogurt jar was probably the hardest part. My jars were Yoplait Oui yogurt and they come with an adhesive paper that seals the top. Getting the adhesive off the rim of the jar took a bit of time. Once you get the jar clean and dry, you’ll want to wipe the outside surface with rubbing alcohol. This is to get the surface really clean and remove any oils from your hands. I tried to hold the jar by placing one of my hands inside and holding the jar from the inside so I didn’t have to touch the surface from this point.

Once the alcohol is dry, you can paint an even and smooth layer of the white chalk paint on the outside of the jar. You can either avoid the bottom or have a kitchen cooling rack ready to rest the jars on while they dry so the paint doesn’t stick. I had a small piece of chicken wire, and that worked great. Depending on the look you’re trying to achieve, two coats may be necessary. I used a hairdryer on the cool setting to speed the drying time between coats. If you’re using a jar with raised lettering, or are wanting to achieve a more rustic look, after the paint is completely dry, you can sand places to remove some of the paint. Wipe any sanding dust away and then apply one even coat of the sealer, making sure to seal everywhere that you applied paint.

![]()
Using regular scissors or a kitchen knife, you can cut the florist foam to be just slightly wider than your jar and a little bit shorter so it doesn’t stick out the top. You want a tight fit so you’re basically going to force the foam into the jar. I used a little bit of craft glue on top of the foam and then put a couple of small pieces of moss on top. Avoid the very center or it’s hard to push your succulent through the moss.
Hold the succulent up to the jar to get an idea of the length you need to cut the stem. Add some glue to the stem and then push it into the center. At this point, you can tie the twine to the outside and you now have an adorable Repurposed Yogurt Jar Planter.
If you decide to use real succulents, don’t forget you’ll have to use a special carbide drill bit to drill a drain hole in the bottom of the jar. I’m not an expert on plants, but I do know that succulents love drainage.
Stay tuned for more glass jar projects. I’m already working on distressed canning jars! If you’d like to take a look at another glass project, check out my Milk Bottle Mod Podge!
xoxo,
Denise