
iDOO Hydroponics Growing System Review {From A Customer}
I decided to write an iDoo Hydroponics Growing System Review for you and share my experiences. I’ll continue to update this post as time goes on as well as additional content about each type of plant that I grow.
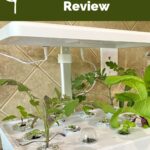
Before we get started, this is the exact hydroponic garden I purchased. It will open in a second window if you want to leave it open for reference while you read.
Since purchasing, I’ve received quite a few questions so this article is a bit lengthy as I’ve tried to answer them all. You’ll also find a video at the bottom of this post.
I hope you find this iDOO hydroponics review helpful. I earn from qualifying purchases at no cost to you. If you find this review helpful, you can purchase your hydroponic garden using any of the links in this post.
You can view my go-to hydroponic growing sponges, machine, and other items on my Amazon Storefront.
I also have a video further down in this post that you will likely find helpful when reviewing the iDoo 12pods hydroponics growing system.
iDoo Indoor LED Hydroponic System
I wasn’t sure if this hobby would last for me so I figured I could upgrade to a different model later if I got into it.
When choosing a system, I chose from $50- $100 hydroponic gardens with the highest reviews which gave me the confidence of purchasing an item that was fulfilled by Amazon. The garden met the minimum purchase for free shipping and that’s always a plus!
If you’re willing to spend a little more on a hydroponic grow system, here’s an example of a large hydroponic garden for indoors.
The biggest differences I found with these more gardens are the adjustable light features allowing growing up to 36″ whereas my unit only has about 12″ maximum. This is something to think about if you want to grow plants indoors.
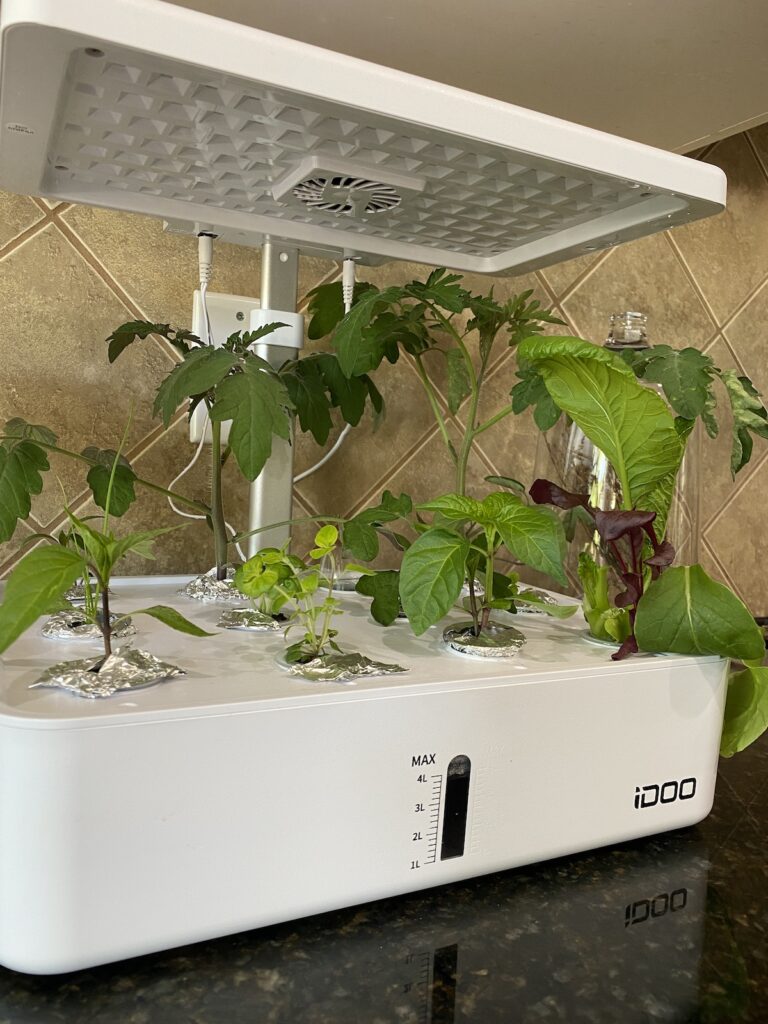
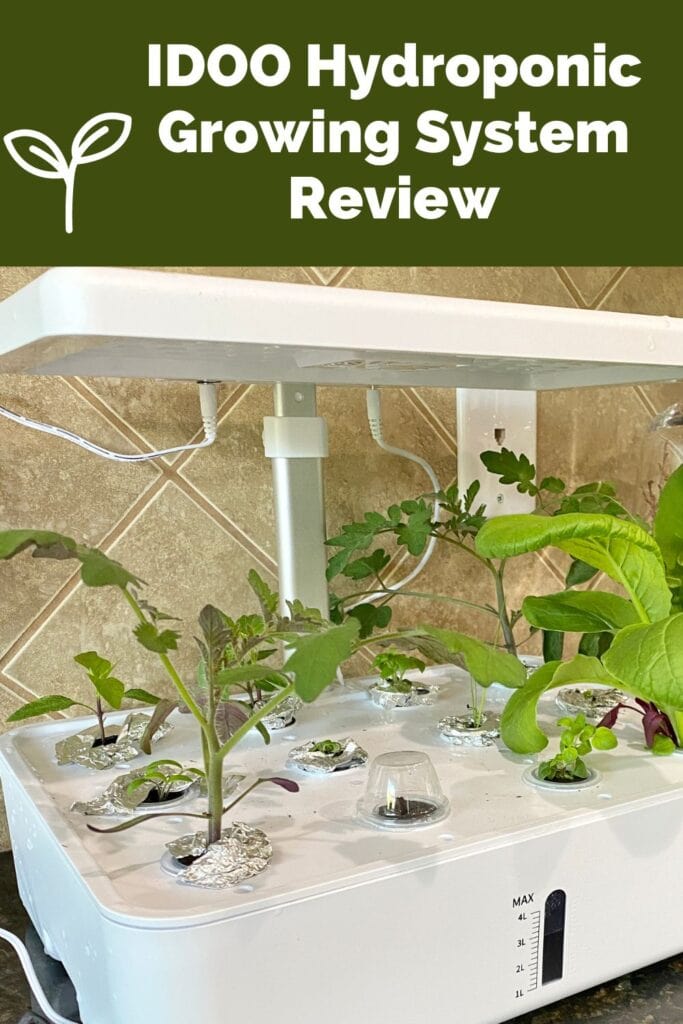
I ultimately purchased the Amazon iDOO hydroponic growing system called “iDOO 12Pods Hydroponics Growing System, Indoor Herb Garden with Grow Light, Plants Germination Kit Built-in Fan, Automatic Timer, Up to 11.3″ mainly due to the price, but I also liked the compact size. It stays on my kitchen counter.
Even though I read that it’s almost impossible to grow 12 plants in a 12-plant system, I still chose it so I would have the option to start more plants from seed and then transplant them outside if I want.
The iDOO hydroponic system is compact so why not have the option, right? I quickly found that the plants needed to be moved around based on their different growth stages so I’m glad I chose this indoor hydroponic garden.
iDOO Hydroponic Indoor Garden System How To Use
The iDoo hydroponics growing system instructions were very clear. The assembly and set-up were quite easy and the instructions were good.
Everything snaps together with absolutely no tools necessary. It came with everything you need to get started except seeds.
Unpack the system and remove the white tray with holes and you’ll find everything inside. The pump is already installed and you don’t need to do anything with it.
The power adaptor has a black piece of plastic on the end of the cord and it matches up with a black square in the light. The pump plugs into the light on the other side, closest to the pump.
The pole that holds the light snaps in. Just gently work it in until it hits the bottom with the wheel height adjustment facing the wall.
The light snaps right in on top of that in the oval groove. Add 4 L of water. There’s a gauge on the front which makes this easy. I like the larger water tank capacity. I add water less often than I do with my Aerogarden Harvest.
Make sure the little plastic plug in the back is secure. When you clean the system, you’ll hold it over the sink and pull that drain plug then replace it to refill.
They send an extra one so look for it in one of the envelopes. Add the nutrients per the product specifications.
NEVER pick up the system without holding your finger over the plug to hold it in. It popped out on me once. I don’t use the plug so I’ve taped mine on using strong tape.
You can plug the unit in once the water and nutrients are added and the two cords are plugged into the light. Follow the manufacturer’s instructions.
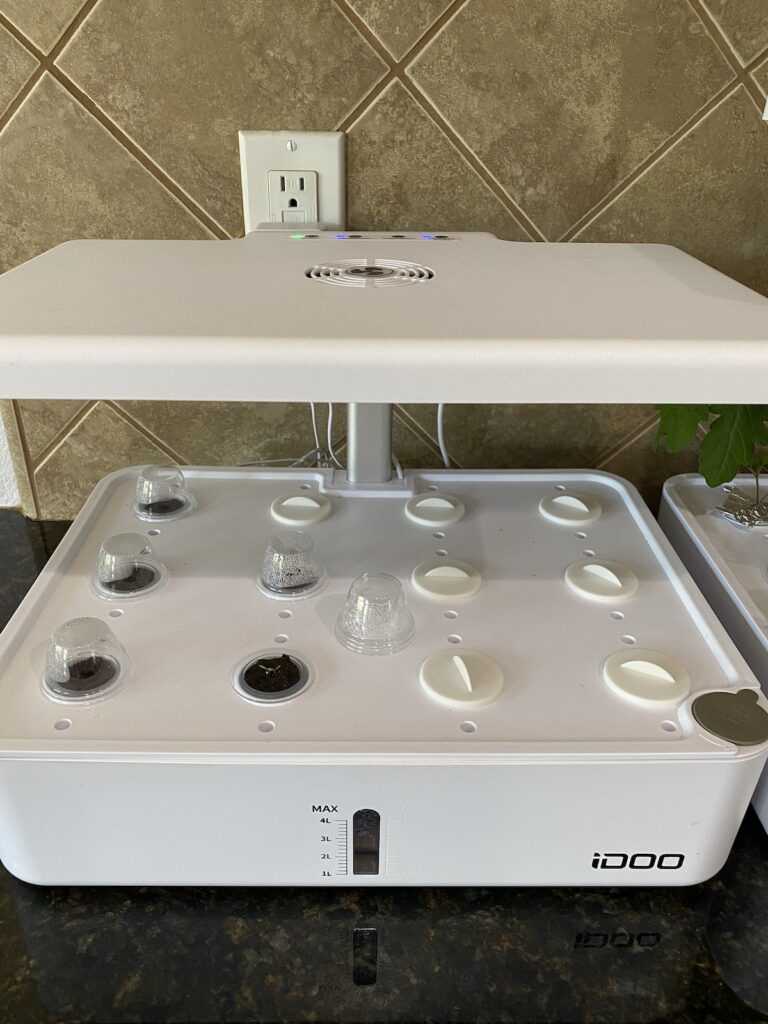
Put the white tray with holes on top of the unit.
Put a seed in the tiny hole in the top of the brown growing sponge and then put the sponge in the white basket and place it in an empty spot in the white tray.
PRO TIP: For very tiny seeds, dip a toothpick or skewer in clean water, touch a seed with the toothpick to pick it up, then place the seed into the growing sponge.
Put a clear plastic lid over the top and leave that in place until you see green leaves sprout.
Select one of the two grow modes on the top of the control panel to start the light cycle for either growing fresh veggies or fruits/flowers.
Sprouting can happen in as little as 2 days but some seeds take longer. Save the clear plastic lids for the next planting.
iDOO Seed Pods – Do You Need Them?
Nope! I bought seeds from a hardware store, planted them, and had success with everything I bought.
If you’re searching for iDOO hydroponic growing seeds, they have them, but you don’t necessarily need to buy them.
When I bought my first hydroponic garden, I added a fresh herbs starter kit just to get me going.
If I had this to do over again, I would just purchase exactly what I wanted to grow. I didn’t have success with everything that came with the herb starter kit.
I replanted some of the seeds and had success on the second try except cilantro. Maybe I just needed to wait longer. I’m not very patient.
The seeds I bought from the store are:
- Red cherry tomatoes – 2 days to sprout
- Orange cherry tomatoes – 2 days to sprout
- Mixed lettuce seeds – 3 days to sprout
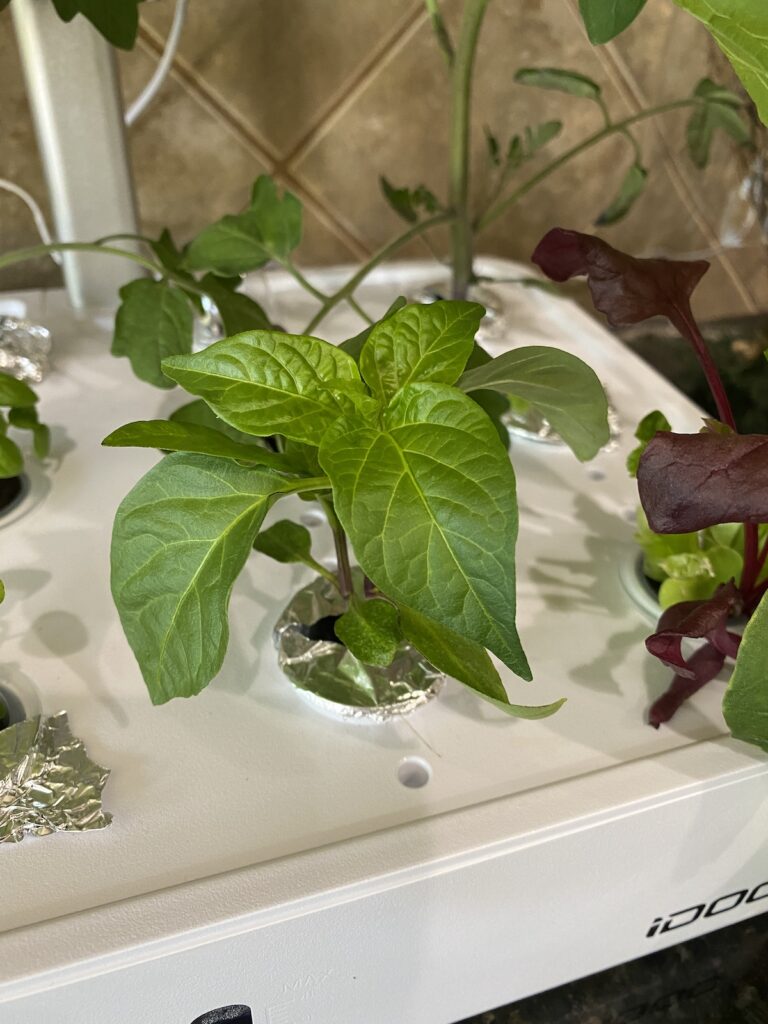
- Sweet Banana Peppers – 4 days to sprout
- Sweet Peppers – 4 days to sprout
Hydroponic Seed Sprouting
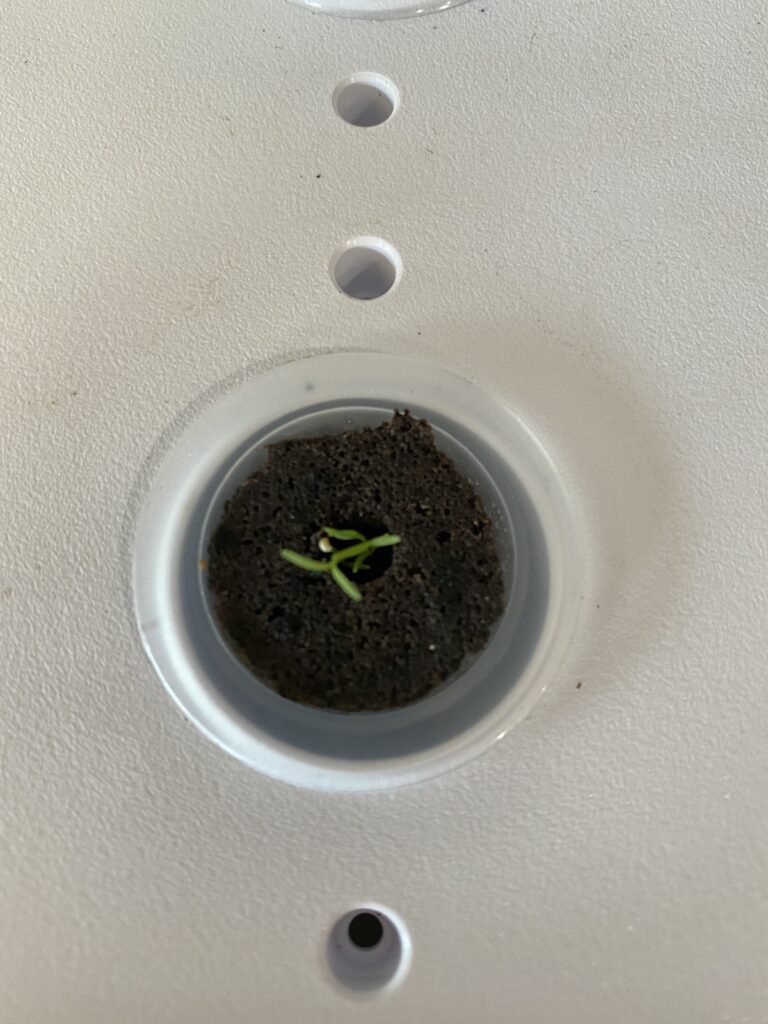
I’m updating this post due to some very good questions I received regarding what the seeds should look like when they sprout.
If you see a seed start to cover over with white fuzzy mold, my recommendation is to pull it out and start over. When I start a new seed, I just reuse the original sponge.
After a seed has sprouted, you should see a nice stem with green leaves. If a stem starts to look thin or weak, I recommend starting over with a new seed. When you get one like this, you’ll know what I mean, the stem is quite thin in one spot.
Please stay tuned as I have lots of things growing but I want to see successful fruits or vegetables before I write more.
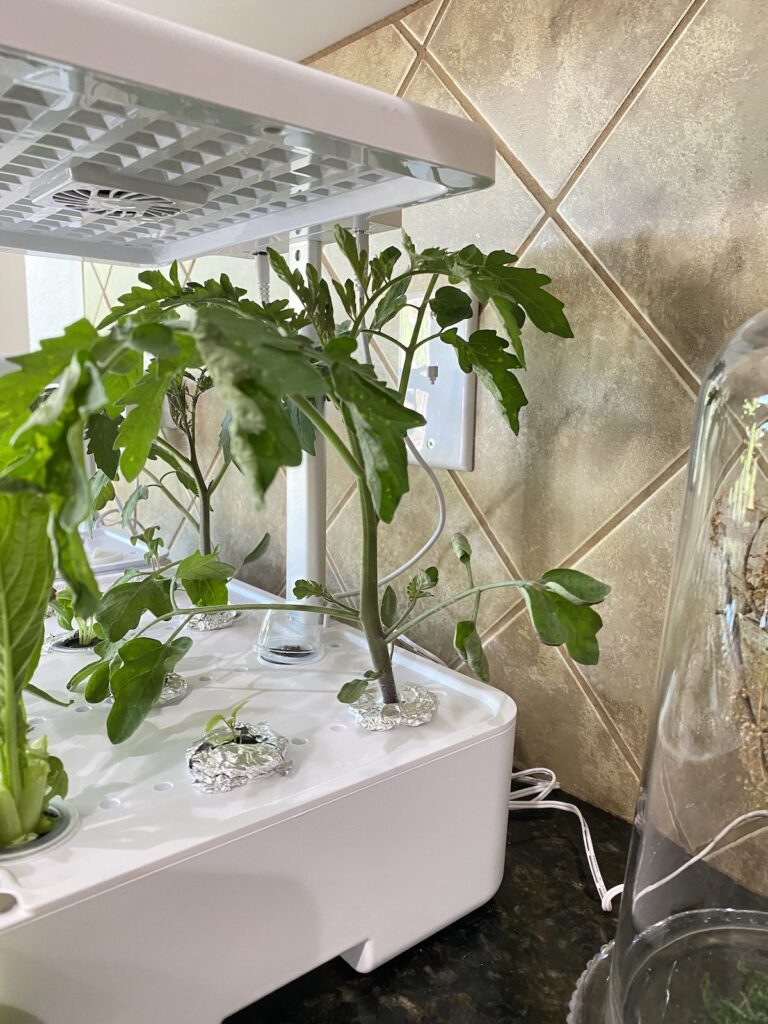
My tomatoes after one month are about 7 – 8 inches tall but I haven’t gotten a tomato yet. I also think I’ll need to move these outdoors as they are getting so big.
I’ll likely leave one inside just to see what happens. I might have to make a trellis of some sort.
Other Things You May Want To Order
Things you may want to purchase more of are the iDoo growing sponges. I don’t buy the same brand. I haven’t had to replace the baskets yet. I’ve been able to reuse them.
You’ll need a new sponge each time you plant something new.
Cleaning the iDOO Hydroponic Growing System and Other Things You Should Know
Is the IDoo hydroponic garden difficult to clean? No. It’s quite easy to clean.
The light and fan come on in intervals. You can turn the fan off if you want to. The light is bright. It’s a combination of blue light and red light, mimicking the sunlight spectrum. It will look a little different depending on which mode you’re using.
I start my system when I leave for work and then every few days I unplug it and do the same. I don’t like the light glowing at night while I’m sleeping. If the light gets off as far as the timing goes, then I just restart it.
If the system gets lower on water, it will make a trickling noise letting you know to add more water. Adding the water will make it run more quietly.
Other than that, you can hear it a bit but it’s very quiet and has a low-noise pump. You can put these in a laundry room or extra bedroom. They aren’t heavy even when full so it’s not hard to carry them to the sink to drain and wash.
I clean mine out about once every 7 – 10 days. I drain and wipe out the tank. I also spray the pump off well and remove any debris that is stuck to it.
I fill the basin with clean water and a Tablespoon or so of bleach and allow the pump to run for about 5 minutes.
I add the white baskets to sterilize them as well. This was not recommended by the manufacturer but I had read about this being a good way to sterilize the unit between plantings.
Dump the bleach and water solution, add fresh water, and allow the unit to run again. Dump and add fresh water once again after the bleach is completely rinsed. Always unplug the unit when there is no water inside then plug it back in when it’s full.
iDOO Hydroponics When To Add Nutrients
Add the iDOO nutrients each time you clean the machine or when you’re adding water.
The formula is 5 milliliters of Nutrient A and 5 milliliters of Nutrient B to 1 liter of water. One liter is about 4 1/4 cups of water. The cap on the nutrients has the measurements on it.
When you’re adding water to the system, you wouldn’t want to dilute the current nutrients in the tank so that’s why it’s so important to add nutrients when you’re adding more water.
I always wait until I need one full liter to make math easier.
I put two tall drinking glasses upside down on my counter and rest the tray with all the plants still in their pods. I just put one glass under each edge and this keeps me from damaging the roots or having to remove the plants from the holes. This works great.
Keep plants with shorter roots closest to the pump. If the roots are getting very long, you can trim them with clean and sterilized scissors.
You’ll see aluminum foil over some of my plant bases. This protects the sponge from light and stops mold from growing on them. In most cases, I was able to let the seed sprout and then put foil around the stem.
I Bought A Second iDOO Indoor Countertop Garden
This hobby has gotten serious and you can now find more hydroponic articles at The Countertop Gardener. For the iDOO Hydroponic Garden review, I’d have to give it 5 stars so far.
For comparison, I did buy an AeroGarden. I chose a model that was similar in price. I’ll have to write a full review of that garden soon, but in short, I like the iDOO better.
I may be adding more units to the garden shed, so I’ll let you know.
In the second unit, I’m growing Dahlias, Zinnias, Poppies, Canterbury Bells, and Hollyhocks. Most of these will be moved outdoors once they get large enough.
Are Hydroponic Gardens Worth It?
I can’t see myself growing food on my counter regularly. This is more of a hobby for me and I’ve found the greatest value in growing flowers. Although, lettuce would be a great thing to grow year-round.
Flowers at a nursery are quite expensive. One small packet of seeds can yield A LOT of plants. I also harvest flower seeds from spent blooms each year.
Are you hydroponic gardening? What’s been your favorite thing to grow? Do you have any other questions about the system that I didn’t cover today?
I’m happy to answer! Just leave a question in the Comments section. I monitor for spam so it may take a day or so for the comment to show. Thanks for visiting. Now I’m off to make some DIY Succulent Kits.
Happy gardening,
Denise
I’m new to countertop hydroponic gardening. So I’ll start with one question first is it necessary to trim the roots that grow long into the water? Why is that? Second question is it advisable to transplant tomato seedlings into soil once they get large enough?
Any other resources you can recommend? You
The roots will grow so long that they will interfere with the pump. You need to trim roots with sterile scissors. Cherry style tomatoes can grow in the hydronic garden but larger varieties will need to be transplanted. They sell trellis systems for tomatoes if you keep them in the hydroponic garden or you can make one. Herbs grow well in the hydroponic gardens as well.
Thanks so much for this information. I am wondering does anyone else have a problem with the extremely bright light? I am having a lot of trouble with it. My eyes seem very sensitive and I actually had worn sun glasses when near it. Any suggestions?
Also – I wish IDOO had thought to build something onto the planter tray so when you take it off it would rest on the counter. Their design with everything else is great. Someone missed out on this issue.
MP
I haven’t had that issue with the light making my eyes sensitive. I usually have two machines going at one time and they don’t bother me. I agree with with you on the design but resting on two upside down glasses or cups works just fine. I appreciate you stopping by!
I recently purchased an IDOO 12-pod system. What’s the frequency for the automatic light (e.g., how long is it on before it automatically turns off)? My light automatically turns on each morning around 7AM but I’m having to turn it off around 9PM each night.
It runs 16 hours on and 8 hours off. I ended up doing the same as you and turning it off when I went to sleep and back on in the morning.
Isn’t the fuzzy white on the seedlings the air roots and not fungus?
In my experience, the fuzzy white turns into green mold and produces a very weak stem that can’t support the plant. It eventually breaks and dies. Air roots are thicker. This white mold is more cotton-candy like. I hope that helps.
Everything works accept the light what am I doing wrong
If you’ve turned the power on and then selected either fruit/vegetables or the flowers setting, it should be working. Try unplugging the machine and then plug it back in. Turn on the power button and then touch the setting for what you’re growing. I’ve never had trouble with a light but their customer service was awesome when I eventually had a power cord go bad. It’s support@idooworld.com. It takes a day or so for them to reply but they helped me get a replacement. I hope you get it figured out!
Hello I bought the odoo 12 pod, I wanted to ask you something. I planted my seeds and it turned white but I waited a week and nothing grew out of it just stayed white. Does this mean it’s a bad seed I should throw it but keep the sponge and plant new seeds or should I wait because the seeds need more time? Thank you
Yes, I’ve found if the seed turns white and a little fuzzy looking, it’s not viable. I dig out the seed and reuse the sponge and have had no trouble. If seeds are longer, I’ve used a small knife to core out the sponge a little more so the seed doesn’t stick out of the top. Dahlia seeds are pretty tall so I do this. Sometimes a seed will sprout and then the little plant turns white and fuzzy. They usually won’t make it either. The healthy plants will be green with no mold. I hope that helps!
Hi Denise I’m a new idoo user and I get fungus even after I sterilize the unit. I use purified water..is it the sponges or will the foil work better? The fungus starts right after they sprout. I have an idoo 7 pod with no water-fill window but I love it. Please help 🙏☺️
I recommend putting the foil on right when you plant things. Just wrap a small piece around the sponge and basket and press it down into the spot. You can use a skewer to poke the hole for the plant to grow through. Once the plants get large enough to completely cover the surface of the sponge, I find I don’t usually have to use the foil anymore. I hope this helps and thanks so much for the question. I’ll update my post with this information. I’m sure it will help others as well. If you already have a little mold, wrap the foil around it and it usually stops growing since it doesn’t get light.
when I plug in the system it makes a LOUD ALARM sound!!!! How do I stop this from happening?
I have not heard this before but their customer service is responsive so I would just email them. I looked at one Youtube video and it sounds like a flow safety valve is stuck but unfortunately, I don’t know how that can be fixed. Sorry I couldn’t help more.
I have 2 IDOO systems and a 9 pod Qyo. To give you a comparison they both work the same and are very close in price. I can’t say that I prefer one over the other. They’re both awesome!
Thank you for the comment. I know other readers will love to hear that both systems work similarly. They’re a lot of fun!
Thank you for all the great info & tips. I am having so much fun growing my herbs & flowers!!!
What is the website for IDOO replacement products like the sponges?
I’m glad you enjoyed the information. Last time I ordered the same sponges that came with the unit. This is an affiliate link to them on Amazon. https://amzn.to/3U9YgFg Thank you for visiting!
Thank you so very much for your input I’m interested in the idoo unit, but I’m now sure I will most definitely will buy the unit.
I’ve been gardening for a long time, but this year the heat killed all my crops. I live in Texas and the 🌞 is unbearably Hot.
So I will be trying to get everything growing inside my house.
Thank you so much for making it easier to purchase this unit.
Sincerely
H.G
I’m glad this post helped. The heat here has been brutal on my veggies this year as well. I’ve been using the units to start a lot of flowers. Enjoy!
I wanted to know if that thing is deep enough for the roots.
The roots grow pretty long and eventually need trimming. I’ve pulled out some plants and had roots that are at least 8 inches. When I clean the machine, I cut overgrown roots to a shorter length. That’s a great question. I’ll have to add more information to the post for future readers. Thank you!
I also decided on an iDoo after looking at many. I’m so happy with it and ended up with a second. Then I speed a secondhand Aerogarden online and grabbed that. I have micro dwarf tomatoes and dwarf hot peppers in my units currently. I’m enjoying hydroponics so much I’m also doing the Kratky method with lettuce and herbs. I have plants growing all over my kitchen! I’ll definitely grow year round from now on.
It’s been so fun. I’m already contemplating a third. I have plants everywhere, too! I started heirloom tomatoes and they just got moved outdoors since they get really big but I had a 16″ plant in just about a month’s time. They’re so fun and addicting. Thanks for stopping by!