
How To Finger Crochet A Chunky Yarn Wreath
This post contains affiliate links which means that at no cost to you, I may earn a commission if you purchase using one of my links. For more information view my full disclosures.
~
Learning how to finger crochet a chunky roving yarn wreath is super easy and the finished look is so soft and pretty. It takes just a bit of practice then you’ll be finger-crocheting a wreath in no time! I also have another nice yarn for finger crocheting linked below.
Best Yarn For Finger Crocheting A Wreath
I tried finger crocheting with fluffy blanket yarn and it wasn’t worth the effort. There isn’t enough texture in the yarn so I used two other yarns that worked well.
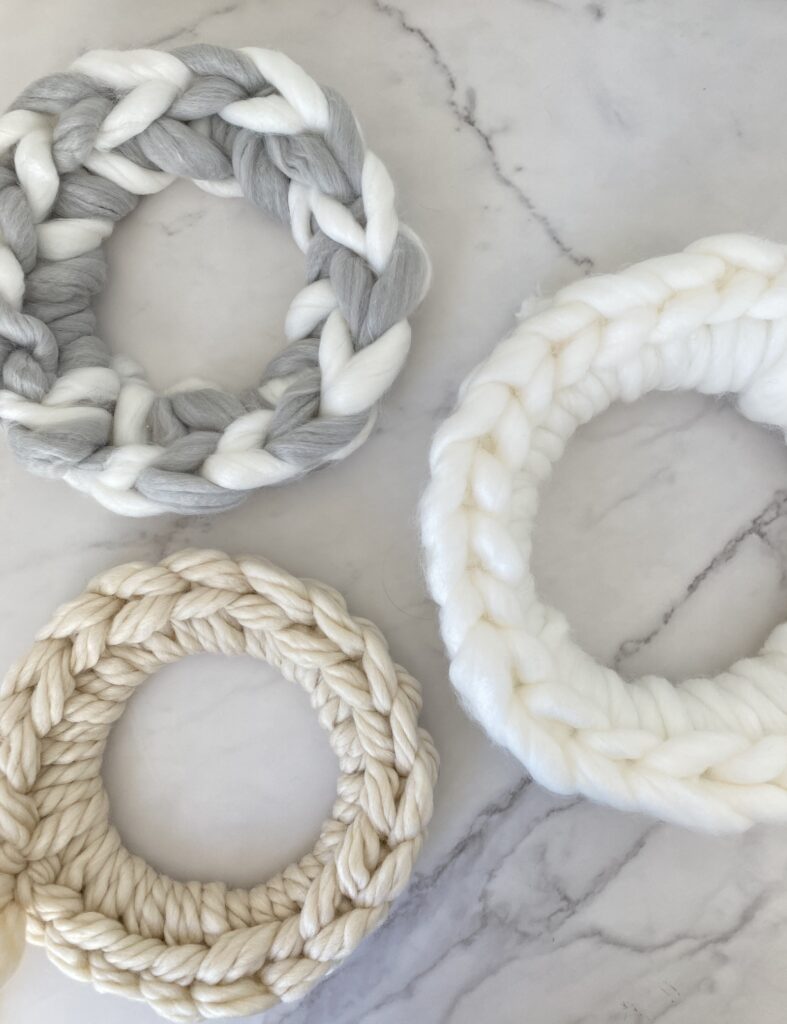
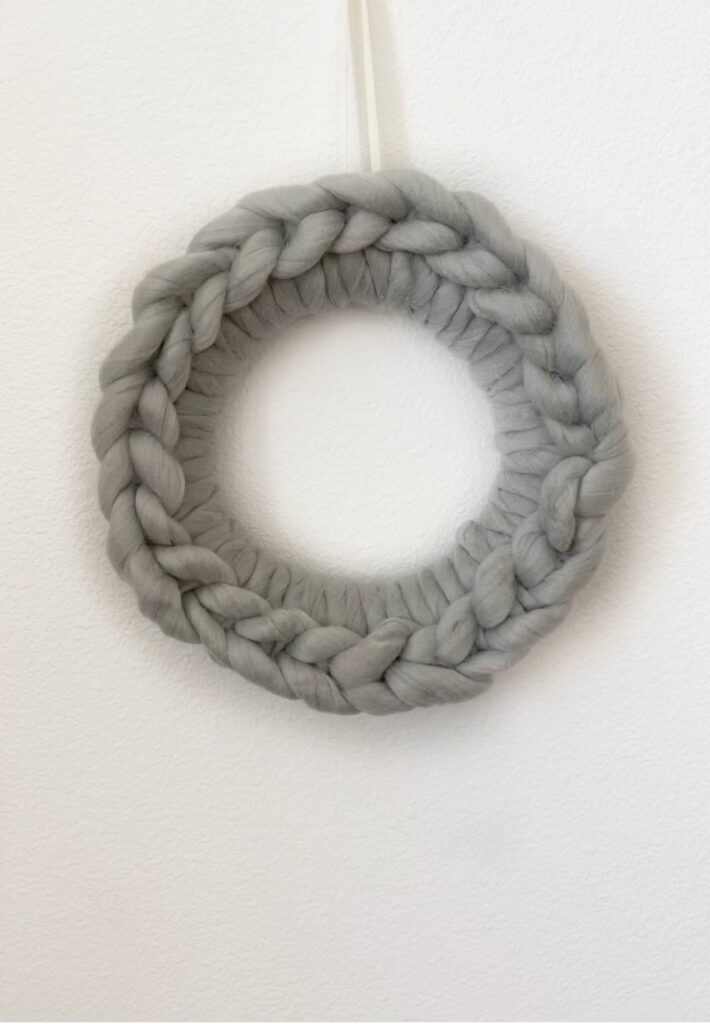
My absolute favorite yarn to make a wreath with is roving yarn. The price is reasonable and this wreath looks so good with it. I’ve made one in ivory and one in gray. If you order online, they sell it in 4-packs. I use this yarn for so many things!
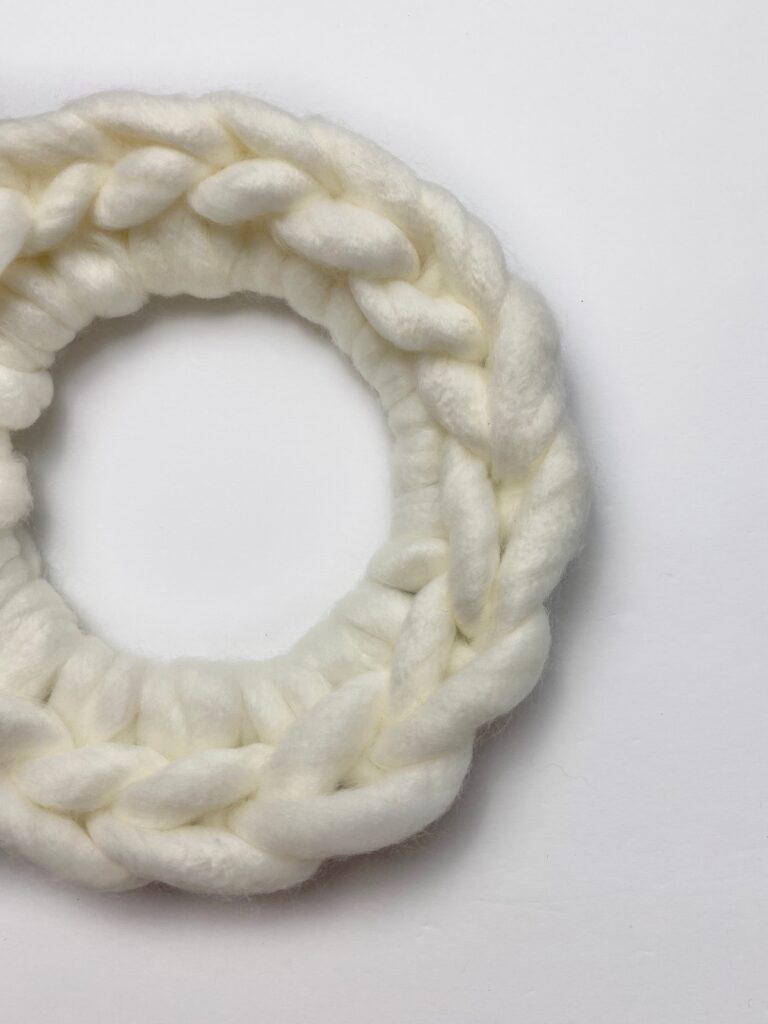
You can find roving yarn at Walmart for a great price or at another craft store like Hobby Lobby. Wool is more expensive so I used acrylic to make this wreath. If I were making a sweater, I may use wool, but for a decorative wreath, the acrylic works great and it looks so plush!
Update: The second yarn is now out of stock but I linked it so you can see the texture. It will help you when selecting the type of yarn you want to use. The other chunky yarn I love also works well and I’ve made a round wreath with it and a heart-shaped wreath. Be sure to check those out.
The Right Wreath Frame for Finger Crocheting A Wreath
The type of wreath frame will determine the overall look of your wreath. The loop stitches on the top will look the same, but the wider the wreath frame, the longer the straight pieces will be.
I like to use a wire wreath frame or a styrofoam wreath frame when making mine. Wire wreath frames are cheaper, but yarn slides more easily on styrofoam. If you’re using white yarn, consider a white styrofoam wreath instead of green.
How To Finger Crochet A Chunky Yarn Wreath The Easy Way Step-By-Step Tutorial
Before you get started, I recommend cutting off about a 3-foot section of yarn to practice with. Roving yarn untwists and gets super soft and fluffy. If you have to start over too many times it will lose its shape and be unusable. I taught myself with a shorter piece until I got the hang of it. Don’t worry, there is a video further down but I recommend reading the steps first.
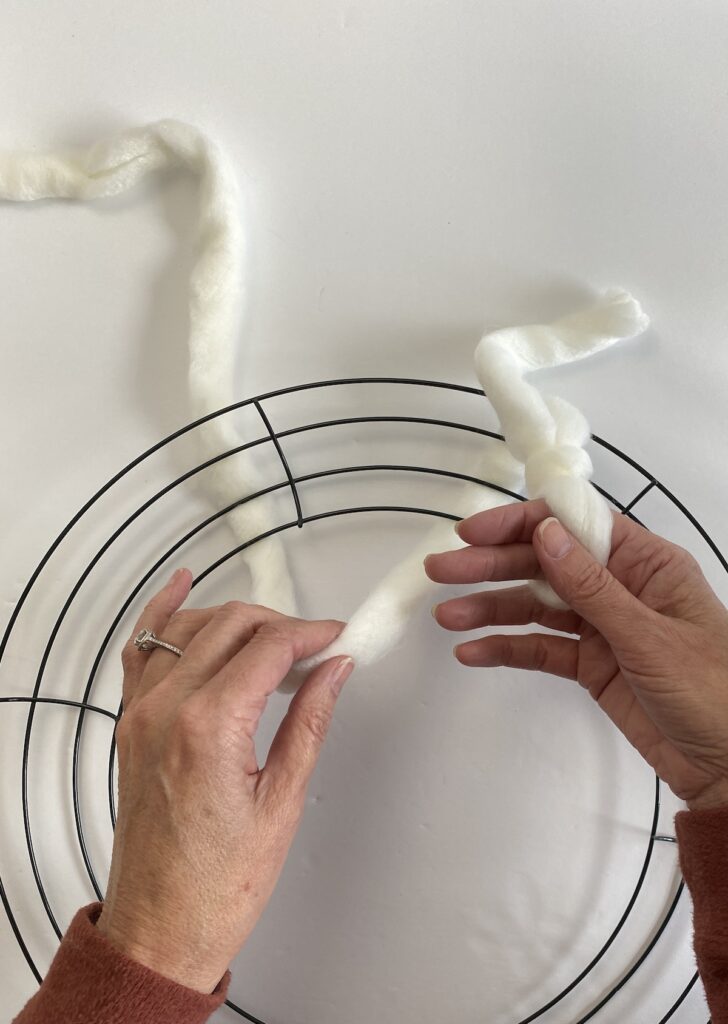
You’ll start by making a slipknot and leave about a six-inch tail on the end to use for tying off when you’re done crocheting with your fingers. You want the loop just barely big enough to fit your thumb and two fingertips through. I’ll explain this as best as I can. I’m right-handed so you may need to reverse this if you’re left-handed.
Hold your slipknot on the right and lay your ball of yarn on the left. Unwind enough yarn to work with and pay attention as you go and unwind more so it doesn’t tighten or your stitches will get too tight.
Reach through the center of the wreath grab your working yarn and pull it up through the center.
Gently pull the working yarn up and behind your two fingers and then over the top of the same two fingers.
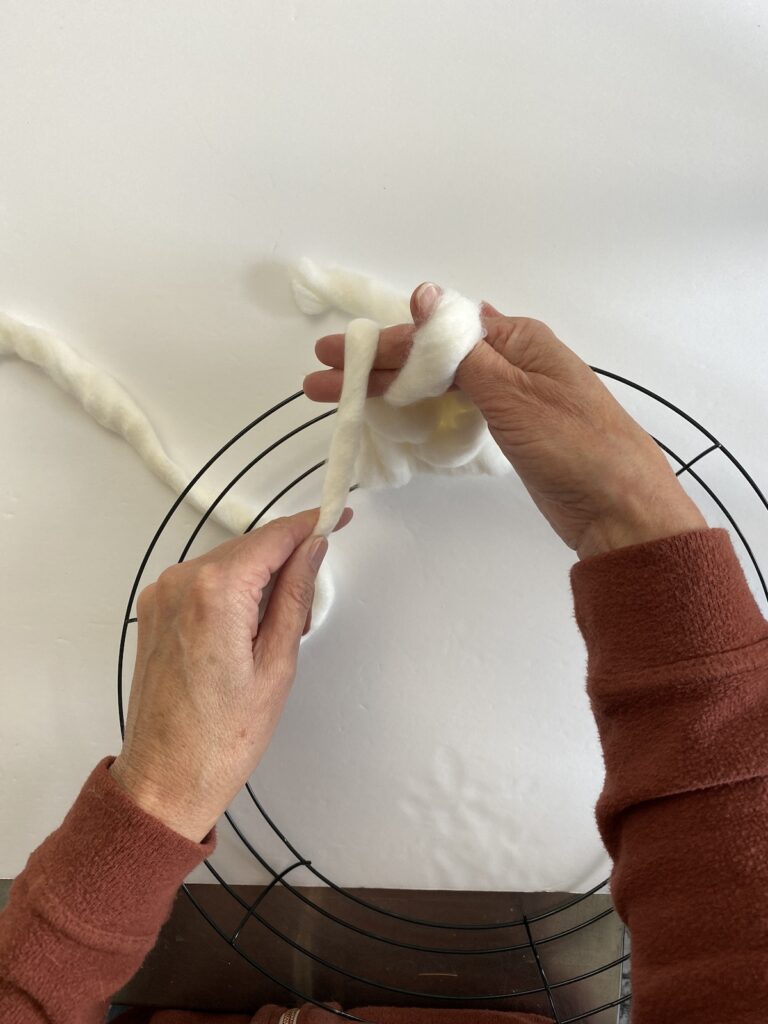
Let go of the working yarn but keep your right hand with the yarn on it down close to the wreath frame.
Reach over the TOP of the wreath, pull up the working yarn and over the TOP of the wreath frame, and pull it through both loops. You just did your first stitch!
It doesn’t look like much yet but it will soon. Don’t let your stitches get too big. Sometimes you have to pull back on the working yarn to keep things a little tighter. Not too tight, but also not super floppy. The loop on the right ends up being a little longer than the loop on the left.
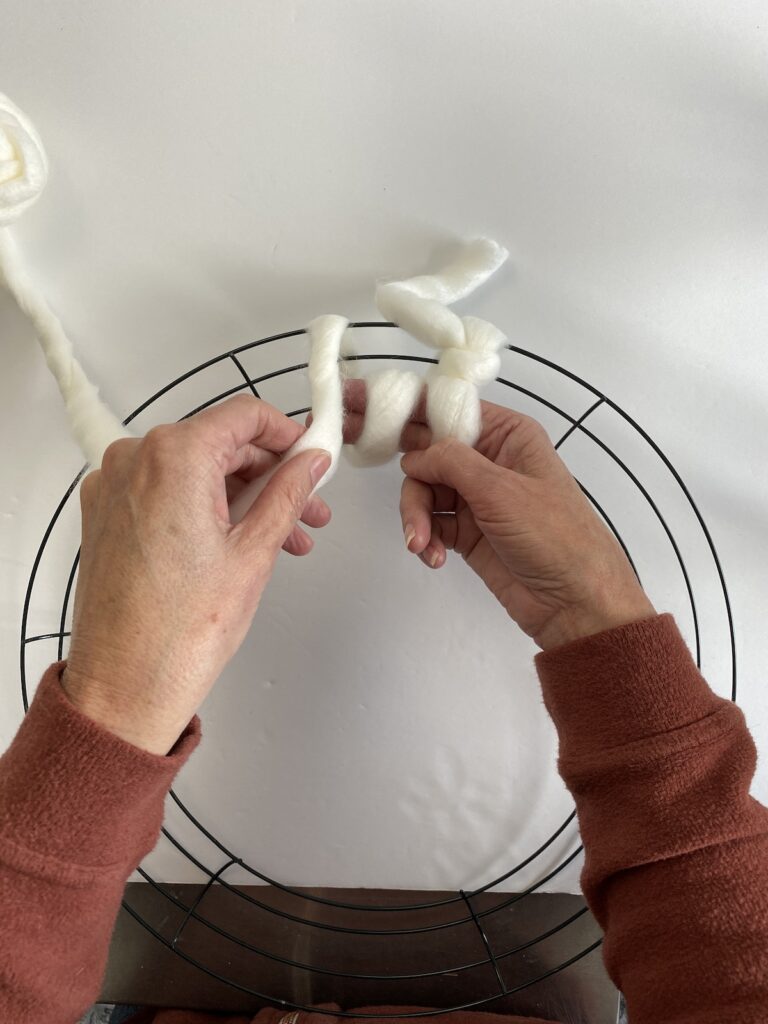
Repeat this process. The stitches will work in a counter-clockwise direction around the wreath, so the next stitch will be on the left of the first. Here’s a quick recap:
- reach through the CENTER of the wreath
- pull up behind the two fingers then over the top of them
- let go of the working yarn and pick it back up by reaching over the top of the wreath
- pull the working yarn up and over the top of the wreath and through the two loops
- remember to check to see if your working yarn is unwound enough after a few stitches so it doesn’t tighten
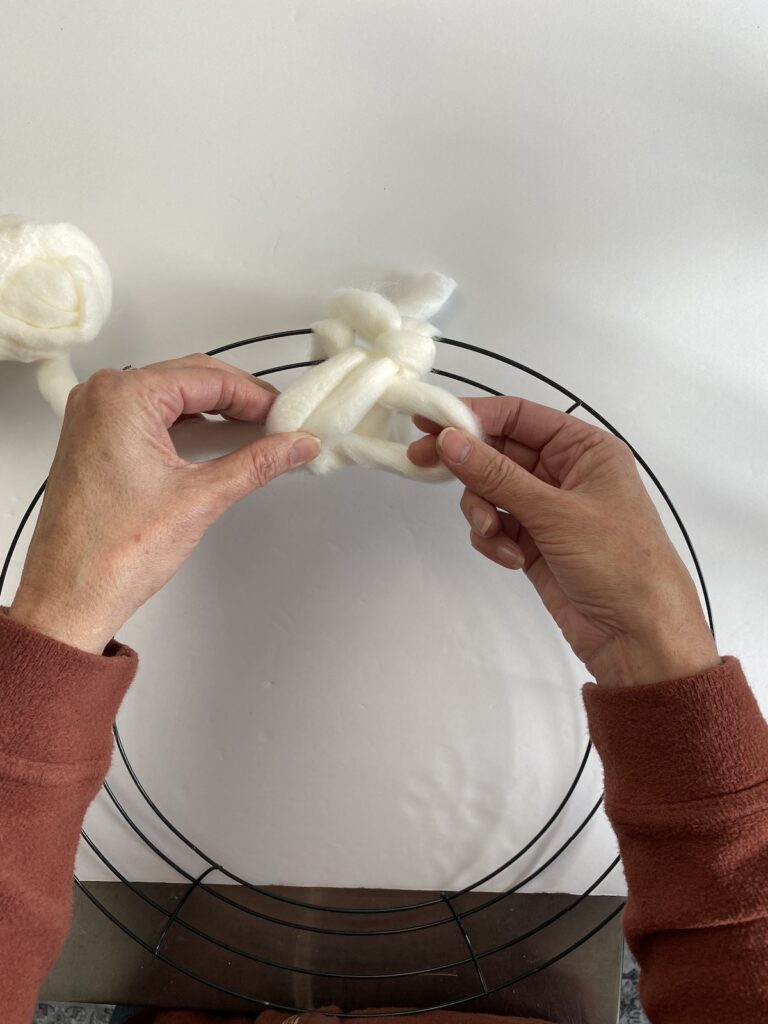
Arranging The Stitches
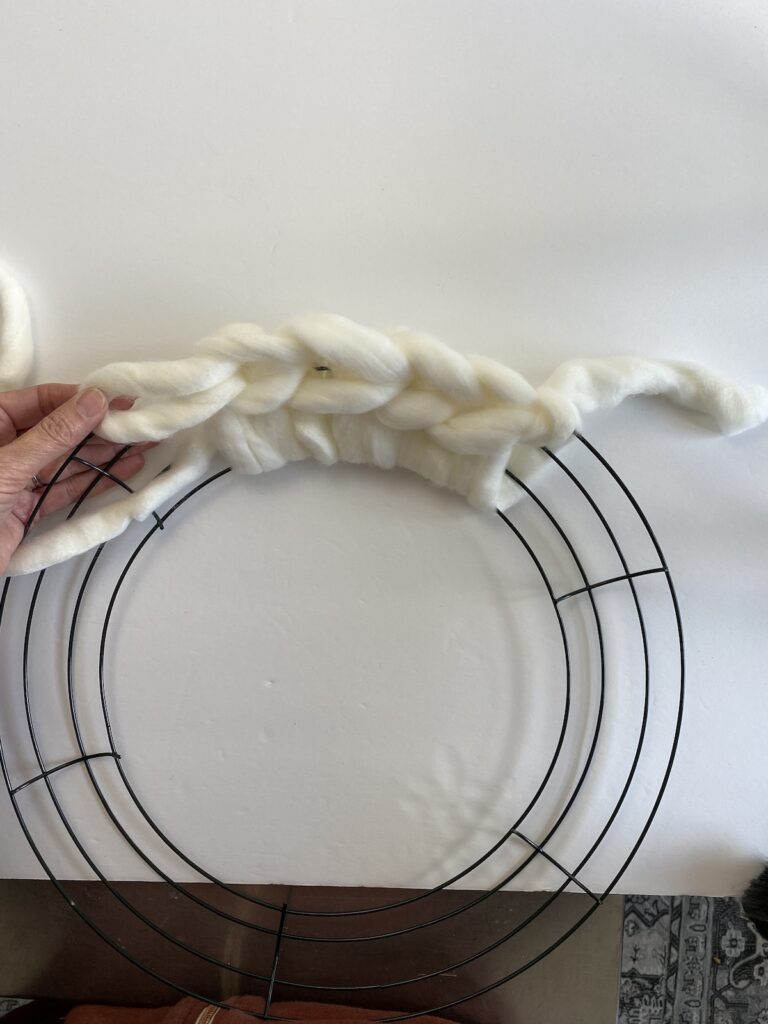
After you get five or six stitches, bunch them up a bit so you can’t see your wreath frame. Shape it a bit then repeat the process and continue to bunch until you get all the way around the wreath.
The amount of yarn you need when finger crocheting wreaths depends on the size of the wreath frame.
Tying Off The Back
When you get to the end cut your working yarn off but leave another 6-inch tail. Take the first tail you started with at the knot end and slip it through the last loop you made on the wreath.
Arrange the two tails towards the back of the wreath without pulling too tight and tie a knot in the back. You can trim those off but leave a couple of inches and weave them back through on the backside of the wreath to hide them.
The first video below shows how to make this wreath with one row. The second video will show how to finger-crochet a chunky yarn wreath with two rows.
You can hang your crocheted wreath with a ribbon or hide a wire on the back for hanging. These cute DIY wreaths look so pretty. As another option, you can twist the stitches to the outer edge. I’ve seen that done and it’s a pretty method as well.
Since you like making wreaths with yarn, be sure to check out my chunky braided yarn wreath DIY as well.
xoxo,
Denise
So I watched your video for the first time and I was able to get it like in the first couple stitches thank you very much for your video 😊
That is good to hear. I try to make things as clear as possible. Enjoy!
Best video tutorial I’ve seen for a finger crochet wreath, thank you.
You’re welcome. I’m glad it helped you!
Thank you. I have never tried this finger crochet but will, you made it look easy in the video
Hi
Not sure if you got my email in regards to the finger crochet video I just watched.
I wanted to know if I could use merino wool roving for this, or is it to thick?
Thanks
I haven’t personally tried the merino wool but I believe it would work fine.
Thank you for not speeding up the video! I was able to follow it perfectly 😊
You’re welcome! I’m glad you found the video helpful. Thanks for stopping by.
Hi
I just watched your video on finger crochet with chunky yarn.
Can you use wool roving or is it to thick?
Thanks