
Easy DIY Rag Garland Step-By-Step Tutorial
You’re going to love making this easy DIY rag garland made with fabric strips. This DIY fabric garland can carry you through several seasons with just a couple of quick changes. Let me show you how to make a rag garland.

My DIY rag garland is made with painter’s drop cloth, but you can make it with any type of fabric. I also made a DIY rag wreath with the same fabric. For my seasonal accents, I’m using fat quarters in different colorful fabric pieces.
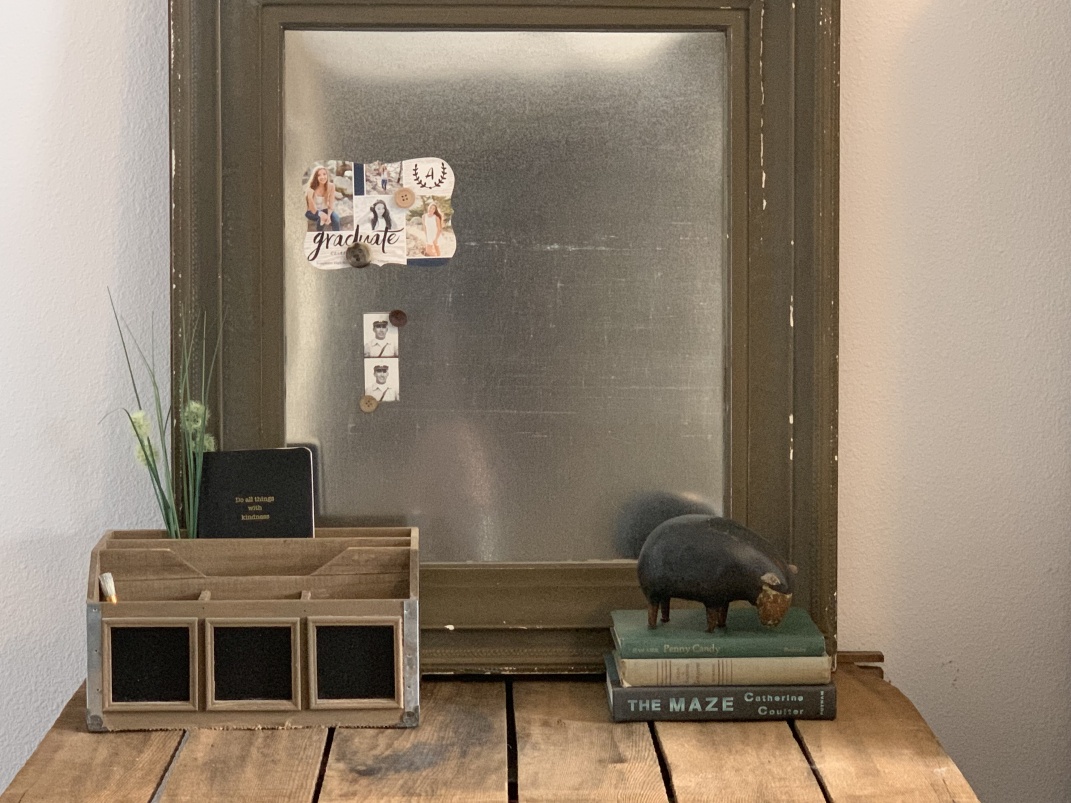
You can use a rag garland to decorate for Christmas, baby showers, a bridal shower, or any time of year. You can hang a rag garland on a fireplace mantel, use it on a Christmas tree, or as a fun way to decorate a mirror or lockers as I did.
This DIY project is so much fun to make, it doesn’t take much time and you don’t even need a sewing machine!
Supplies And Other Materials
You can get the materials at craft stores like Hobby Lobby or the Walmart craft section. Fabric stores will have the fabric and may also have the twine. If you decide to use a drop cloth, you can get a drop cloth on Amazon or in any hardware store. Here’s what you’ll need:
- Twine or a piece of ribbon for hanging
- Fabric (I like the Fat Quarter Shop and Walmart fat quarter bundles.
- Rotary cutter, ruler, and mat or scissors
What Kind Of Fabric Do You Use For A Rag Garland?
You can use any kind of fabric for a rag-tie garland. I used a solid color, but you can use different fabrics to make your rag garland. You can even add strips of tulle, ribbon, lace, or pieces of twine to create more interest.
You can buy yardage or use up scrap fabric so nothing goes to waste. Choose whatever fabric colors you like. You can use your favorite fabrics and mix different patterns with solid colors together.
How Much Fabric Do You Need For A Rag Garland?
The amount of fabric you’ll need will depend on the length of the garland. If you’re using fat quarters, you’ll need one fat quarter per foot of garland.
For the sake of crafters everywhere, I sacrificed a fat quarter to get the details I knew you would want! I tested this theory with 18 x 21-inch fat quarters from Walmart.
When I cut the fat quarter, I folded the 18″ side in half to make a 9″ piece and cut one-inch strips. I then cut those in half to make 9″ x 1″ strips and I got 44 strips from one piece.
After all 44 pieces were attached, I got exactly 12″ of garland. You’re welcome!
Step-by-step Instructions
Here is a quick tutorial for how to make this project. The amount of time it will take will depend on how many feet of garland you need to make.
- Cut all of your fabric strips.
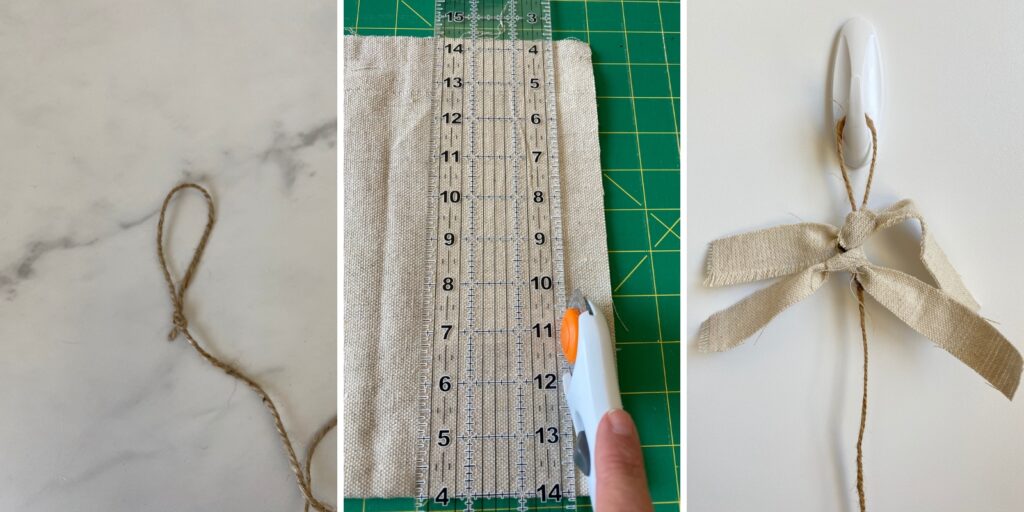
- Cut a piece of twine the length that you want your garland, leaving some extra to tie a loop at each end for hanging.
- Tie each fabric strip to the twine using a single tie knot.
How To Cut The Fabric Strips
Clear your work surface so you have plenty of room to spread out your fabric to make the folds and cut strips of fabric.
I highly recommend a rotary cutter for this project. If you know how to use one, this project comes together quickly. I cut all of the strips and made the garland in 45 minutes.
If you don’t have a rotary cutter, you can fold the fabric the same way only with the outside in, and use a ruler to draw lines on the back of the fabric to use as a guide for your cuts. This will take longer, but it’s entirely possible to do.
If you really want to make your life easy, you can purchase a jelly roll which is a roll of coordinated fabric strips that are already cut for you.
A jelly roll has wider strips but they look great and they can easily be cut in half to create the 1″ width if that’s really what you want. Be sure to check out my other fabric garland I made with a jelly roll.
Prepare The Twine And Tie The Strips
Start by tying a loop at one end of the twine and then measure to determine the final length of your garland. Leave a little extra twine to tie the loop on the opposite end.
I found the easy way to tie the strips is to hang the twine from a hook. After you tie the first fabric strip, slide it up to the knot.
You only need to tie one simple overhand knot. No need to tie it twice to form a complete knot. They don’t come untied.
Continue doing this until you get about halfway down the garland. To save your back, once you get about halfway done, turn the garland around and work from the opposite end.
I tried to pay attention and make sure each strip was turned slightly so all of the knots weren’t facing the exact same direction.
Adding Seasonal Colors
To change up my garland for the season, I cut additional strips of fabric in seasonal colors and add them here and there. I generally add two strips every foot just to add a pop of color where I want it.

They’re so easy to untie so you can change those colorful stips as often as you’d like.
I made another cute heart garland using the same red fabrics in the above photo.
This is a great way to change up the garland for the seasons without having to make an entirely new project. Add some pinks and reds for Valentine’s Day, Christmas colors for Christmastime, etc.
The final step is to hang your garland and enjoy!
Happy crafting,
Denise


I love that this garland can be used for any event/holiday just by changing out of few of the fabric strips. Saves time and money.