DIY Wooden Bead Christmas Ornaments
This post contains affiliate links which means that at no cost to you, I may earn a commission if you purchase using one of my links. For more information view my full disclosures.
~
Learn how to make DIY wooden bead Christmas ornaments with flat split wood beads or round wooden beads. They are easy DIY Christmas ornaments to decorate your Christmas tree or gifts with style.
DIY Wooden Bead Christmas Ornaments Using Split Wood Beads
Split wooden beads are wooden beads that are cut in half so they are flat on the bottom and round on the top. They don’t have holes. They come in a number of sizes so you’ll want to choose a size that works best for the frame you’re using. I bought these split wood beads and they came in a couple of different sizes.
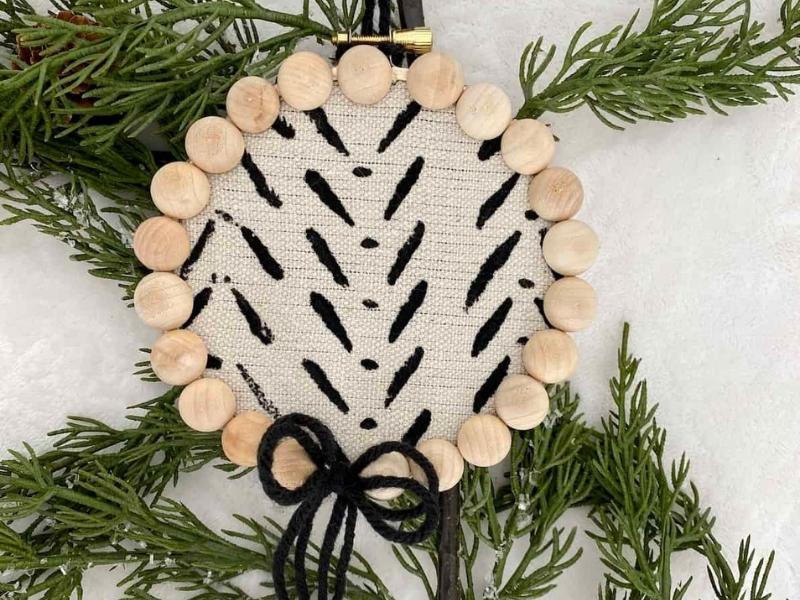
For these DIY wooden bead Christmas ornaments, I used 4″ embroidery hoops with 15mm and 12mm split wood beads. The larger size was easier to handle but the set of beads I bought had both sizes so I made some with each size. You can also mix the sizes.
If you want to stretch fabric in between the hoops, remove the inner hoop before hot gluing the beads onto the outer piece of the embroidery hoop. Otherwise, you may glue the two pieces of hoop together. Set the inner hoop aside. Remember not to put a bead where the outer hoop stretches apart or you won’t be able to tighten it later.
Beads don’t always line up perfectly so you may end up with a gap. Plan ahead and make the potential gap where you know your decorations or ribbon will cover it. Always glue all the way around in one direction so you only end up with one gap.
After gluing beads to the outer hoop, let them dry then flip the ornament over and add dots of glue to secure them better to the hoop along the outer edge of the beads. Don’t add the extra dots on the inner edge or they may interfere with putting the hoop back together.
To add fabric, lay the inner hoop down and arrange your fabric over the top. Loosen the clamp on the outer hoop with the beads attached and stretch it over the fabric. Pull the fabric from the back to stretch it out and eliminate wrinkles then tighten the clamp. Trim excess fabric or fold it over and glue it to the back to hide it.
How to Make DIY Wood Bead Christmas Ornaments With Round Beads
When using round beads, be sure to order wood beads with holes in them. Cut a piece of florist wire to the length you want and bend it into a round shape. Sometimes the wire will stay in a round shape when you cut it. I also tried this with twine and it worked, although the ornament was more oval than round.
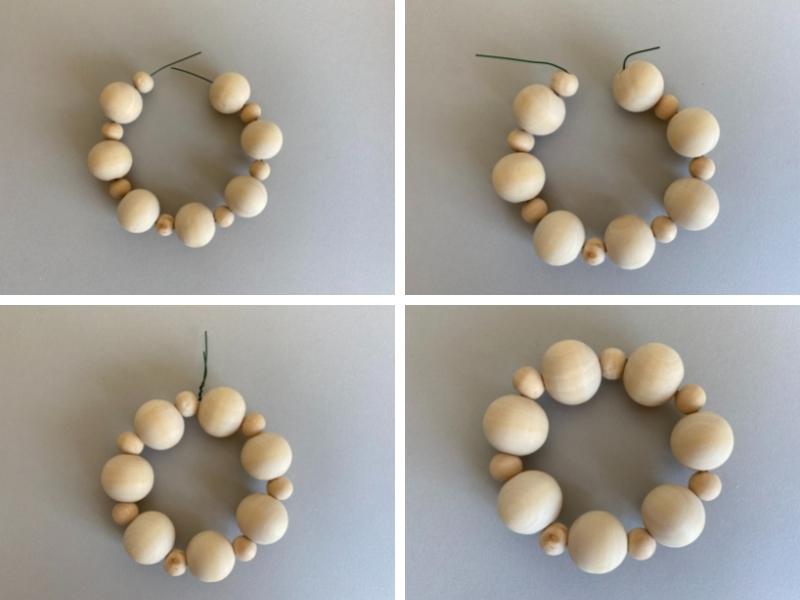
String beads on the wire then pull the two sides of the wire together and twist tightly several times and clip the excess. I was able to bend my clipped wire back into the last bead to hide it. If you can’t do that, your ribbon will cover it. Small needlenose pliers worked great.
Add grosgrain ribbon or jute twine for hanging.
How To Make Wood Bead Icicle Ornaments
Wood bead Christmas ornaments don’t have to be round. You can also make simple wooden bead icicle ornaments by stringing wooden beads on hemp cord. Hemp cord works better than twine because it’s not as fat and fuzzy which makes it easier to work through the beads.
If jute twine is all you have, it will likely work but you may need to wrap a small piece of tape around the end of the twine to make a “needle”.
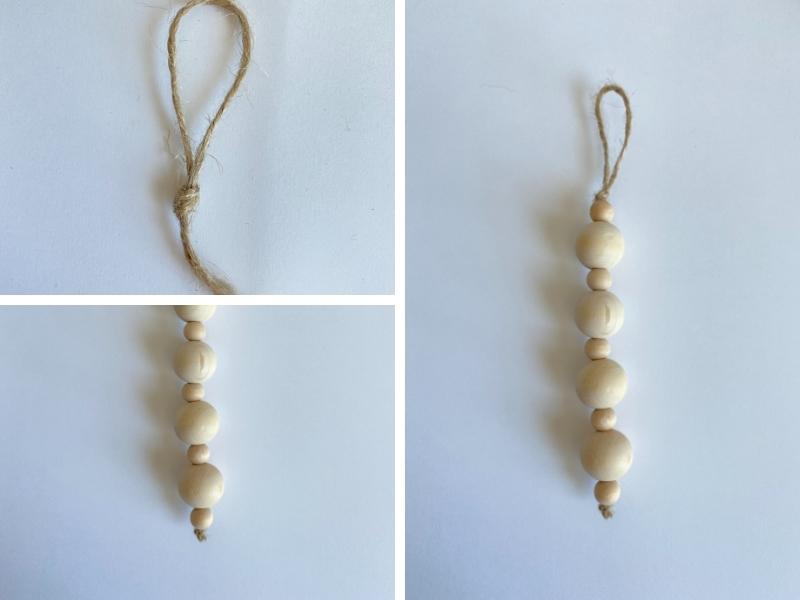
Measure a 18″ piece of hemp cord and fold it in half. Make a knot a couple of inches down the folded end to create the loop for hanging the ornament.
String a small bead through both loose ends of the cord then continue to add more beads using any sizes that you like but end with another small bead. This is where the tape comes in handy with twine. The larger beads can pull through so I recommend starting and ending with a small bead.
Once you get all of the beads on, tie a double knot at the bottom of the ornament and cut the excess twine. A bit of Elmer’s glue on the knot will ensure that it doesn’t come untied. Just rub a dot in with your fingers then hang the ornament on something until it dries.
Happy crafting,
Denise