
Easy Shutter Shelf DIY
How To Make An Easy Shutter Shelf
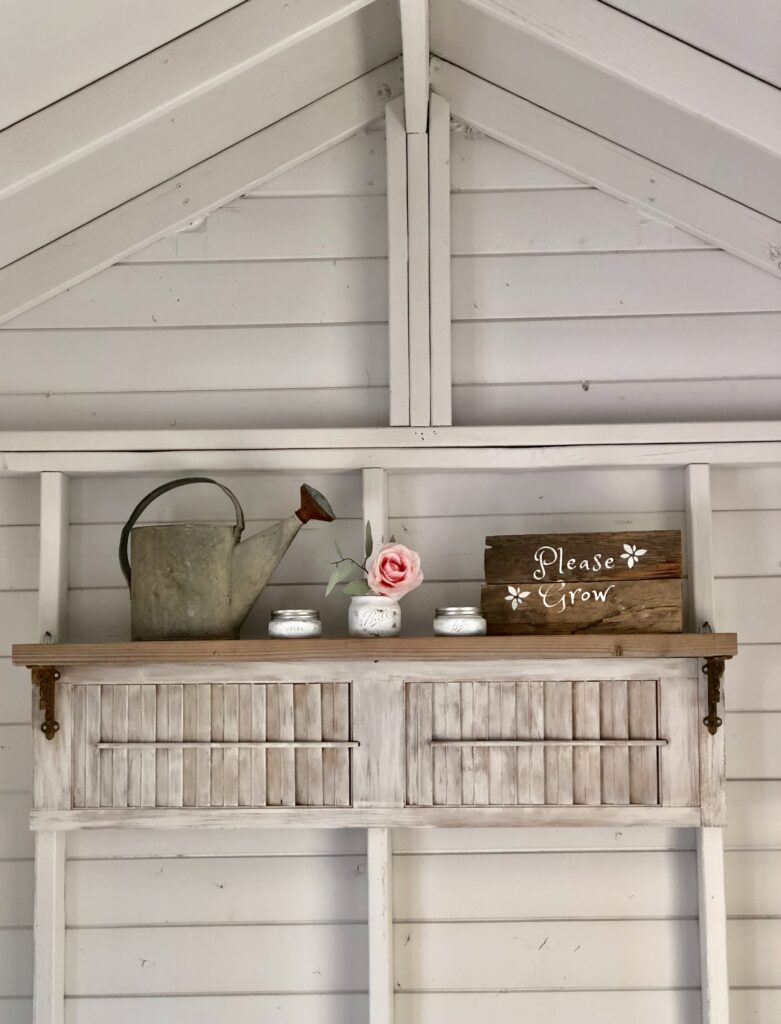
Today I made an Easy Shutter Shelf DIY. I love old shutters but sometimes they come in less-than-perfect shape. I bought four at a local event. None of the shutters functioned so they sat in the garage for a year before I finally decided it was time to put them to use. I’ve been decorating my she shed so I have a lot of space to fill. Turning the shutter sideways while the paint dried gave me the idea to turn an old shutter into a shelf!
(My posts contain affiliate links and I may make a small commission if you purchase anything using the links in my posts. This is at no cost to you.)
Here’s what I used to make my easy shutter shelf DIY:
- old shutter
- chalk paint
- chip brush
- shelf brackets
- shelf boards (I used scraps from the yard)
- Dewalt drill (of course you can use any but I like Dewalt)
- Gorilla brand wood glue
- Shelf hanging hardware
If your shutters are broken, you can use the Gorilla wood glue to glue them in place so they don’t fall out when you hang the shelf. If they aren’t broken, lucky you! So here is how to upcycle shutters with a shutter shelf.
Painting the DIY shutter shelf:
I painted the old shutter using chalk paint. I wanted some of the natural color of the shutter to show through, so I watered down the paint a bit. This part takes the most patience because painting every part of the shutter is a bit of work.
You don’t have to paint the back if you don’t want, but I recommend painting all of the edges around the outside because you’ll see that portion when it’s hanging on the wall. I used a cheap chip brush to paint the shelf. I like to reuse things, so I actually rinse my chip brushes and use them as many times as possible.
Cutting The Shelf
Now that you have the shutter’s painted, you’ll need to cut the piece of wood that you’re using for the shelf. I cut mine to the exact width of the shutter. Lowe’s or Home Depot can do it for you but I used old wood from my woodpile for this project.
When you pick your shelf, make sure it’s as deep as the brackets. The wood in my pile wasn’t deep enough, so I pieced two together. I love rustic, but that may not be your thing. Here’s a picture of my two pieces from the side.
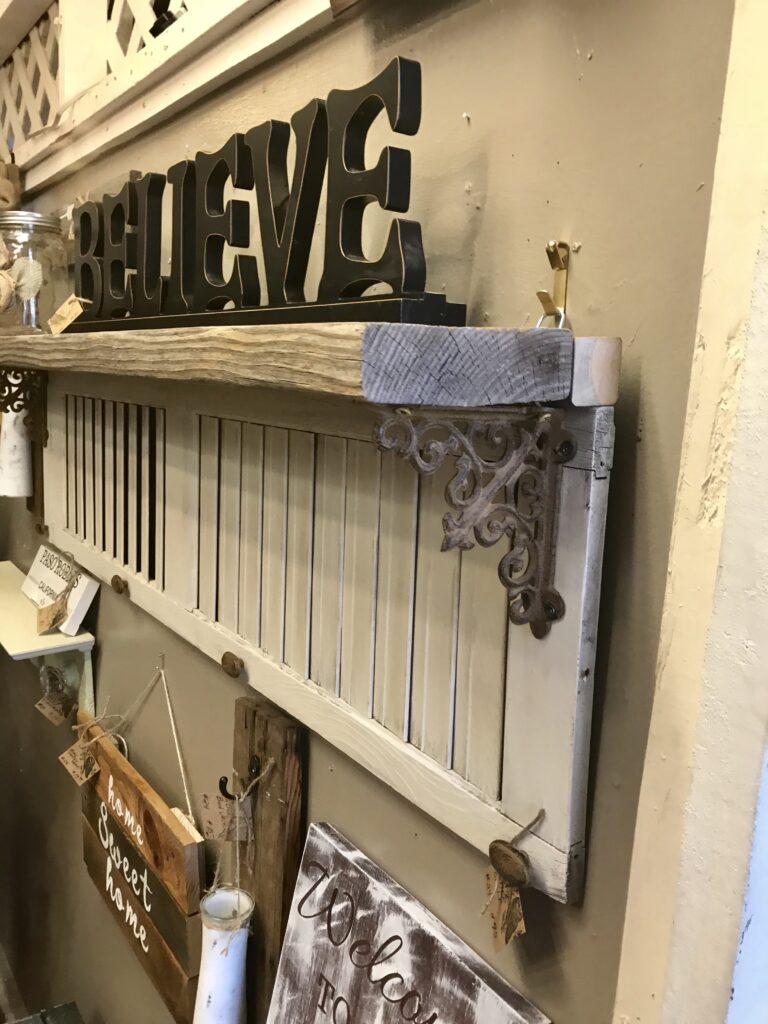
Attaching the hardware:
Attach your shelf brackets to the thickest part of your shutter. After both brackets were attached to the shutter (aligned with the top of the shutter), I attached the shelf pieces using the same method.
I pre-drilled the holes and then attached the shelves to the top part of the bracket. The last thing you have to do is attach the hardware to the back. Again, pick the meatiest part of the wood so the screws will support the weight of the shelf. And, yes, you have to pre-drill one more time.
As an update to this post, I actually added an additional shutter to my shelf to give me a backdrop for hanging wreaths and signs in my she shed. This double shutter shelf can be made by adding small brackets to the shutters.
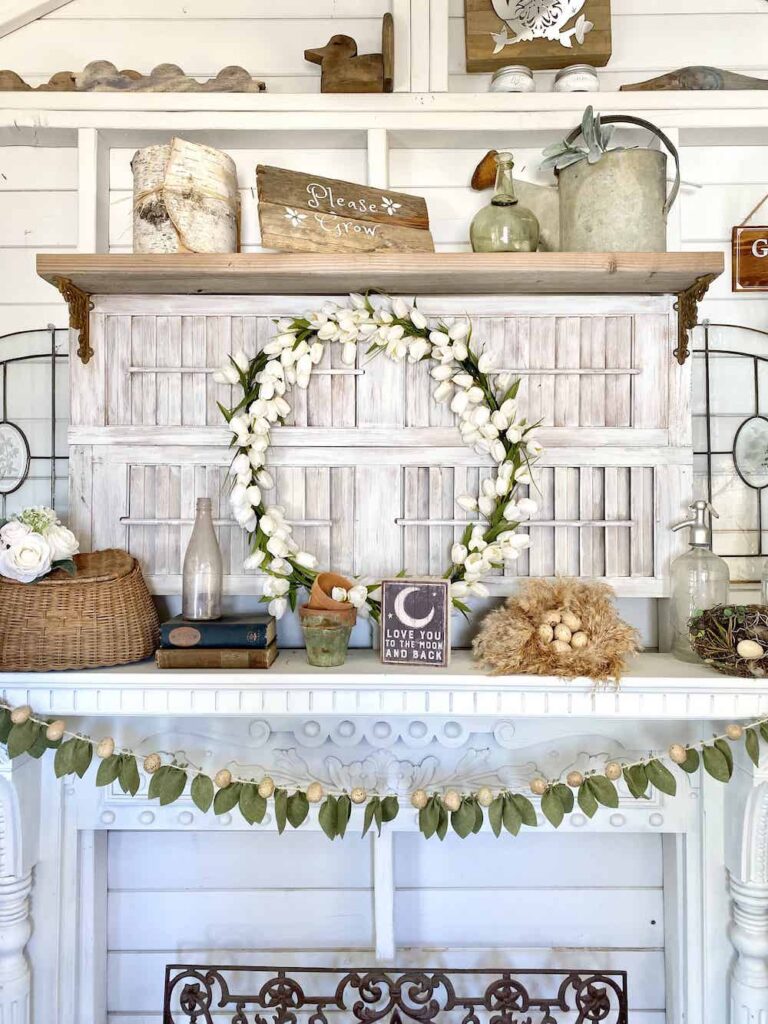
I also added some rustic drawer pulls to the bottom of one of my shutter shelves. If you’ve been wondering how to use old shutters or what to do with old shutters, now you know! 😉
Now that you have extra chalk paint, you should read my 3 Simple Mason Jar DIY Projects to learn how I paint them and other ways I love to use mason jars.
Thanks again for joining me at Hootshack. I hope you enjoyed this easy shutter shelf DIY! Be sure to check out more DIY Shelves at Pine and Polar.
xoxo,
Denise
Wonderful post
Thank you!
Gorgeous vintage shutter shelf craft.
Hugs,
Kippi
This is amazing ! What a great DIY and such a simple concept . Im so sharing this with my sister !
Thank you so much! Glad you stopped by my blog 🙂
It’s nice idea! This looks amazing. Keep up the good work. Thanks for sharing.
I am not much of a DIY person so I appreciate people who have talent in transforming objects that I would usually throw in the bin, and give them a new life. The shutter shelf looks lovely.
Thanks so much, Joanna and thank you for stopping by! I love to repurpose things. 🙂
These are super cute, I love this idea of converting them to a table!
Wow. Been wanting to do something like these too. Yours is so good, i’ll take note of this post for later. Thanks!
What a cool post! I love DIY’S and making old stuff “new.” This looks amazing. Thanks for sharing! 🙂
What a fantastic way to repurpose something! I do love when people can give things a new lease of life in a different way such as this.
Thanks so much for your comments! I’m glad you enjoyed my post. 🙂
I love DIYs! Thanks for sharing this!
This is actually really creative. The shutters give it a classic rustic look!
So easy to make. It has a rustic feeling to it. I can see something like this in a cottage.
You’re so good at this. I love old things. Your way seems amazing! Keep up the good work.
These are such great ideas, I would have never thought of them. I’m not much of a DIY’er but love these kinds of projects.
Thank you! I appreciate your visit to the blog today. 🙂
That is a great idea, reusing shutters, to make a beautiful shelf. This is a perfect DIY project.
Oh wow. This is great. I want to decorate my daughter’s room but I’m so bad at diy ?
Some projects are definitely easier than others but there’s such satisfaction in making something on your own. Thanks for visiting me!
What a great idea, I never thought about that. Looks cute.