
Decoupage Napkin Sign DIY
This post contains affiliate links which means that at no cost to you, I may earn a commission if you purchase using one of my links. For more information view my full disclosures.
~
This Decoupage Napkin Sign DIY was such a quick and easy project. I was shocked at how easy this DIY decoupage sign project was and it turned out so pretty! If you’re wondering how to decoupage with napkins, this is a great decoupage project for beginners.
The real takeaway from this post is the pretty napkins. My mom gave me three of these napkins more than a year ago and I couldn’t throw them out. She gave them to me and said I should use them in a DIY project someday. I’m so glad I saved them.
Decoupaging with napkins is very easy and there are so many pretty designs available.
Good Napkins for Decoupage
Here are some links for you to find the good napkins for decoupage that I used and some other patterns from this talented artist.
In the list below, I’ve included links to some other sellers that sell either one napkin, or a set of napkins from different packs. What a cool idea if you don’t want several packs of napkins.
- Here is a beatuiful owl family
- A Christmas deer
- A pretty bunny
- Brightly colored birds
Decoupage Napkin Sign DIY Supplies:
- Wood sign – painted
- Matte Mod Podge
- Napkins with pretty patterns
- Paintbrush
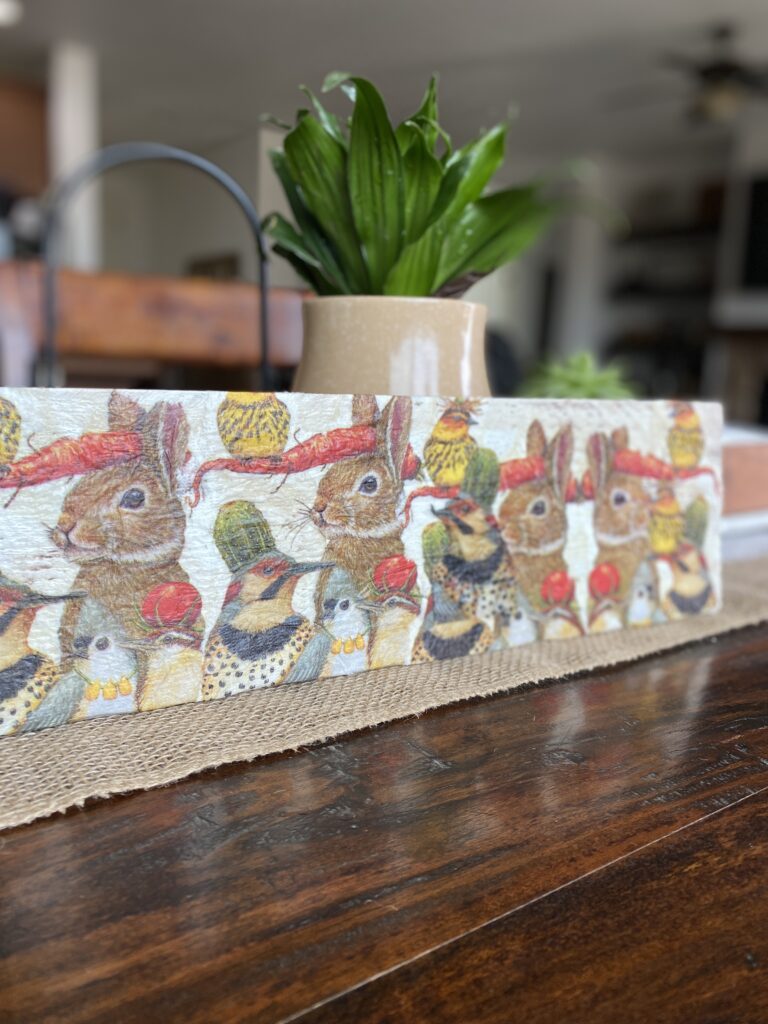
For this Decoupage Napkin DIY Sign project, I painted the first sign black before I started decoupaging the napkins. I got to work cutting out the napkin design. I couldn’t save all of the detailed parts, but I tried to cut around as many as possible.
On my first attempt, I pealed the napkin apart to make it one-ply before starting to decoupage. I didn’t like this so luckily, I had painted the entire sign so I was able to flip it over and start again. It looked much better with the layers of napkins kept together.

How To Decoupage With Napkins
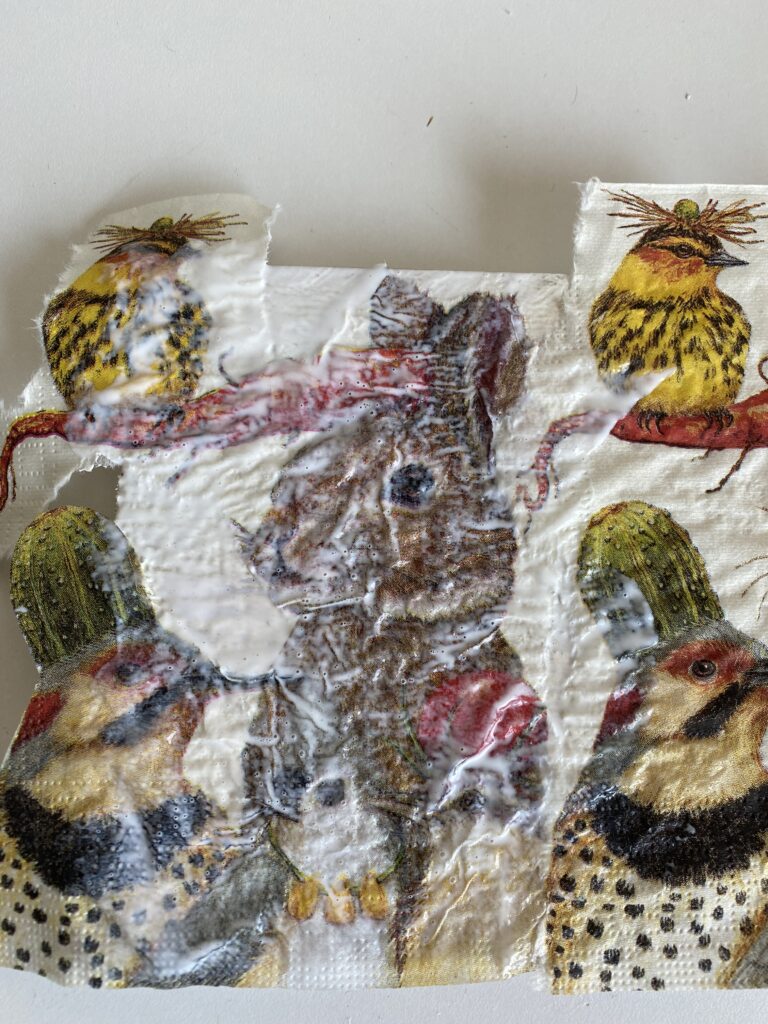
Apply a thin layer of matte Mod Podge to the sign with a paintbrush and then smooth the first piece of napkin on the sign. Continued until all of the napkin pieces were attached to the board in the design that you want.
Saturate the napkins with gentle strokes. Use the brush to gently separate the napkin in some places so the black paint will show through. I globbed more Mod Podge on any bubbles and gently patted them down until they stuck to the board. I did my best to separate the napkin seams in the middle and I wish I had worked on that spot a little more.
I chose to saturate the napkin because it gives a more antiqued look. If you want a smoother look, you may need to use less Mod Podge and take more time smoothing.
Paint some Mod Podge on the edges of the sign and use your finger to smooth the napkin down. Tear the excess napkin off of the back and then apply one more layer of Mod Podge with my finger to seal the edges.
Using The White Board To Decoupage With Napkins
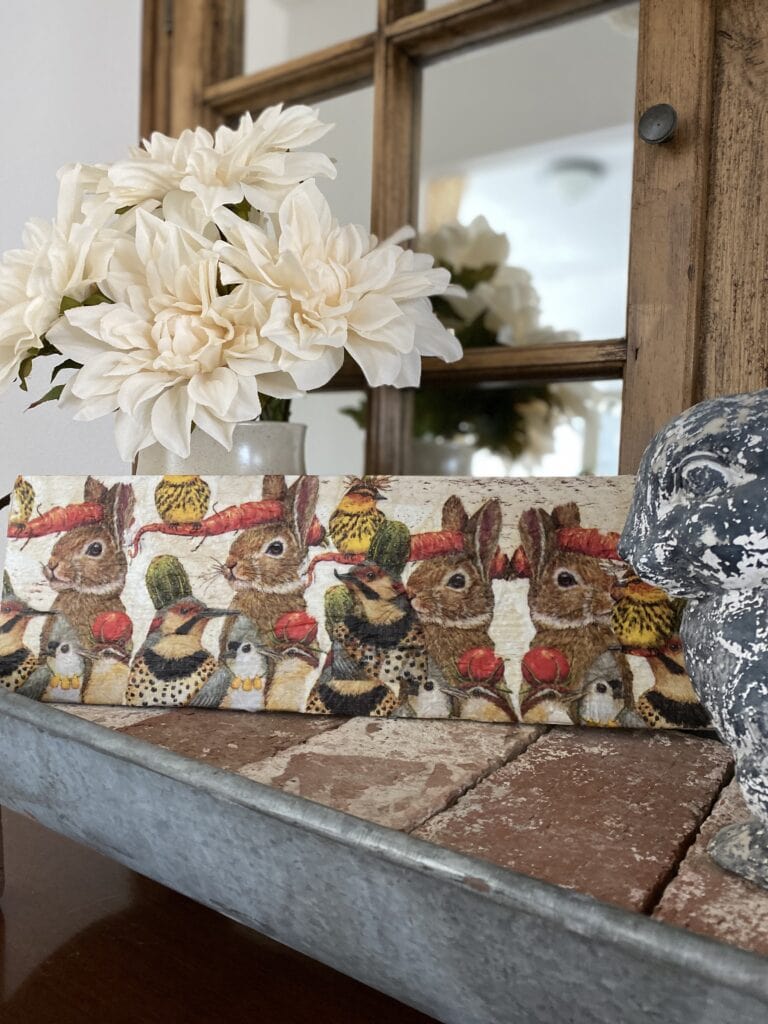
For this decoupage sign below, I used a piece of rustic wood that I painted white and then aged a bit with watered-down brown craft paint. Do you like the white or the black background better? Let me know in the comments below!
For this color, I tore around the animal patterns instead of cutting them. The background of the napkin blended in so I didn’t have to be so precise.
I’m intrigued with decoupage projects now and I’m looking through my craft room for the next decoupage DIY victim. I hope your enjoyed learning how to decoupage with napkins with this DIY napkin sign DIY. I’d like to learn how to decoupage glass bottles next. What are the best things to decoupage? Let me know in the comments or share a link to your favorite decoupage project.
Happy crafting,
Denise

some really cute ideas. Wondering why so many of them have vegetables coming out of their heads though?
The artist used vegetables for their hats. She’s well known for her creative illustrations. 🙂
This is so cute!!
Thanks, Michelle. I appreciate you stopping by.
This is probably my favorite of your DIY projects. I like each color for different reasons but I like the black best of all. Thank you for the links to more napkin art to try!