How To Make A Bow Out Of Wrapping Paper: 4 Easy Ways
Today I’ll show you how to make a bow out of wrapping paper in four different ways. Making wrapping paper bows is a piece of cake if you follow one of these easy tutorials. You can also make these paper bows with book pages! You’ll never need to buy a bow again!
Use one of these awesome tutorials to create a DIY bow for a last-minute gift in minutes. Step-by-step instructions can also watched in this video but there are more bow options below the video so be sure to keep reading.
I’ve added to this post so additional bows will have links to videos further down in the post.
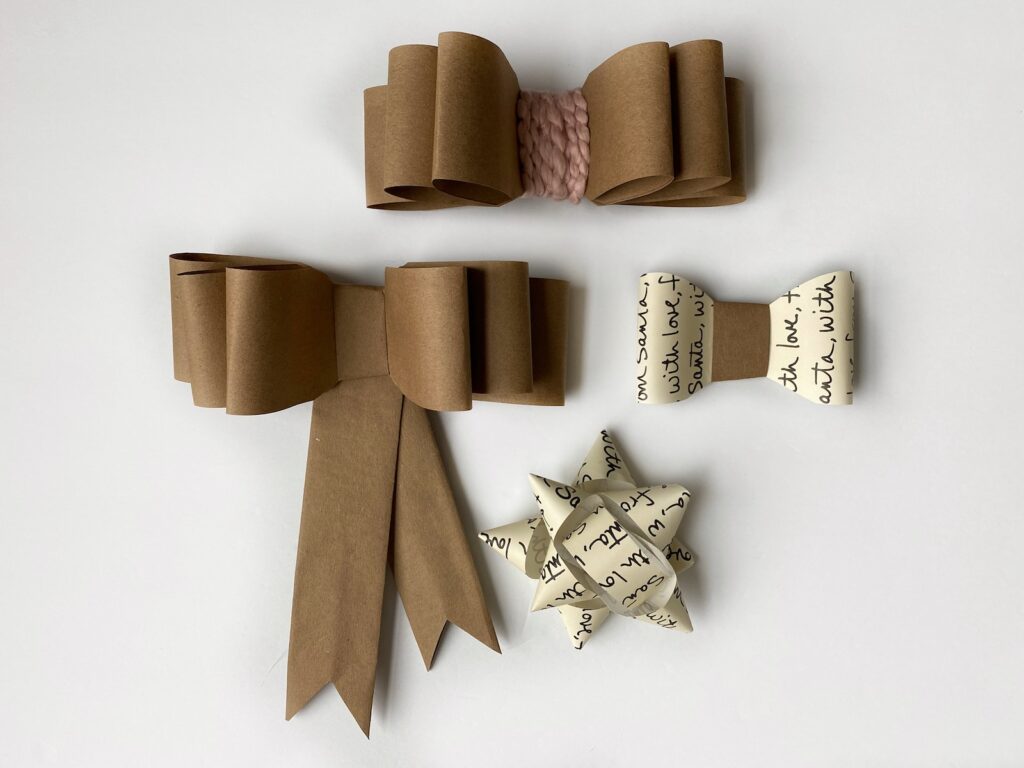
Everyone should know how to make bows with gift wrap! There are so many ways to make paper bows and once you learn these simple techniques, you’ll never be without a bow for a gift again.
Were you just rummaging through your gift-wrapping stash trying to get the wrinkles out of an old bow? I’ve been there…
Not anymore, my friend! You’re about to learn how to make beautiful paper bows! You’ll only need scissors, wrapping paper, tape or glue, and a ruler.
How To Make A Bow With Wrapping Paper: Method 1
These instructions will create a bow that is approximately 7″ wide by 2″ tall. You may need to adjust if you want your bow larger or smaller in width or length when making this bow from wrapping paper.
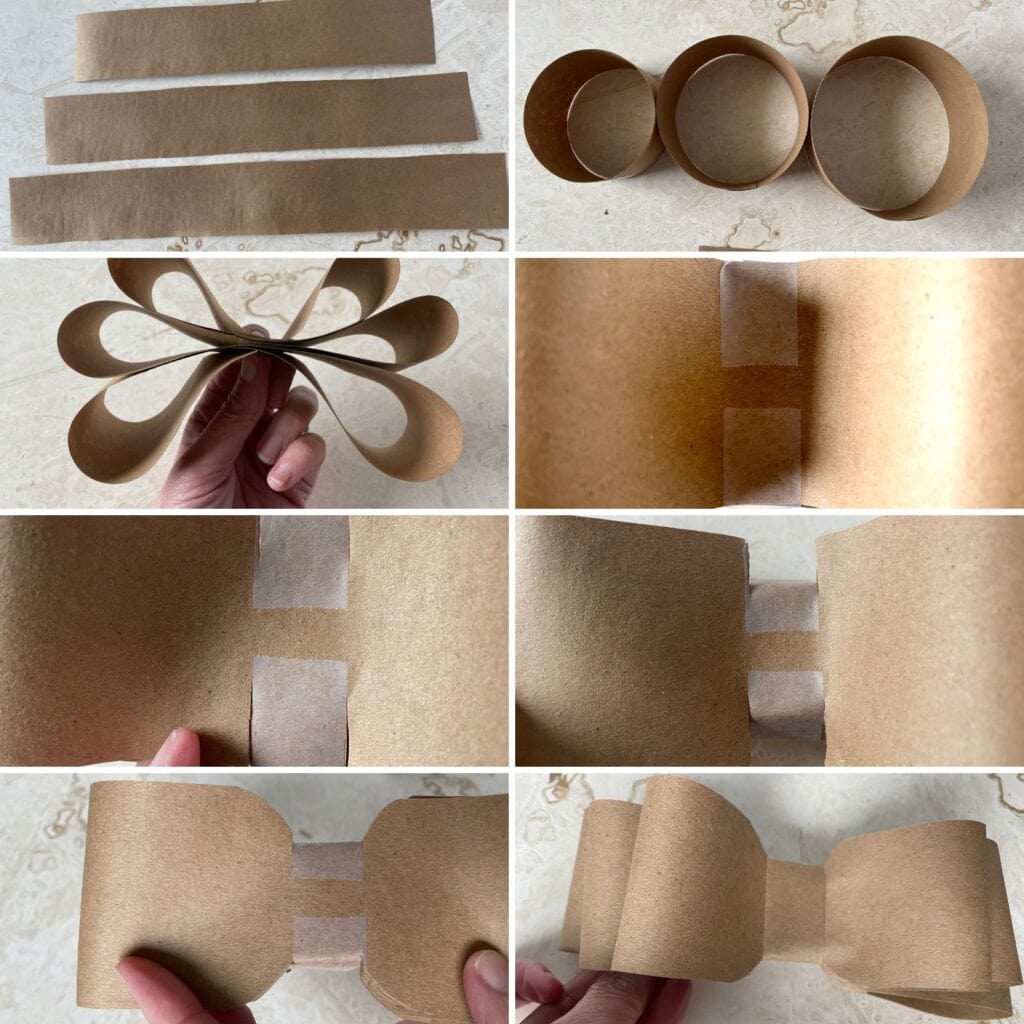
- Cut three strips of wrapping paper to the following widths: 16″, 14″, and 12″ strips. Each strip is 2″ tall. Also, cut one additional strip that is 5″ wide for the center. Set this piece to the side for now.
- Roll each long strip into a circle and overlap by one inch in the back. Secure with tape or glue.
- Hold the largest loop and pinch it in the center making sure both loops are the same size on each side. Use your fingers to pinch the middle of your bow.
- Stack the remaining two loops on top. Position them appropriately by pinching them together in the center. Secure all of the loops together in the center with tape or glue.
- Using the tape as a guide, cut into the center along the tape lines about 1/2 inch. Don’t cut all the way through the bow.
- Flip the bow over and repeat this on the other side. Again, don’t cut all the way through the bow. Fold the cut pieces in.
- Trim the sharp corners around where you cut by barely rounding them off.
- Take the final 5″ strip and fold the sides in to create finished edges. Wrap this piece around the center of the bow. Secure with tape in the back. It may need to be trimmed down.
- (Create tails – Optional). Cut another 2″ by 16″ strip of wrapping paper. Fold the sides in to create a finished look. Find the center and fold the strip down at an angle. Find the center again and fold the other side down. Trim the ends to create points if you’d like.
- Tape or glue your tails to the box and then tape the bow.
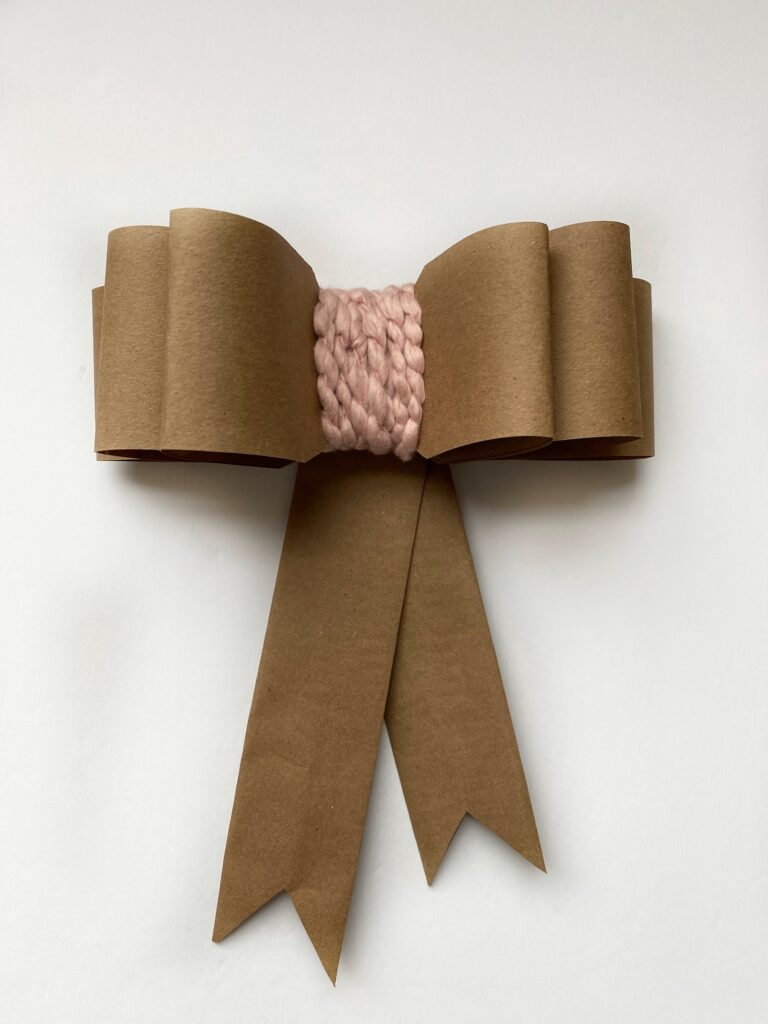
How To Make A Gift Bow With Wrapping Paper: Method 2
This bow is very easy, but I find that the video is helpful. This is how to make a simple ribbon bow out of wrapping paper.
The best thing about this bow is you can make smaller bows or even larger bows for big items like a TV. All you have to do is cut thicker and larger strips to create a bigger bow. This bow is also really pretty when made with reversible wrapping paper.
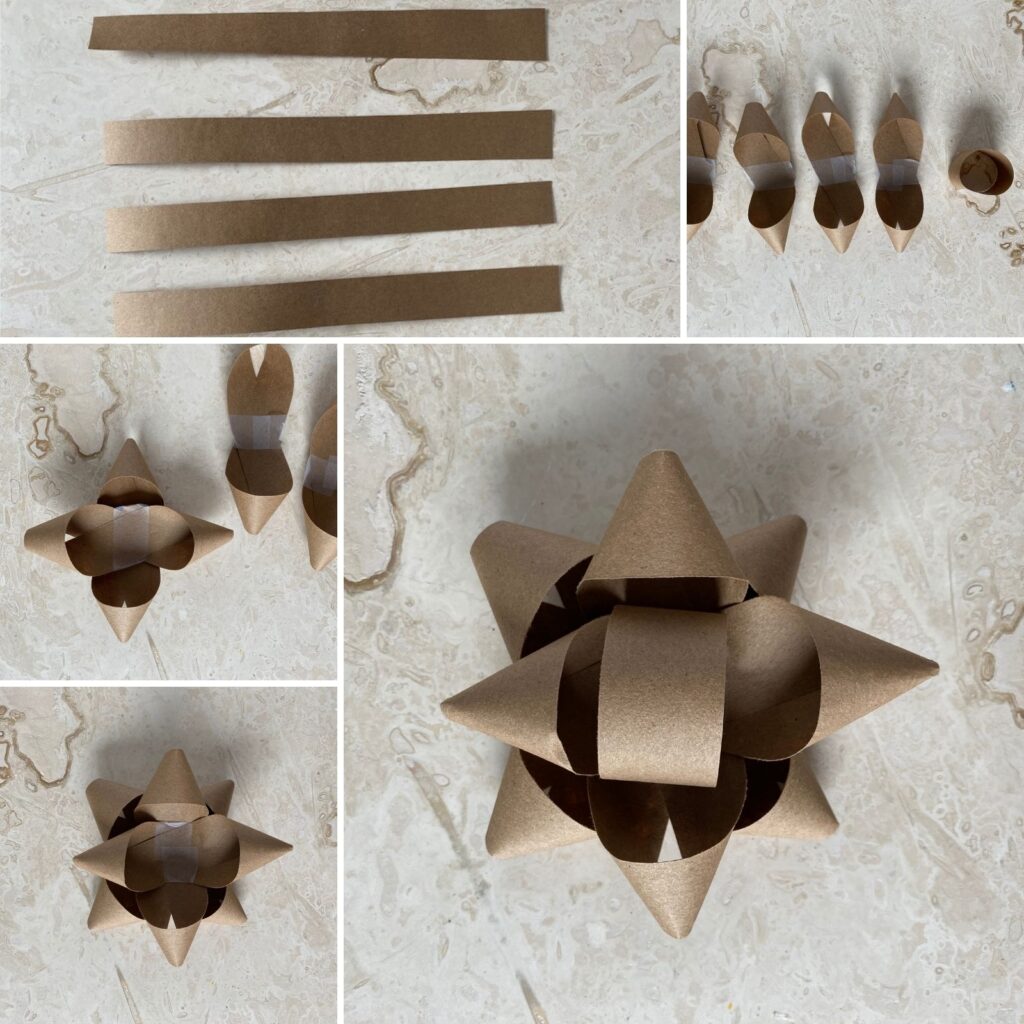
- Cut four strips of paper – 1″ x 10″ and one strip that is 1″ x 4″.
- Fold each of the longer strips into the shapes shown in the photo above.
- Roll the smallest strip into a circle and tape it in the back for the center of the bow.
- Tape one piece inside the other until the bow is full.
- Tape the center inside.
If you were wondering how to make a simple bow out of wrapping paper, this one would be my first choice. It’s quite easy and you don’t need much wrapping paper.
To make a fuller bow, you can use more pieces.
How To Make A Paper Bow From Wrapping Paper: Method 3
For this paper bow tutorial, you may need to practice a couple of times. Once you get the technique down, you can make these any size you want. The video is easier to follow.
I like this bow for small gifts
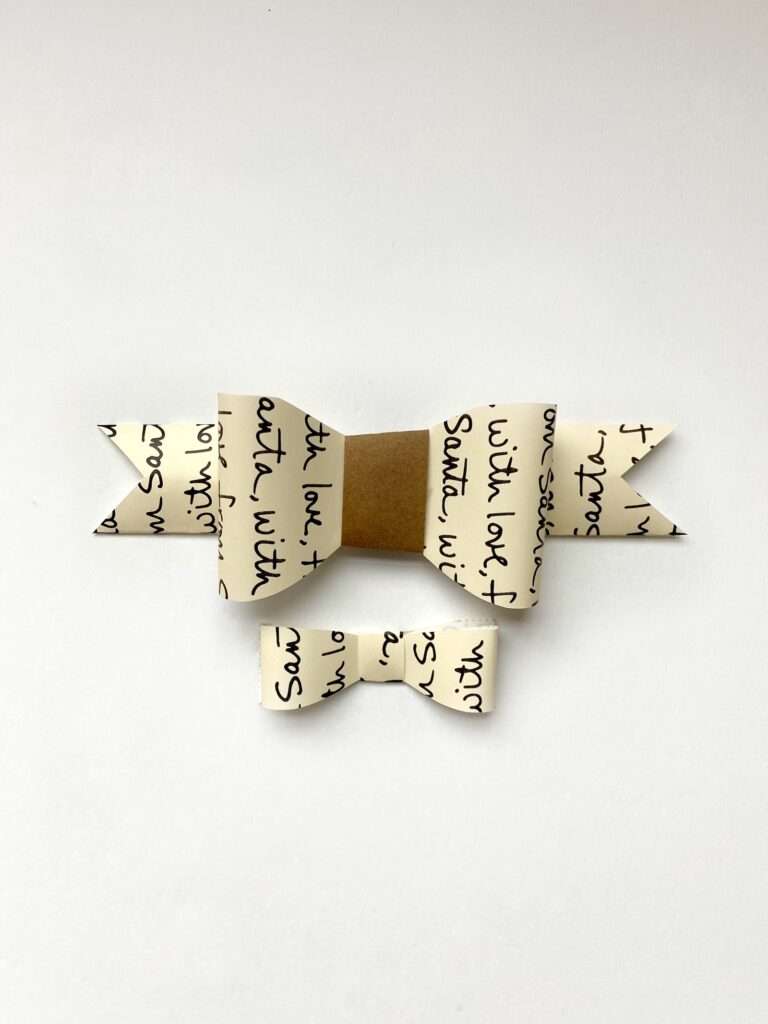
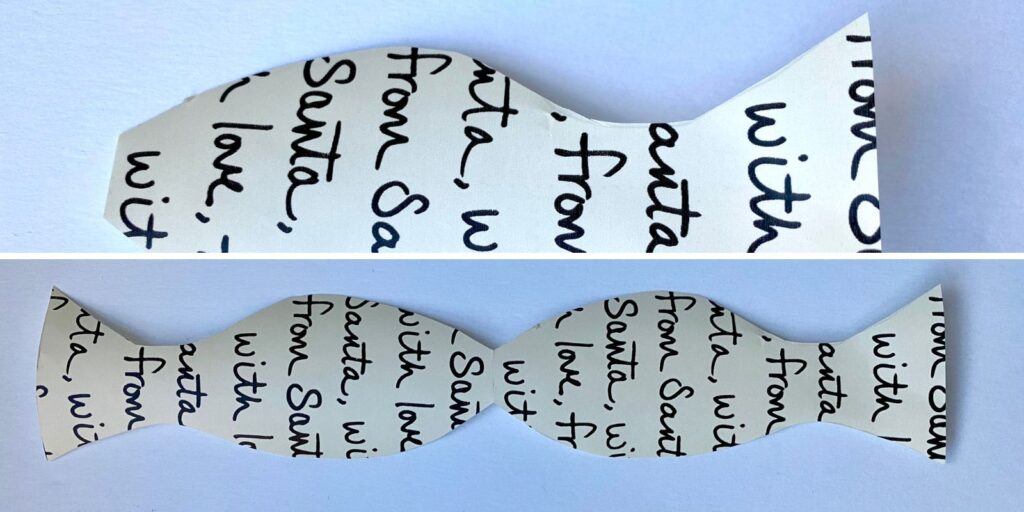
- Cut a strip of paper about 2″ wide by 10″ long and fold it in half
- Cut a shape that will resemble a fish when looking at it sideways. The “fishtail” is on the open side and the mouth is on the fold.
- Open it up and hold it so a tail is at the top and bottom.
- Snip into the indented portion of the tail about halfway.
- Turn it completely around and snip again. Because you’re flipping it, you’ll always be snipping into the right side.
- Fold the bow around, connect the two snips flatten the bow, and secure it with tape or glue.
- Cut a small strip to go around the center to finish it off
How To Make A Paper Bow With Book Pages Or Wrapping Paper: Method 4
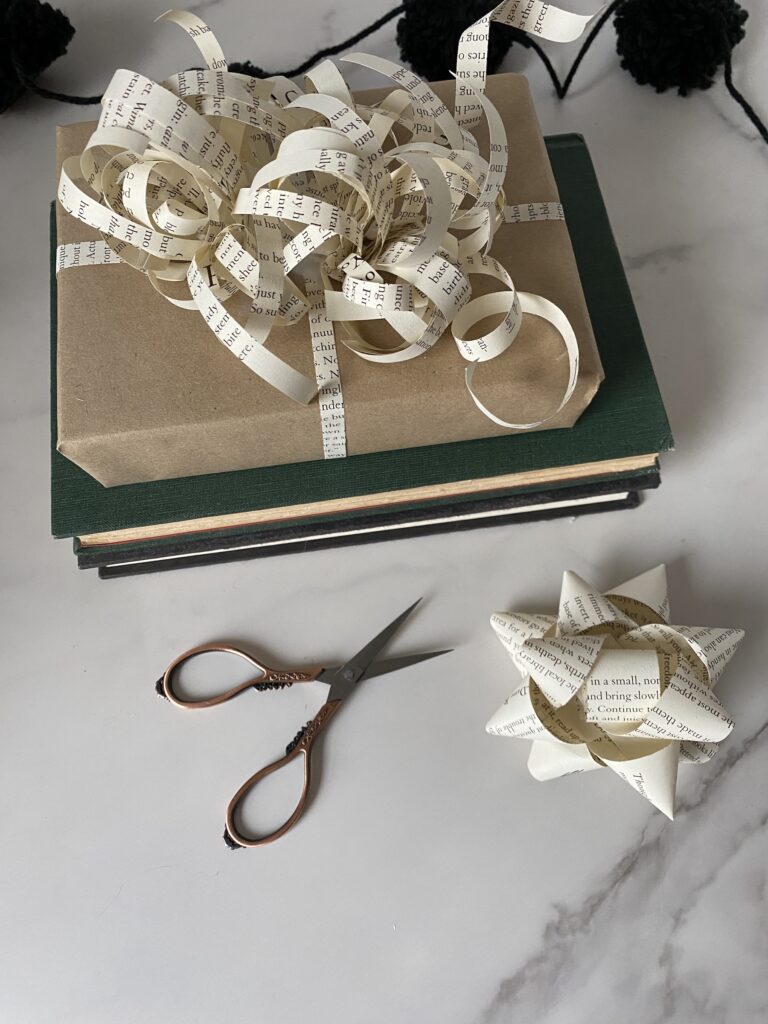
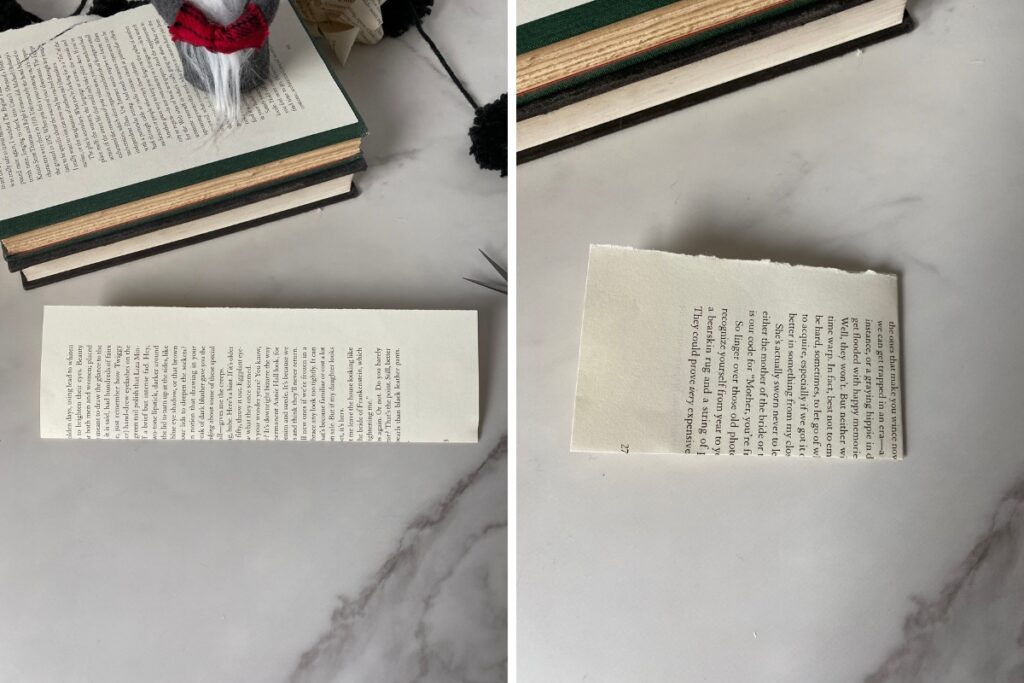
To make this curly paper bow, cut or tear a page out of an old book. You can use an old comic book, a magazine page, or a piece of scrapbook paper. Fold the page in half lengthwise then fold it into a rectangle.
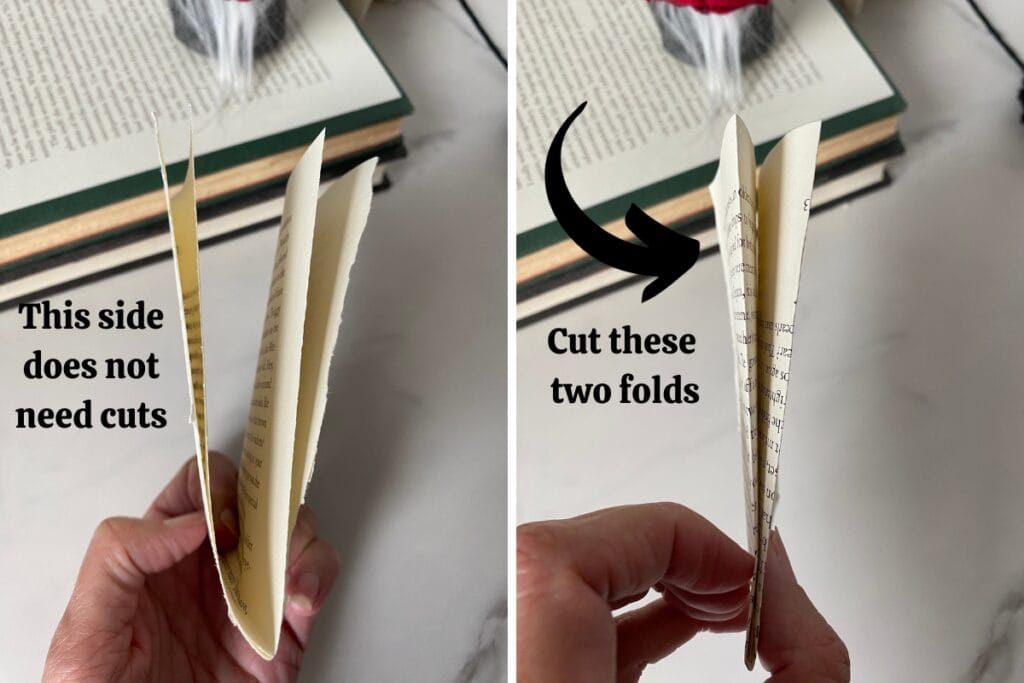
One side will have a couple of folds, cut those folds almost all the way to the center leaving about 1/4″ – 1/2″.
Cut 1/4″ strips almost all the way to the center.
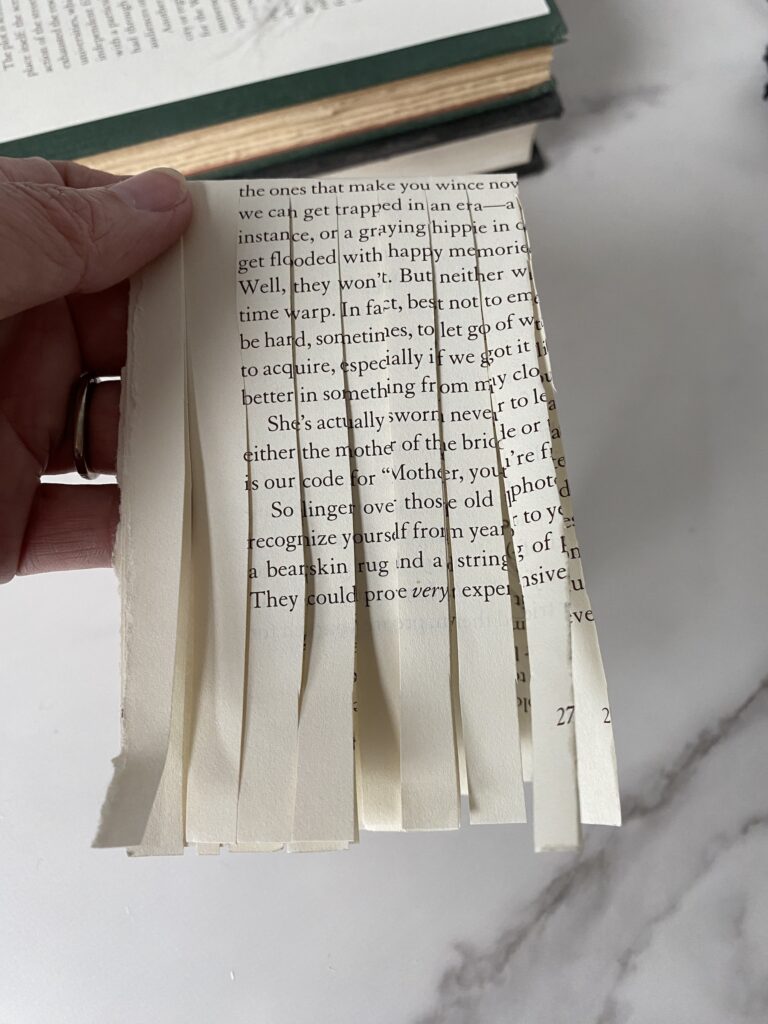
Open the page one time. Not all the way.
Using the edge of your scissors, curl the strips of paper using the edge of your scissors. Don’t press too hard and don’t cut your finger if your scissors are sharp.
Roll the bow up to create a curly bow and secure it with tape or a stapler.
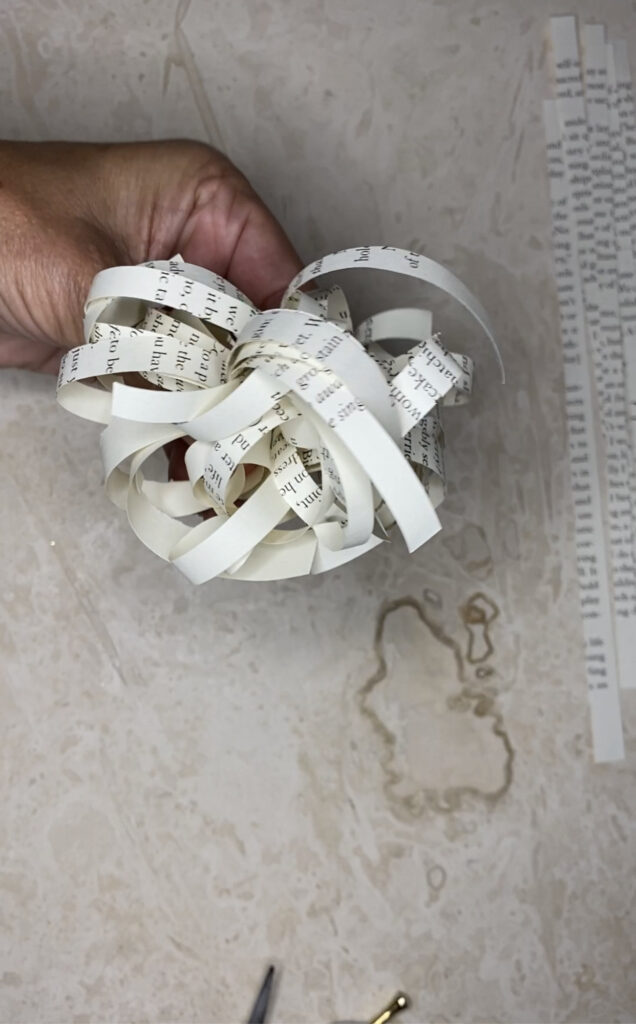
Here is a video tutorial that will be incredibly helpful.
All of these bows can be used for any occasion including a Happy Birthday bow, a Christmas gift, baby shower, wedding or any other gift you give throughout the year.
So, which method is your favorite? Let me know in the comments below! Don’t forget that you can watch the video about making bows out of wrapping paper. You may also like my Burlap Bow tutorial.
Happy wrapping,
Denise
