How To Make A Felt Flower Wreath DIY
This post contains affiliate links which means that at no cost to you, I may earn a commission if you purchase using one of my links. For more information view my full disclosures.
~
Today you’ll learn how to make a felt flower wreath DIY to add to your home decor. The soft texture of the felt is so rich and beautiful and adds a cozy feel. You won’t believe how easy this wreath is to make.
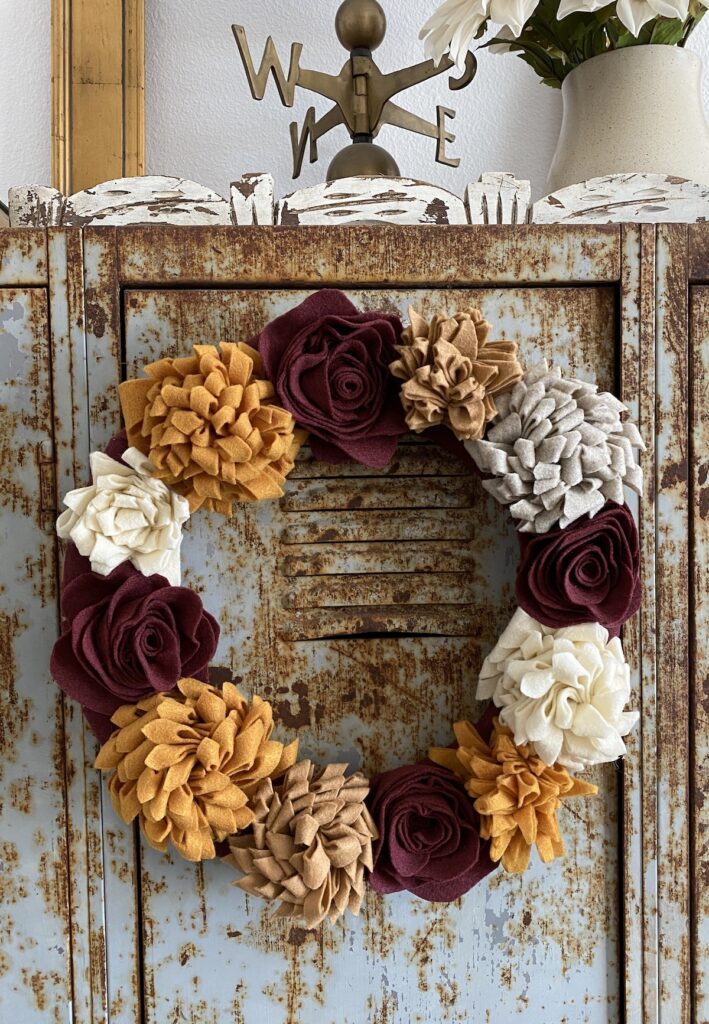
If you love budget-friendly home decor, this felt wreath DIY is a match made in heaven. This wreath only costs a few dollars to make and it comes together so quickly. It’s easy to adjust colors to fit your home decor so you can make a felt wreath DIY for Spring, Summer, Fall, or Winter.
You can buy felt at Michael’s or Hobby Lobby or just about any other craft store. The total cost for this wreath was around $15!
Felt Flower Wreath DIY Supplies:
- A wreath frame (mine was 12″)
- 13 sheets of felt (I used standard felt sheets 4 Cranapple, 3 Goldenrod, 2 Antique White, 2 Tan, 1 Sandstone)
- Scissors
- Hot glue gun
If you make a larger wreath, you will need additional felt sheets. If you have extra, you can use them to make a DIY felt leaf garland.
The wreath frame I linked in the supplies list is the easiest frame to make the wreath. If you use a wire wreath frame, I recommend buying additional sheets of Cranapple to cut strips of felt to wrap the frame so you won’t see it between the edges of the flowers.
I did this with the first felt wreath I made and the darkest color wrapped around the wreath frame makes it sort of disappear into the background. Using a lighter color will stand out and not look as good.
Felt Flower Wreath DIY Instructions
- Make all of your felt flowers using the included tutorials
- Arrange them on the frame in the color pattern that you like
- Lift one flower at a time and glue it in place on the wreath frame pressing the flowers close together
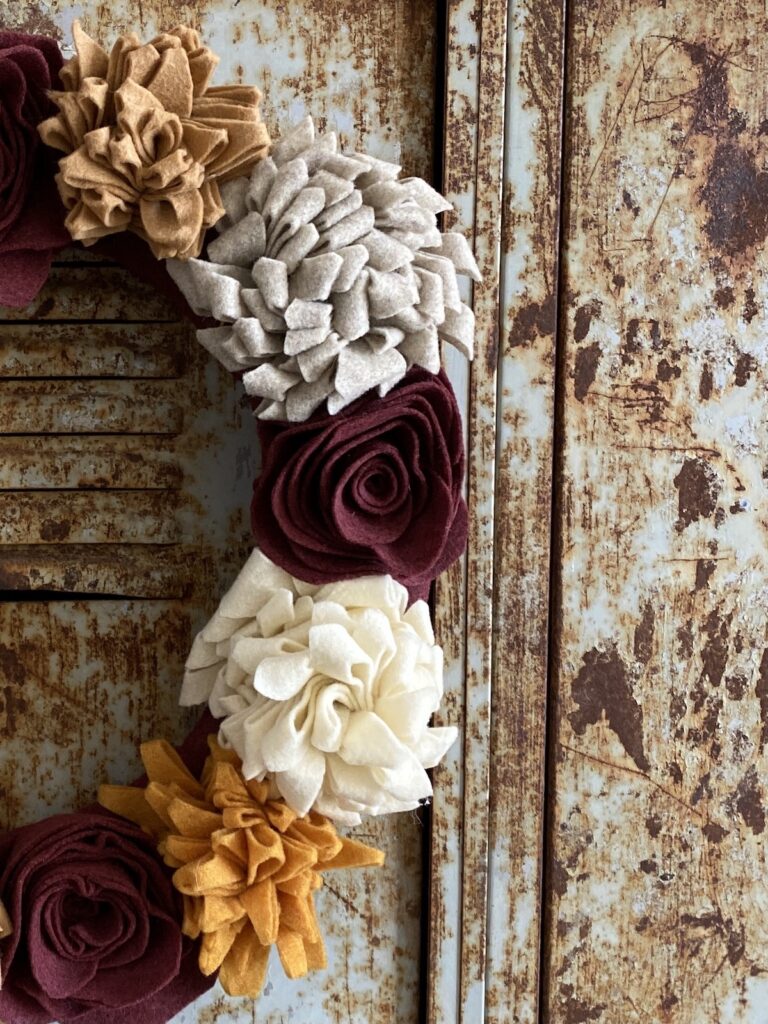
Making Felt Roses
To make felt roses, cut the sheet into a giant oval with wavy edges. Start at the edge and cut the oval into a spiral shape. Leave a circle in the middle to use to glue the rose together at the end.
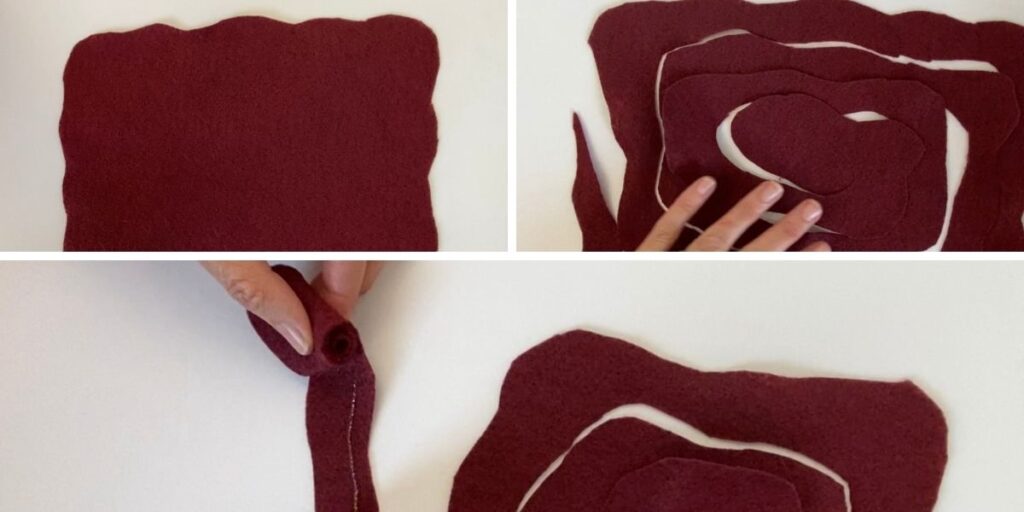
Once the spiral is cut, rearrange it so it’s flat and not twisted up. Start at the outer edge and begin rolling the flower up keeping the bottom edges flush. You’ll start to see a rose form. When you get to the center, put glue on the circle you left and fold it over the bottom to secure the flower.
Add glue as you roll. In the photo above, the side with the glue is the bottom of the flower.
Making The Other Felt Flowers
The other flowers were made by cutting 3-inch strips of felt and gluing them in half only along the outer edges. The strips start at 9 x 3 and then are folded in half to be 9 by 1.5-inches. If you need a better tutorial for these flowers, read Easy DIY felt flowers. I created a separate post for them since you can use them for several decor pieces.
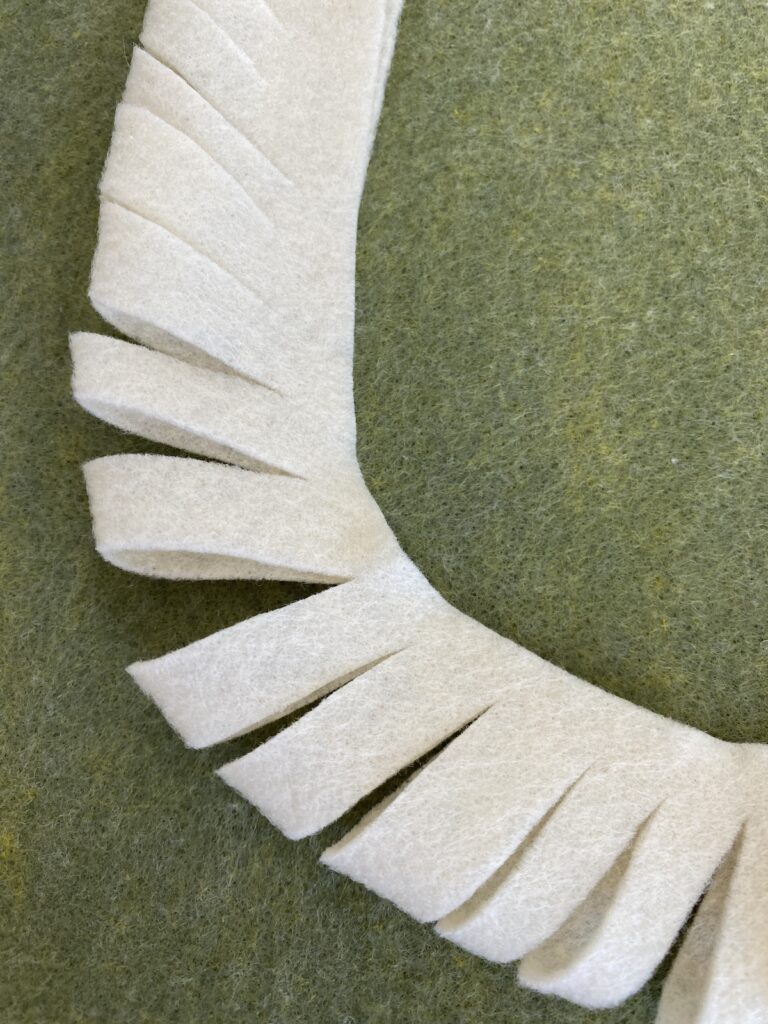
For this flower, cut slits at a diagonal and then roll the long strip up adding glue as you roll to secure it.
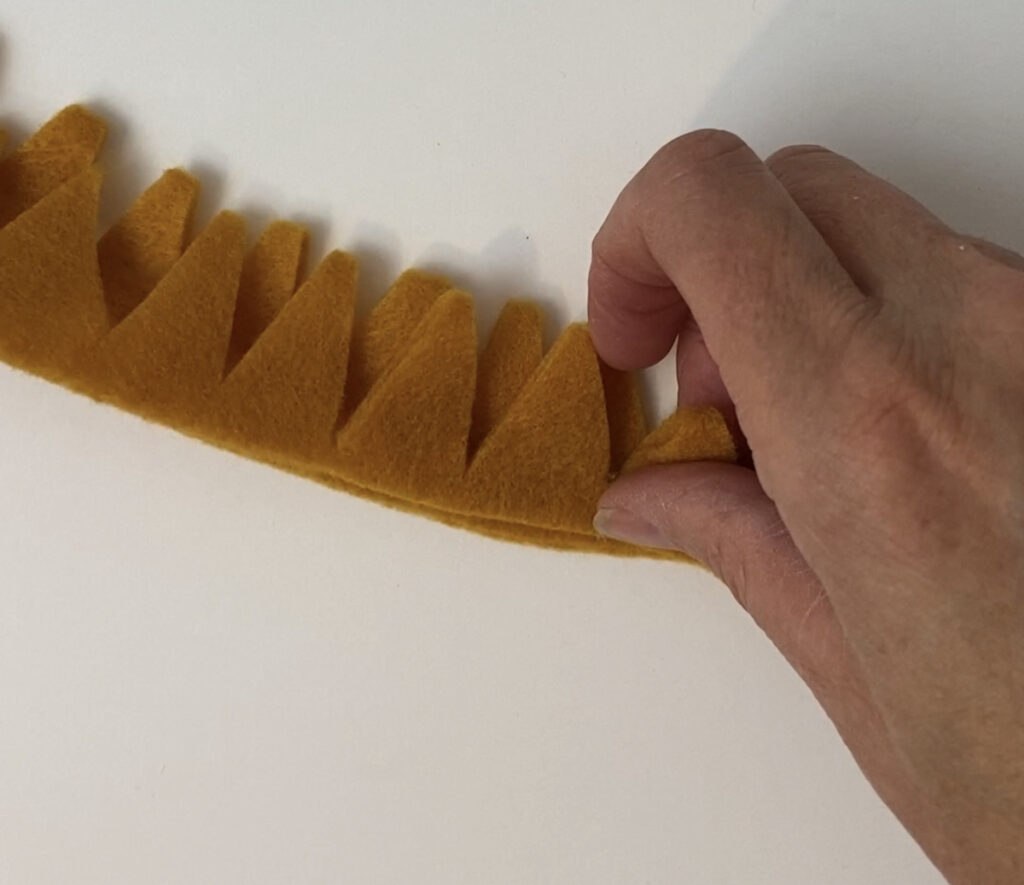
For this flower, cut v shapes out of the felt like in the photo below. I layered two of the strips together offsetting the tips and then rolled them up together to form a flower.
I was quite busy with fall decor. The colors for fall are always my favorite! I hope you find some projects you like!
Happy crafting,
Denise