
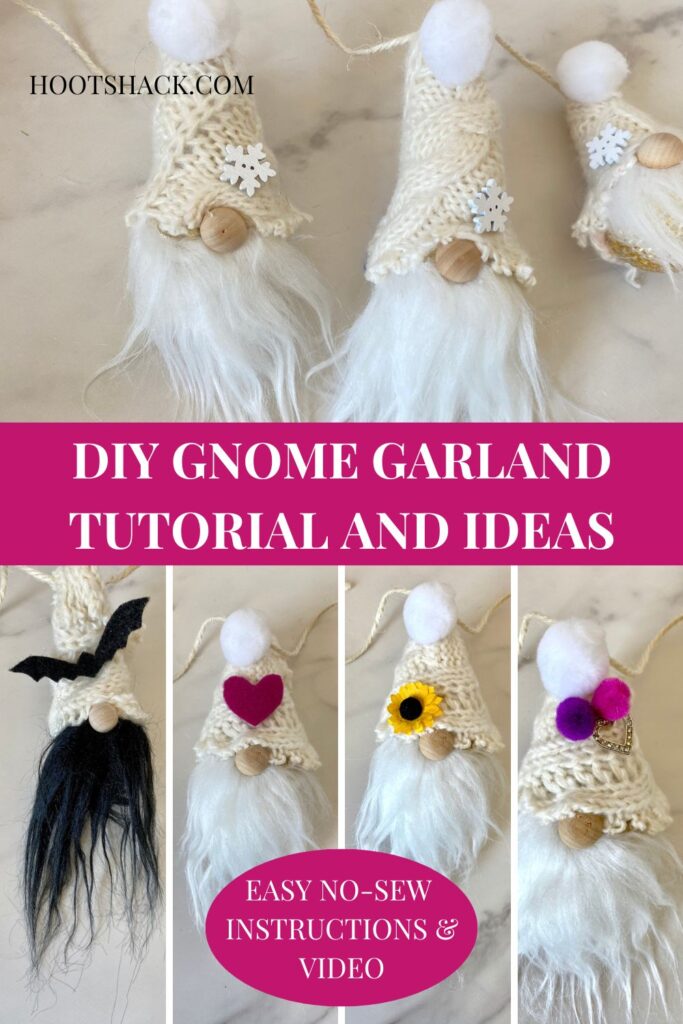
DIY Gnome Garland: Easy No Sew Tutorial
This post contains affiliate links which means that at no cost to you, I may earn a commission if you purchase using one of my links. For more information view my full disclosures.
~
Today I have an easy DIY gnome garland for you and you don’t even need to bust out your sewing machine. This easy Christmas gnome craft took me less than 45 minutes to make, and I didn’t even have a pattern. It’s really that easy!
This gnome garland DIY can be hung on a fireplace mantel, on a Christmas tree or even draped across your mirror or coffee bar. The colors and decorations can be changed for any season.
If you’d like another gnome idea, check out my DIY Yarn Gnomes. They can also be used to make a gnome garland! The other day I also made adorable paintbrush gnomes ornaments.
❤ Be sure to check out my favorite Gnome Making Supplies!
For this gnome Christmas garland, I have some tips and tricks to get things to hang straight and also how to quickly make the hats without a pattern so hang tight for a bit and I’ll show you exactly how to make a gnome garland.
If you don’t have time to make this today, don’t forget to save a photo to Pinterest so you can easily find it later.
DIY Gnome Garland Supplies and Materials
In order to make these gnomes, you’re going to need a few basic craft supplies that you should be able to find at Hobby Lobby or other local craft stores. You can also find some of my favorite gnome-making supplies in my Amazon shop.
- Old sweater or stretch fabric
- Nose
- 2″ ornaments
- Polyfil or stuffing
- Hot Glue Gun
- Faux fur
- Pom pom
- Seasonal accessories
- Twine or ribbon for hanging
- Hot glue gun
- Scissors
- Straight Pins
- Paper for the pattern
Fabric For The Gnome Hat
I used an old sweater to make the gnome hats but you can also use fabric or felt. I love to reuse things so even old flannel shirts or other clothing work great! This tutorial requires a stretchy fabric or you may have to adjust the pattern for making your gnome hats.
You’ll also need more small strips of felt or fabric to make the loops for hanging. More about this in the step-by-step photos below.
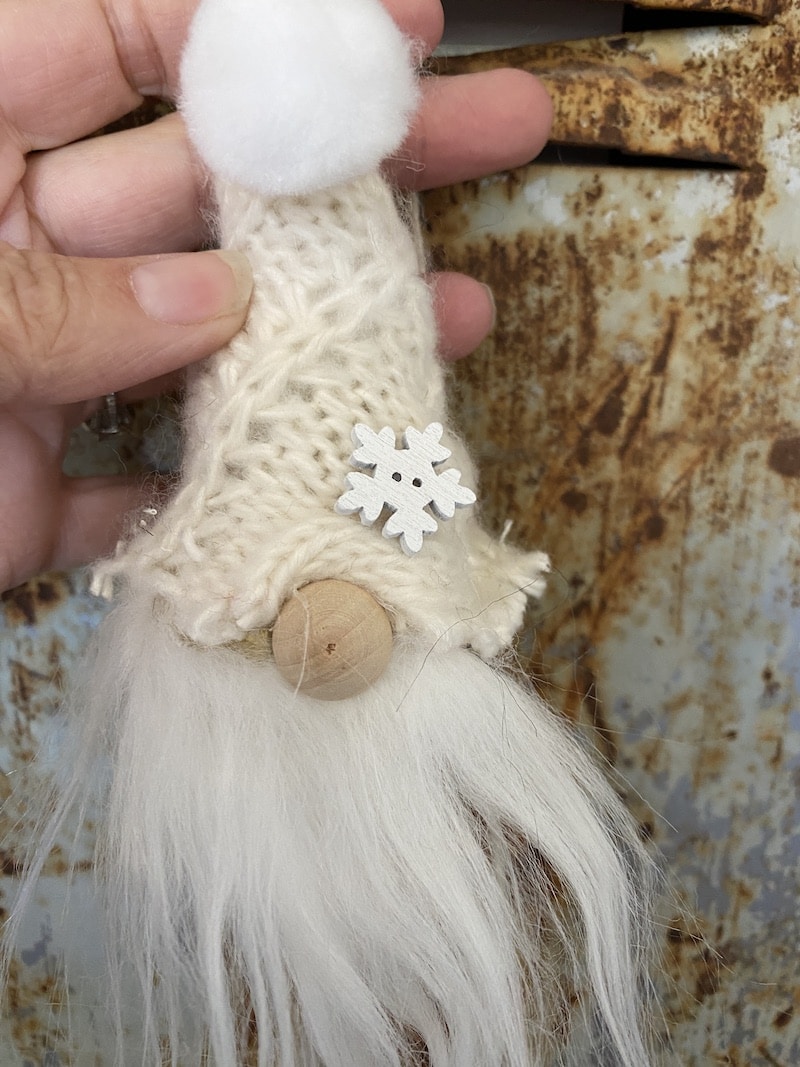
Noses
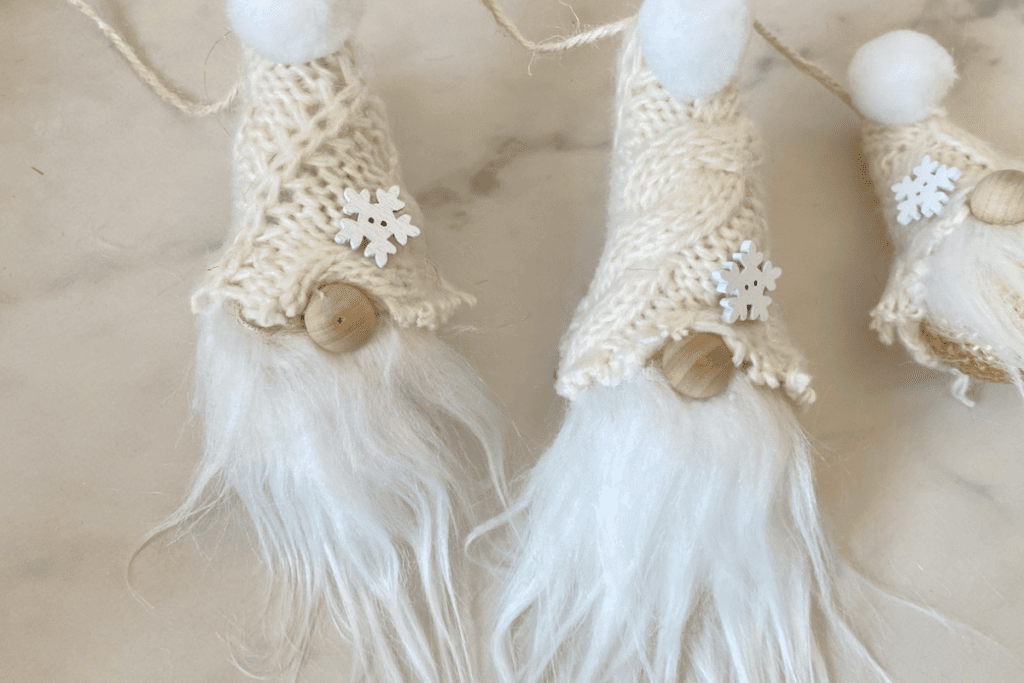
You’ll need some sort of round object to use for a gnome nose. I used split wood beads. I prefer split wood beads because you don’t have to hide the holes as you do with round wood beads.
Other ideas for noses are pom poms, buttons, or any other round object.
Gnome Body
I used a 2″ round ornament as the body for these gnomes. The ornaments were sturdy and cheap to purchase. Other options are ping pong balls or styrofoam balls that can be purchased at Dollar Tree. Styrofoam may crush over time so use caution.
Beards
I used faux fur to make the beards but you can also use pom poms. I also have an entire tutorial for how to make a gnome beard out of yarn.
Hot Glue Gun
I used a hot glue gun to assemble the gnomes. You can also sew the hats by hand using a simple whip-stitch or running stitch if you’d like. I found that hot glue worked fine.
When gluing sweaters, I recommend silicone finger guards because hot glue can seep through the sweater. Be very careful and don’t press down with your fingers. I like to use an old pencil sometimes.
Hat Stuffing
Polyfil or scrap fabric will work to stuff the hat to keep it from flopping over. Optionally, you can flop it over if you like that style and glue it in place.
Gnome Garland Accessories
Little seasonal accessories are fun to decorate your DIY gnome garland with. Cute buttons work great for decorations. The snowflake buttons I used are a perfect size and are fun for winter or Christmas decorations. I like to add a little something special to my gnomes.
You can also cut shapes out of felt or contrasting fabrics as another idea. Silk flowers would be cute as well for a DIY Spring garland. Hearts can be used to make a DIY Valentine’s Day Gnome Garland.
You can also use these as gnome ornaments!
DIY Gnome Garland Step-by-step instructions and video tutorial
Time needed: 45 minutes
Here is the tutorial for the gnome garland DIY. I also recommend watching the video before getting started.
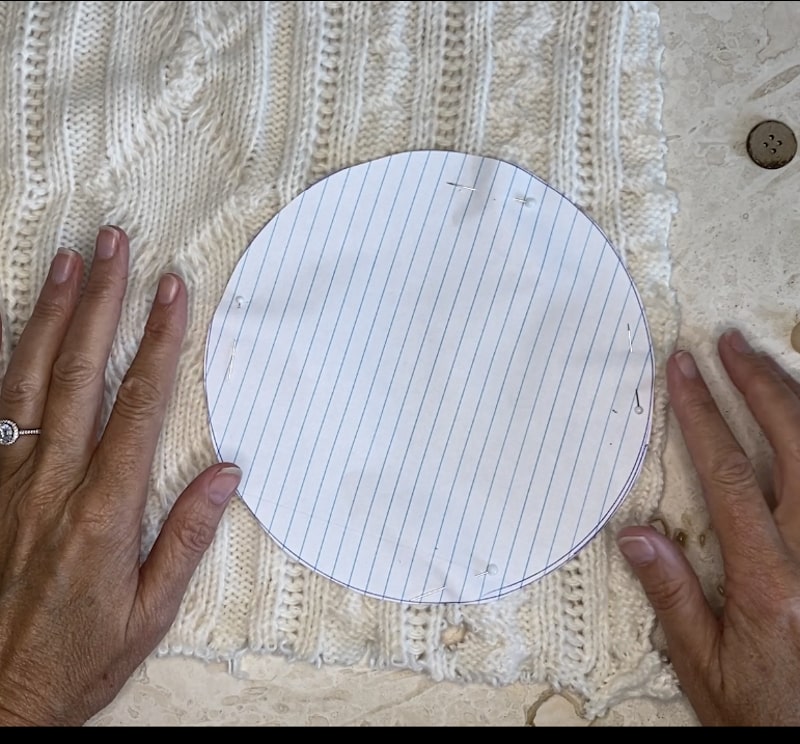
- Cut your fabric for the hats.
Trace a circle on paper to use a pattern and pin it to the fabric and cut around the edges. I used a pen to trace mine on the fabric at first and I don’t recommend that. The sweater curled up so you could see the trace mark a bit.
The circle should be about 7″ around. One circle should make 4 gnomes.
If you’re not using stretchy fabric, you may want to test this with a piece of paper for size to see if your circle needs to be larger.
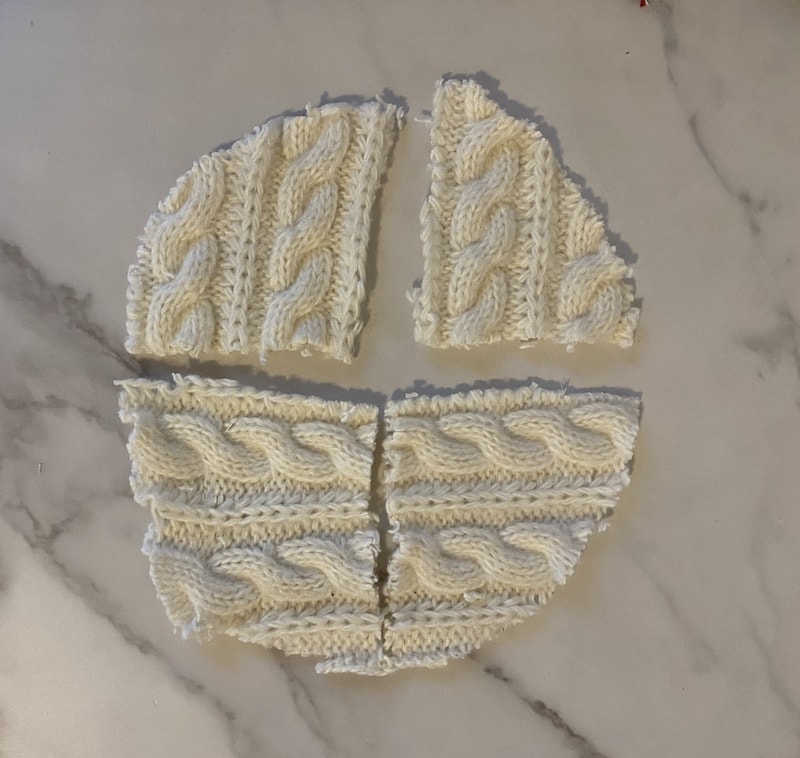
- Cut the circle into quarters.
Fold the circle in half and cut it. Then fold those in half to make quarters.

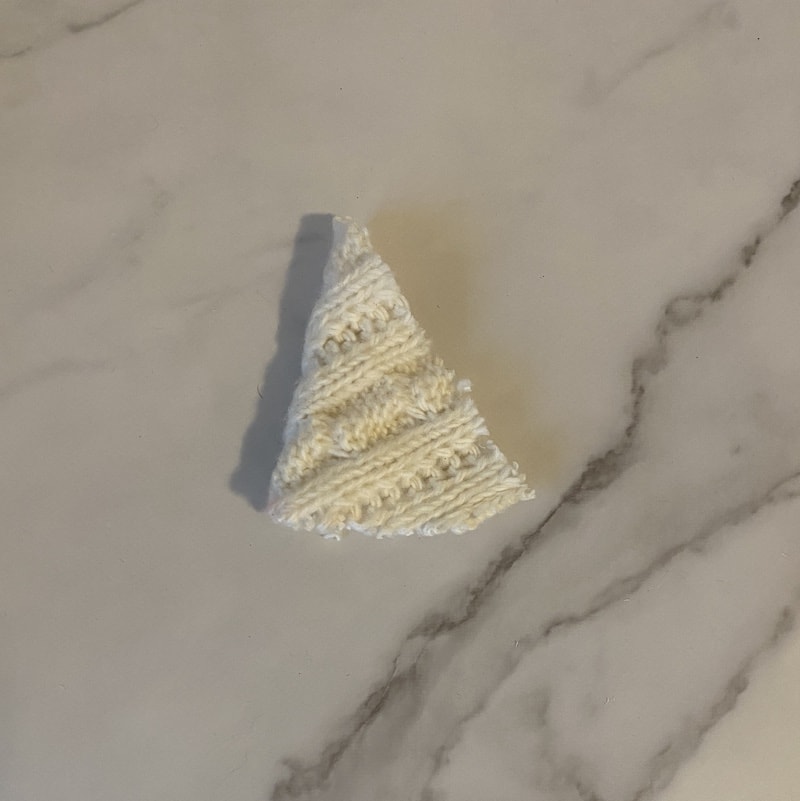
- Glue the hat.
Lay your first piece with the pattern side down then add a line of hot glue down one straight side and fold the other straight side over on top. Use a pencil or silicone finger guards to press the two pieces together until dry. Remember glue may seep through to your work surface if you’re using a sweater so put something underneath.

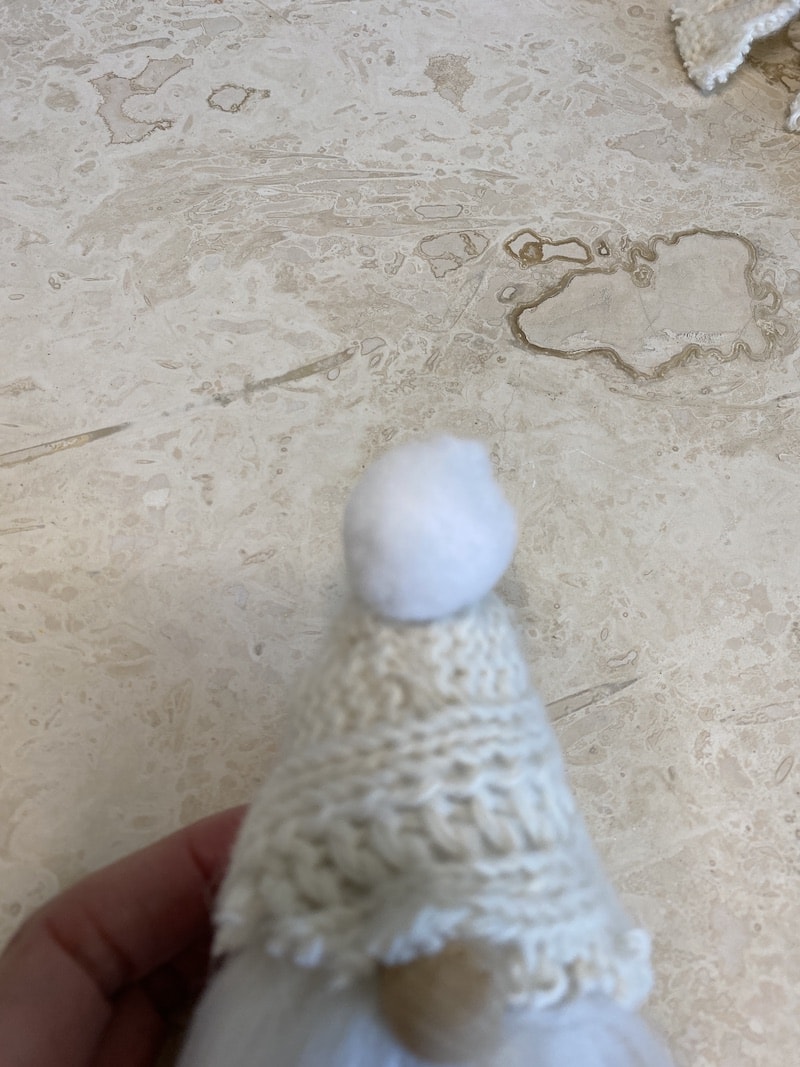
- Turn the hat and trim the bottom.
Turn the hat right-side out and use a pencil eraser to push the top up to make a point. Trim the bottom straight if necessary. You’ve just made your first hat. Make as many as you’ll need for your garland. The amount of gnomes you need will depend on the length of garland you’re making.

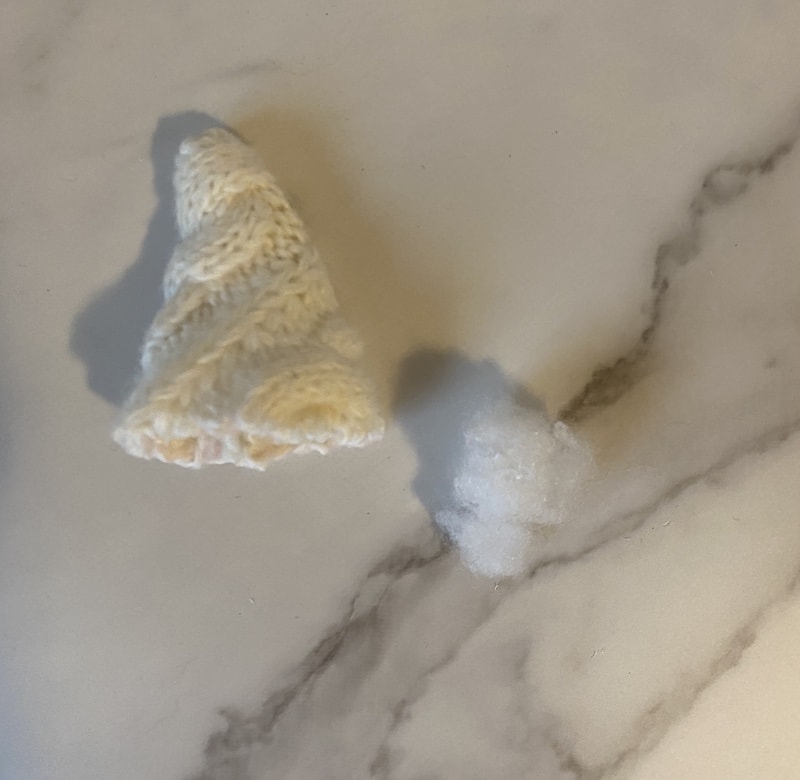
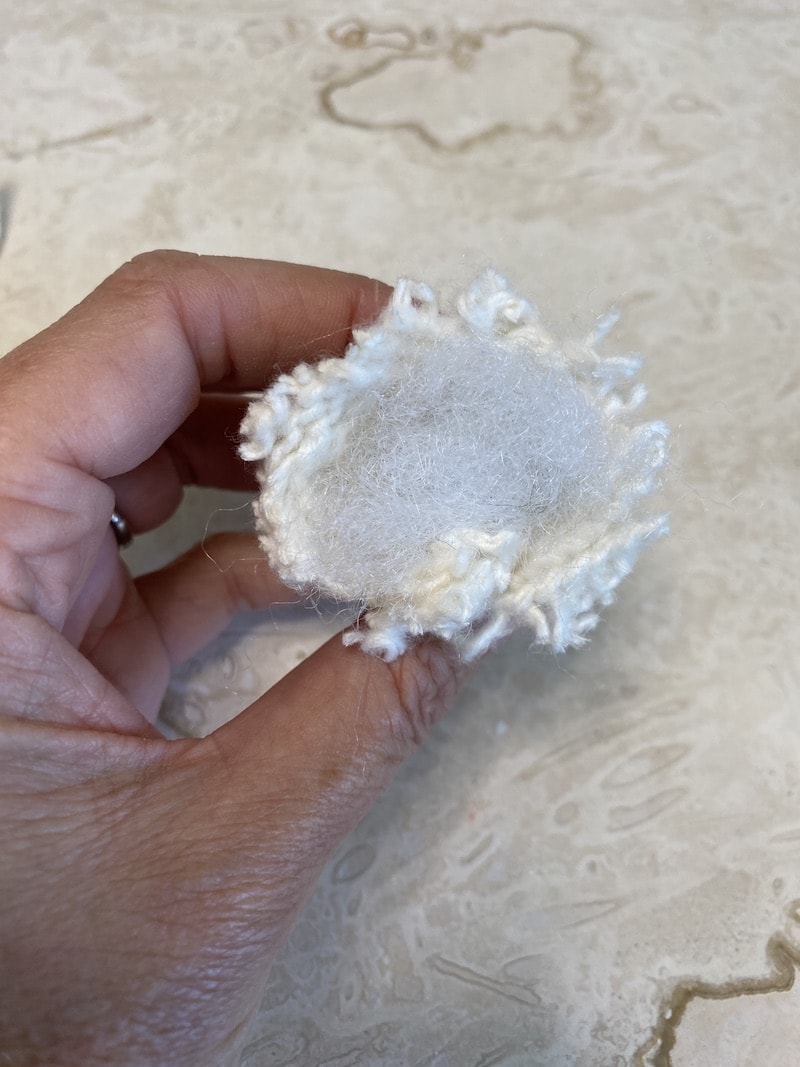
- Stuff the hat.
Stuff the hat with a little bit of Polyfil or extra fabric. You don’t need much.

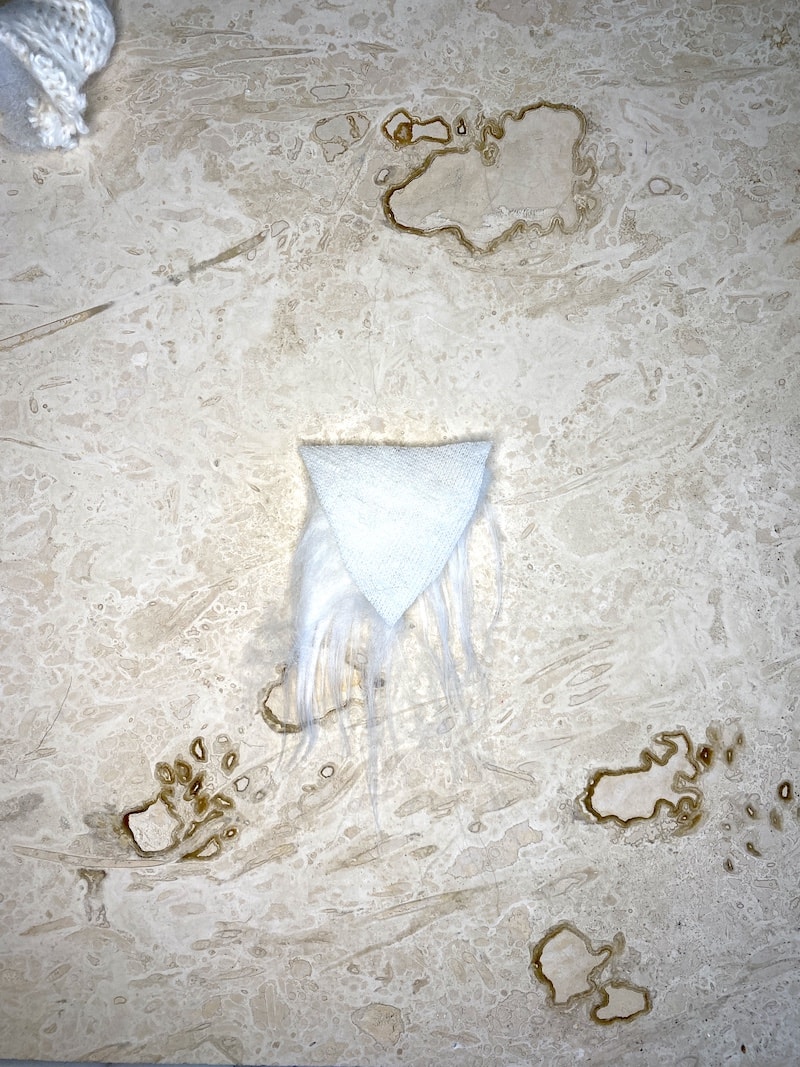
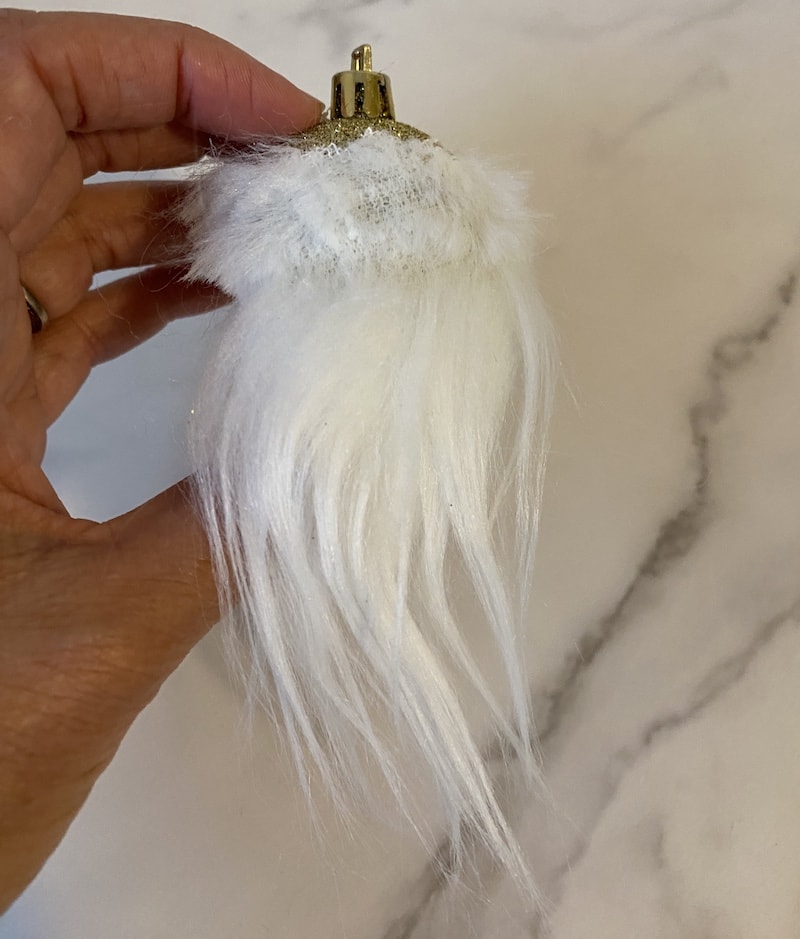
- Cut the faux fur for the beard.
Cut your beards by using the point of your scissors or an exact knife to cut through the backing of the faux fur only. You don’t want to cut through the fur itself. Lay the beard fur in the correct direction before cutting so the hair is flowing down. Cut the backing into a small triangle. It should be wide enough to go halfway around the ornament and about 2 1/2 inches long at the point.
- Glue the beard onto the ornament.
Glue the beard about halfway down the ornament with one stripe of hot glue at the top of the beard. I got mine a little thick so I trimmed some off of the backing at the top.

- Glue the hat in place.
After you glue the beard, the next step is to glue the hat in place. I used a dot of glue on each side and one on the back. Lift the hat and put a dot on the ornament then pull the hat down over the glue.
- Glue the nose.
Glue on the nose and then you may need to add a little glue to the underside of the hat in the front to secure it around the nose.
- Glue a strip of fabric or felt on the top of the hat.
Cut a small narrow strip of felt or extra sweater fabric and glue it to the top of the hat to make a loop for hanging.

- Add a pom pom
Glue a pom pom to hide the felt. (optional)
- Add accessories
Glue on your cute accessories to make your DIY gnome garland seasonal if you’d like.
- String the gnomes
The final step is to string the gnomes onto twine, ribbon, or yarn and hang it and enjoy!


Gnome Garland Ideas
To give you more ideas other than a Christmas gnome garland, I made some for more holidays. Enjoy these adorable DIY gnomes!
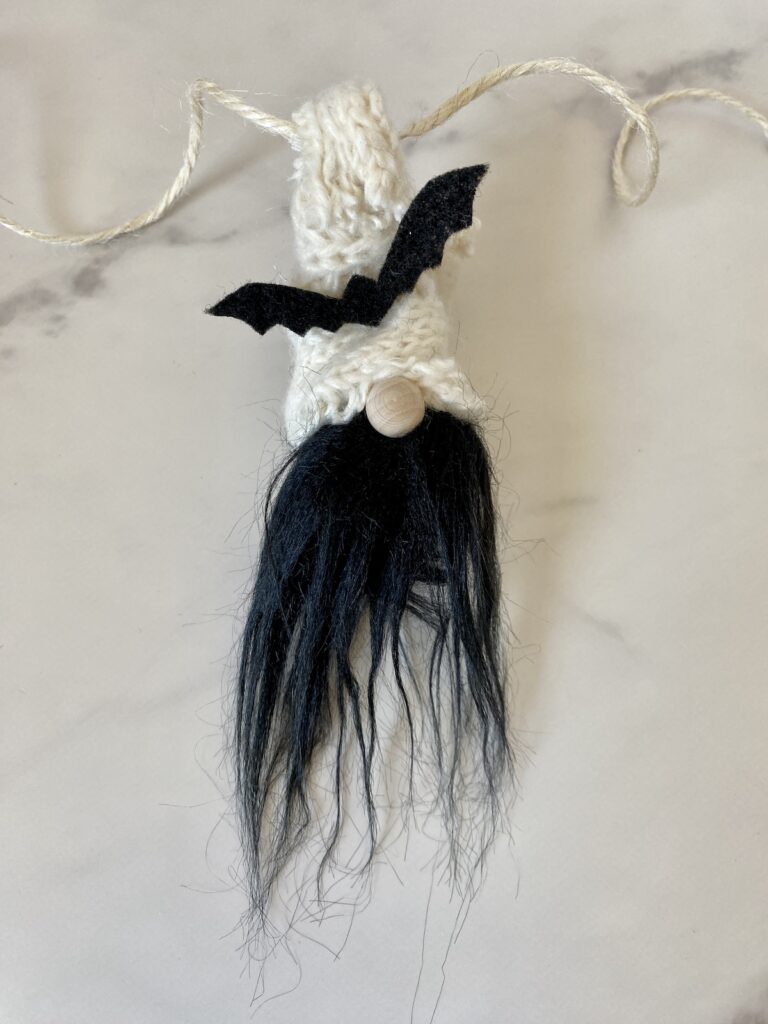
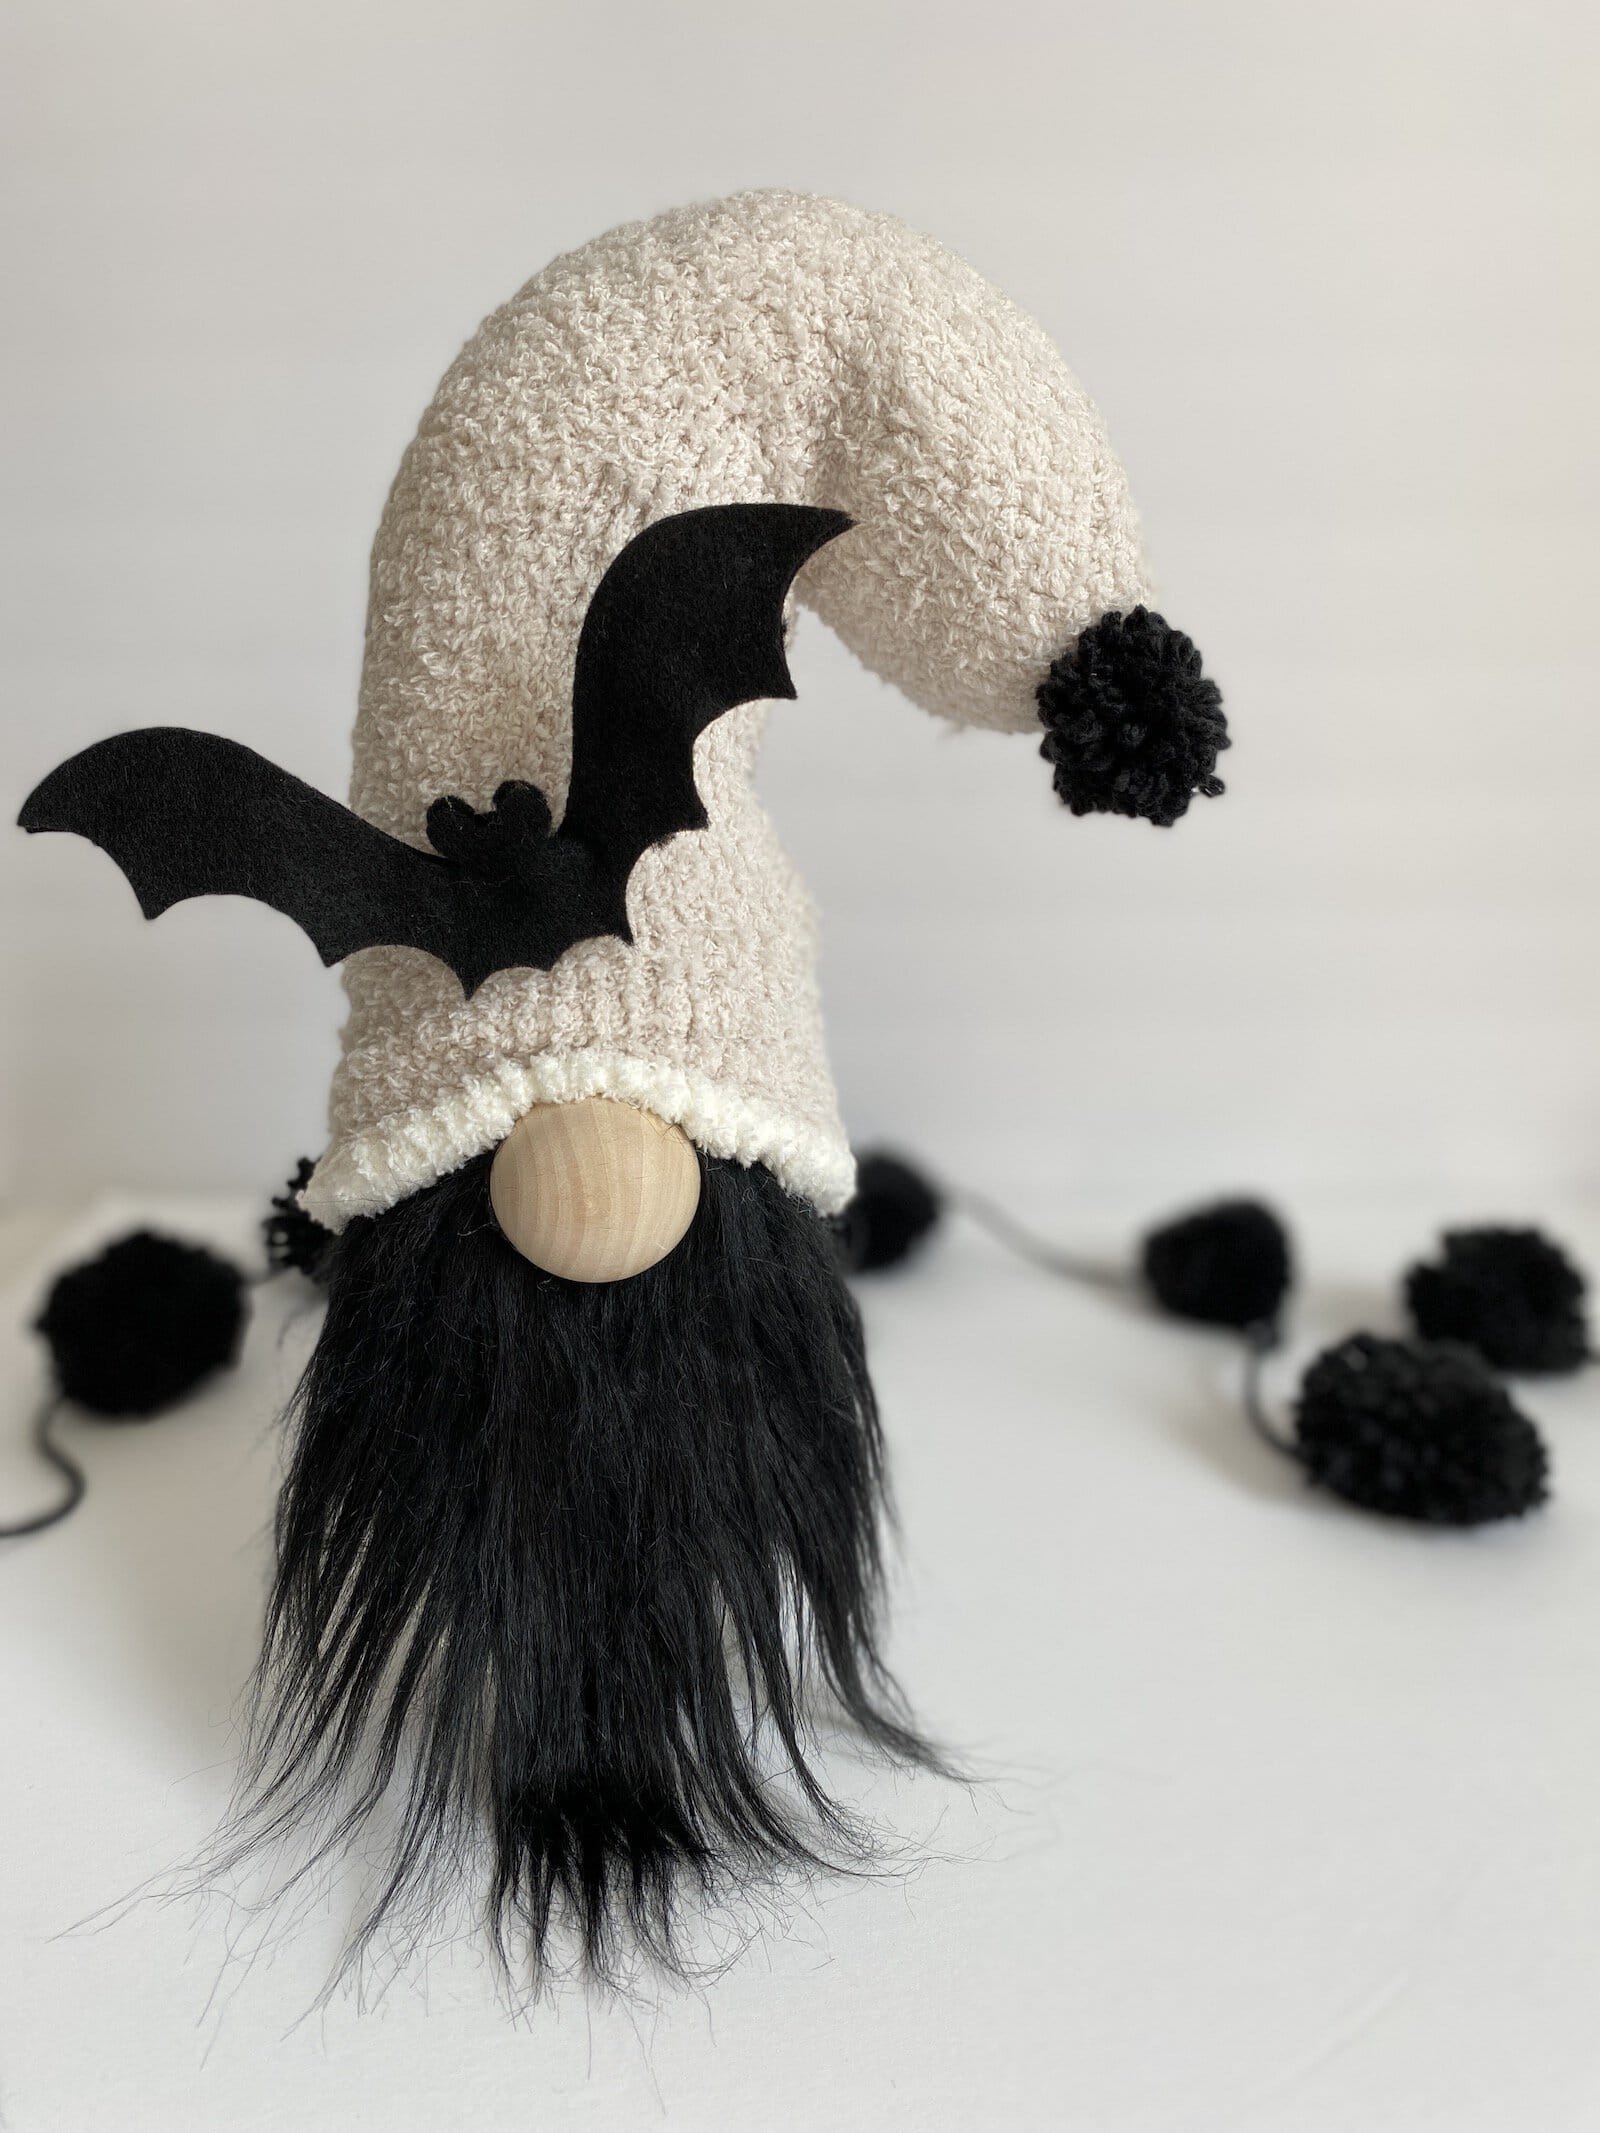
DIY Halloween Gnomes Garland
For this Halloween gnome garland, I drew half of a bat and held it onto the fold of a piece of felt, and cut it out.
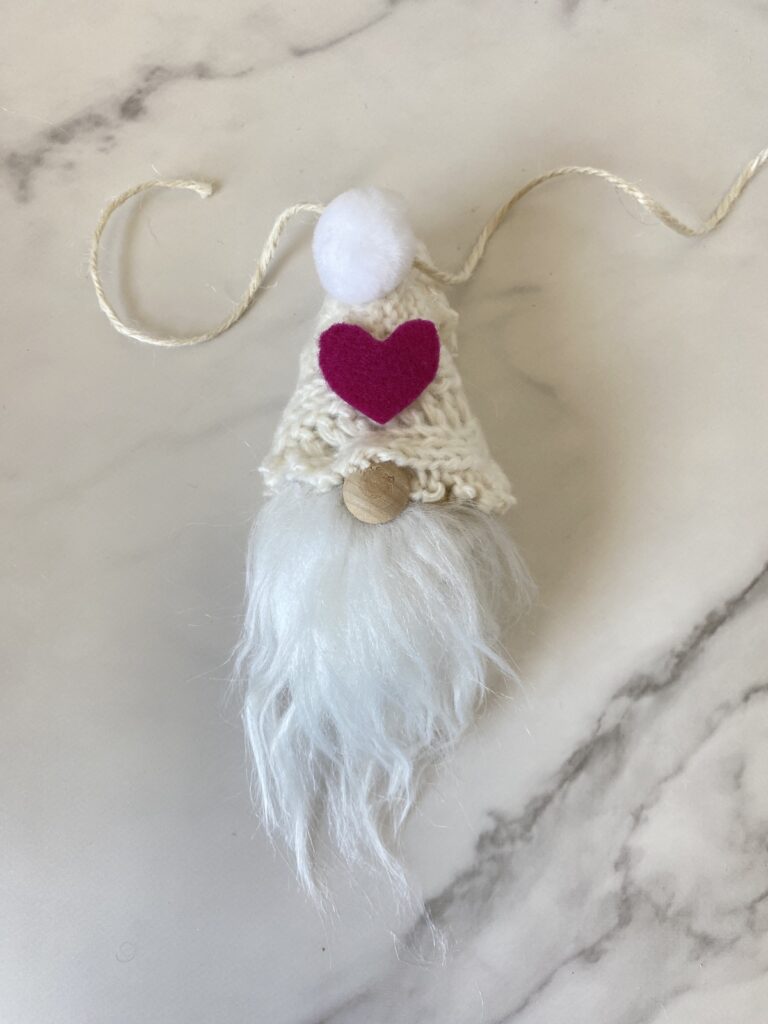
DIY Valentine’s Day Gnome Garland
I cut a heart out of felt to create a DIY Valentine’s Day garland. It’s so easy to change this pattern for any season.
I made another Valentin’s Gnome Ornament and cut pieces off of an old heart necklace to use for decorations. Little wooden hearts would work as well.
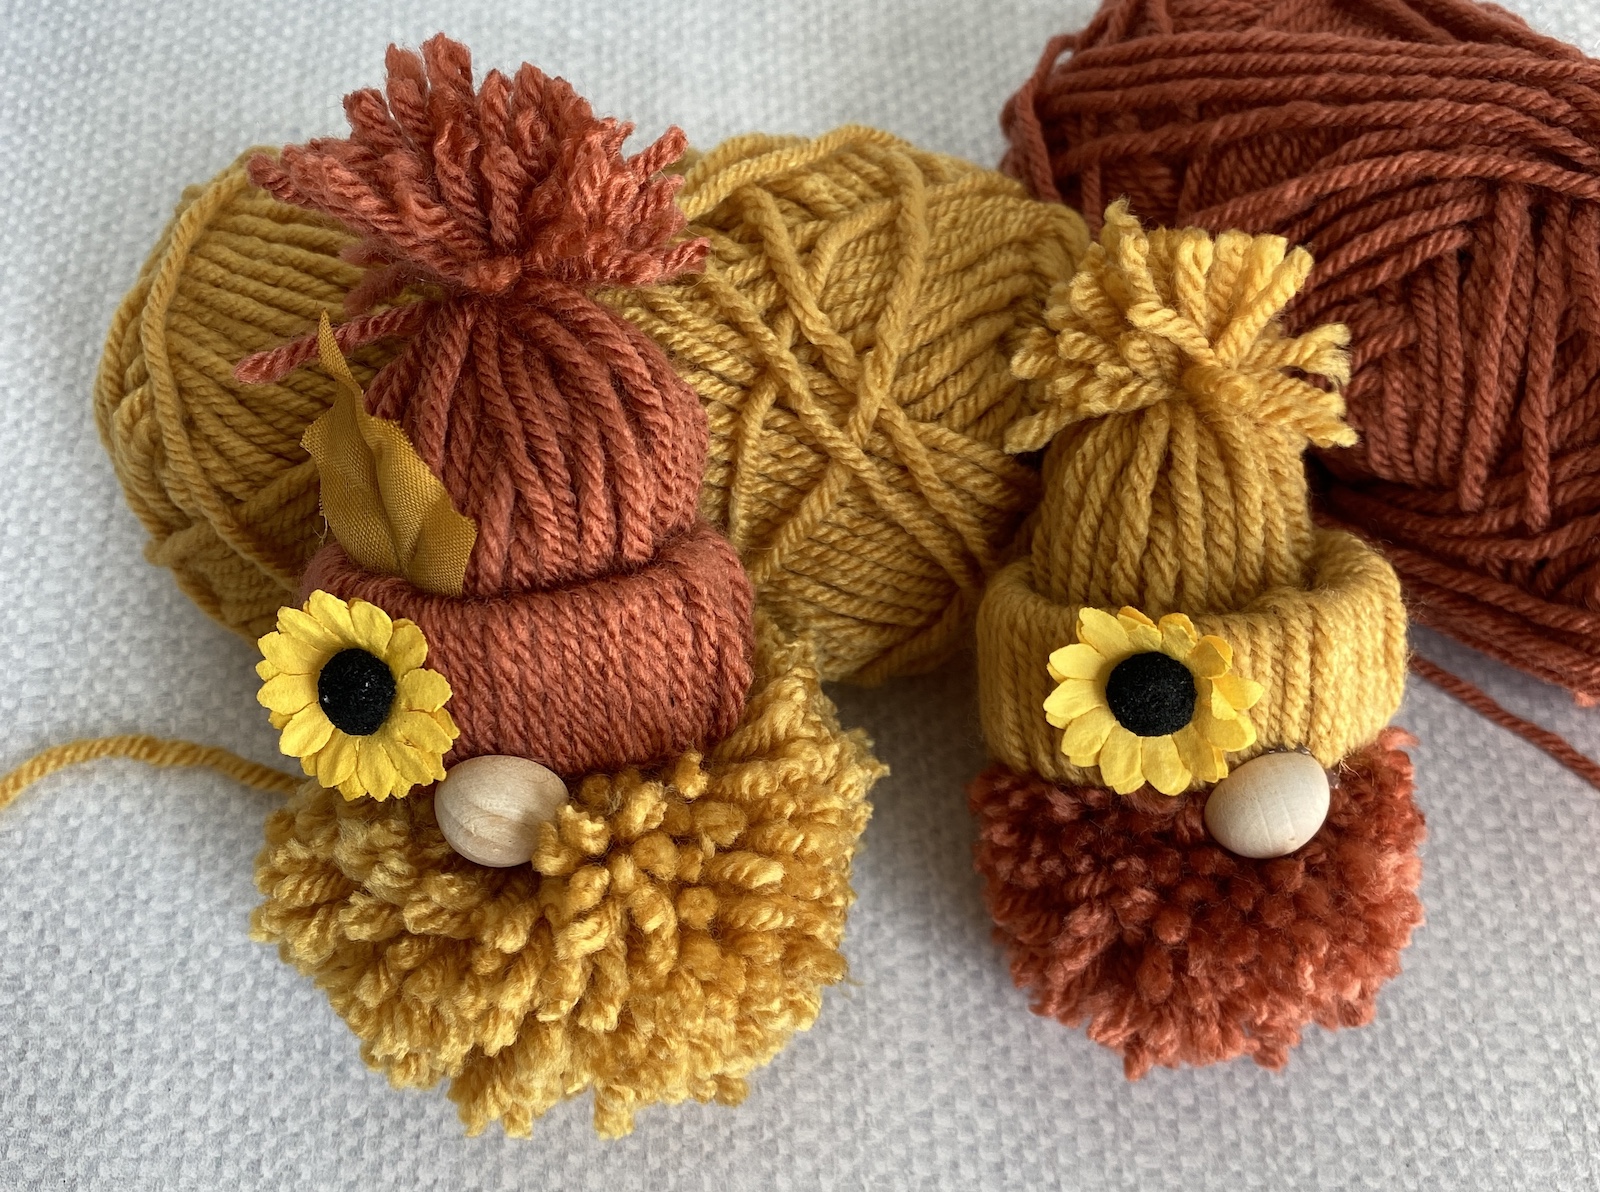
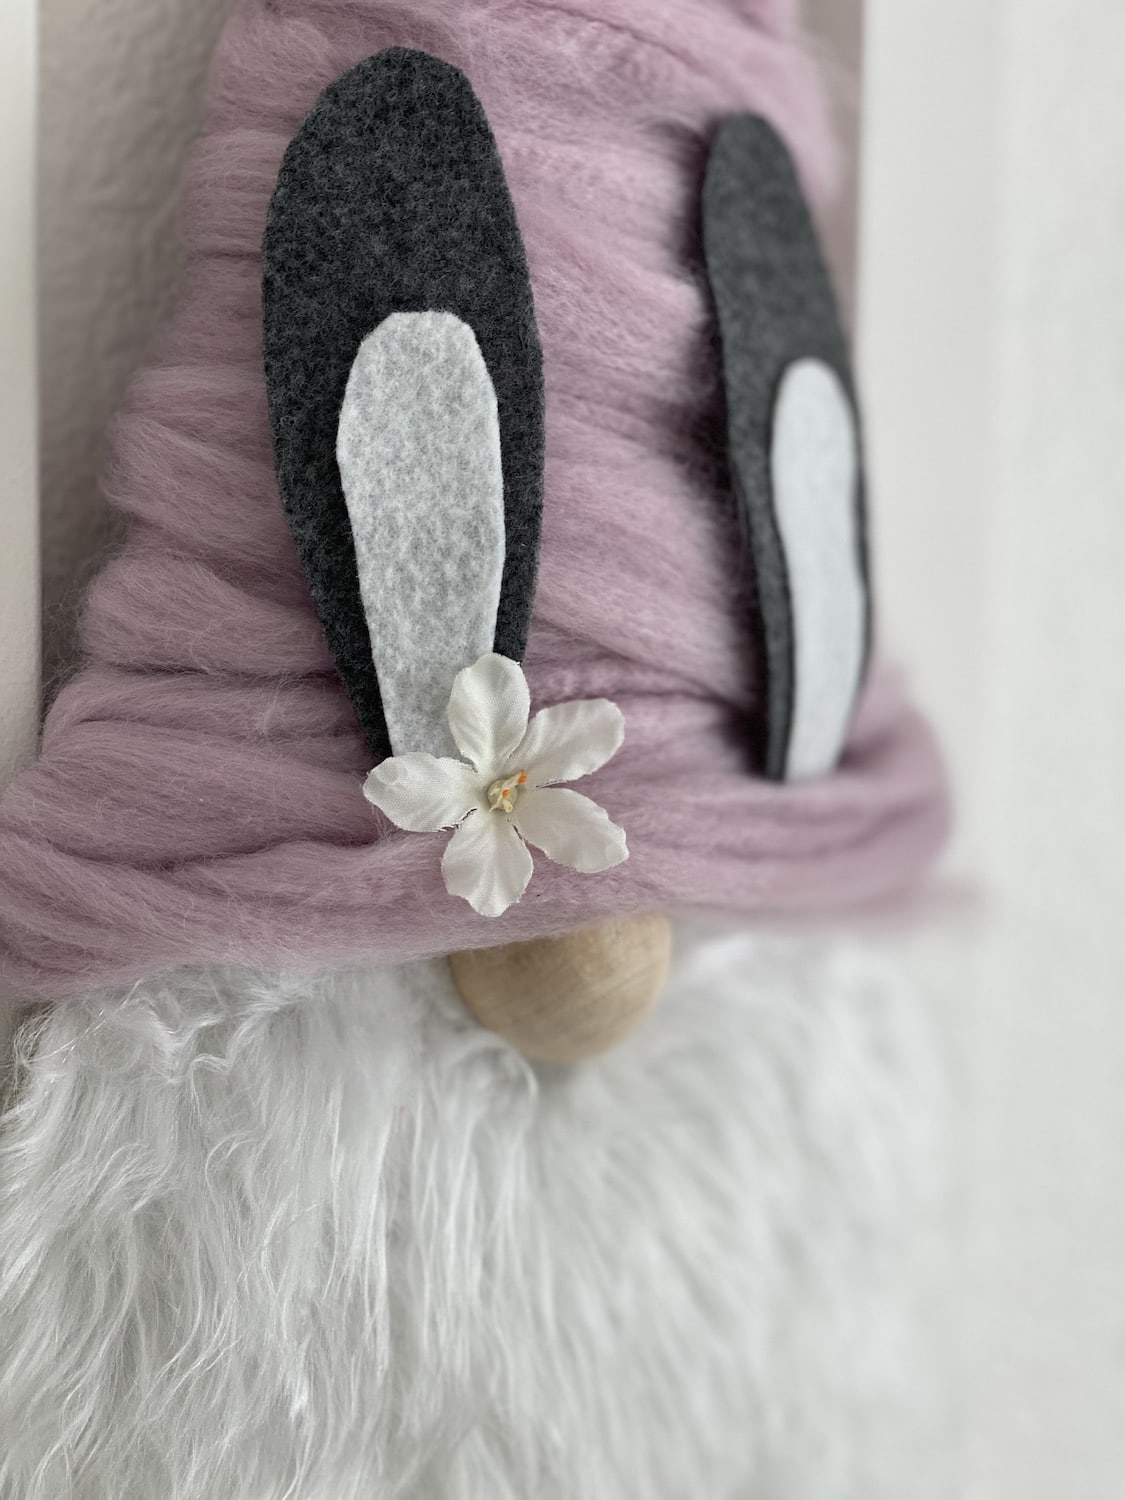
Gnome Garland DIY Spring
For a DIY Spring / Summer garland, I added a simple sunflower. You could use any flower that you’d like.
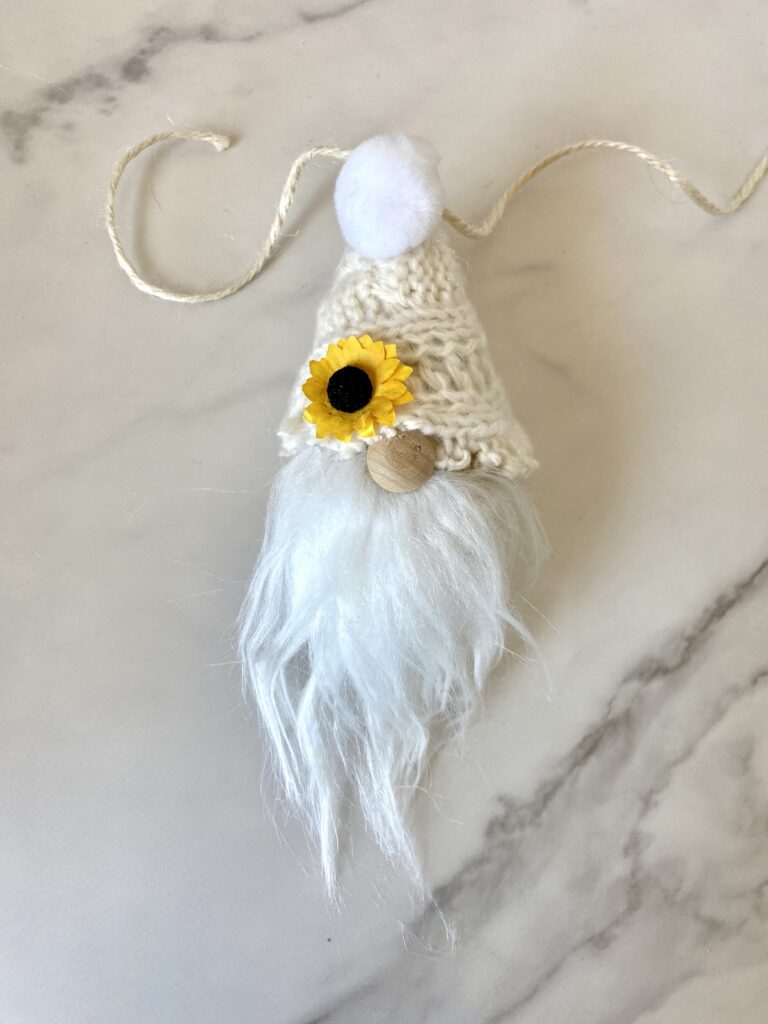
You can use a split wood bead, a round wood bead, or a pom pom for a nose. Any round object will work.
Trace a circle, cut it into quarters then roll the quarters into a cone shape.
Add a small strip of fabric or felt to the top of the hat then string the twine through the felt loop.
I hope you enjoyed making this DIY gnome garland. I love making gnomes so I hope you’ll take a look at my sock gnomes and my flower pot gnomes before you go.
Happy crafting,
Denise


This gnome garland is beautiful! Love the wintery look and suggestions for other seasons. thank you for the post.
Here’s a neat idea. Instead of gluing the decorations on the hats, I used velcro dots cut in half. Glue one side on the hat, other side glue on decorations. Change out from season to season. Store each season in a ziploc bag. Hope you like it!
That’s a great idea. Thanks for sharing.