
How To Make A Sock Gnome Step-by-step
This post contains affiliate links which means that at no cost to you, I may earn a commission if you purchase using one of my links. For more information view my full disclosures.
~
Today I have two different ways to show you how to make a sock gnome step by step. I’ve written about them before so you probably already know about my love of gnomes. Let’s get started learning how to make sock gnomes!
These DIY gnomes are so easy, and you won’t even need a pattern or a sewing machine.
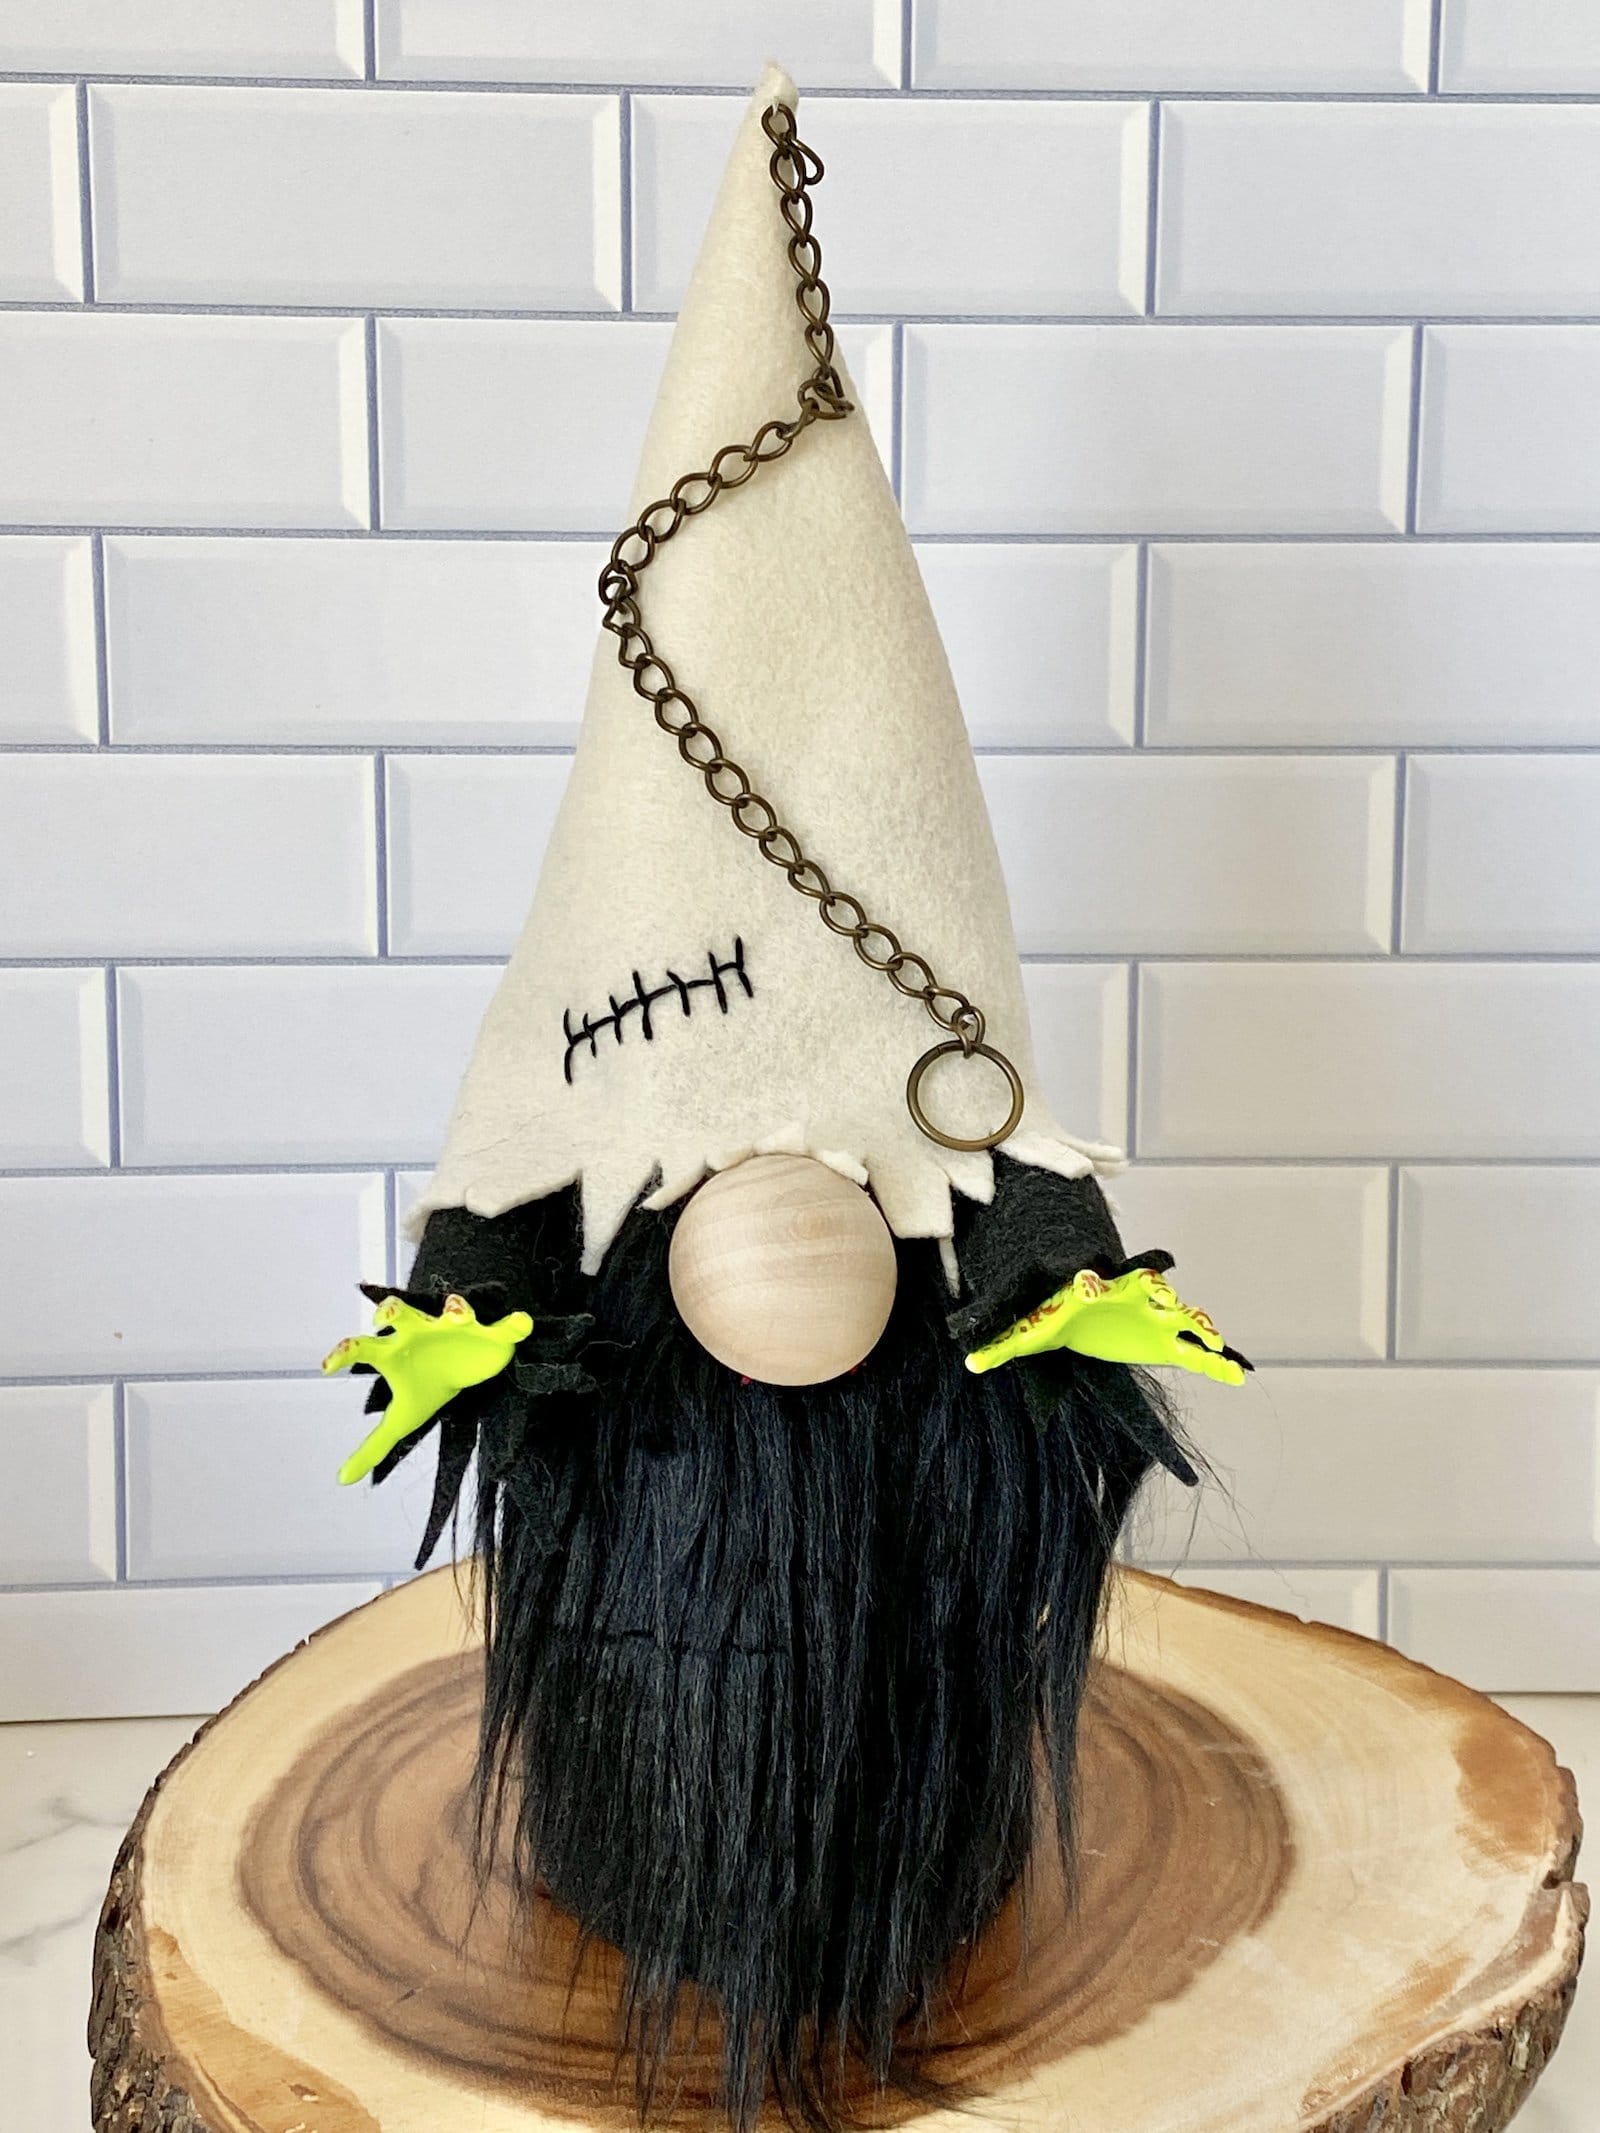
Sock gnomes are super popular at Christmas, but don’t forget about all of the other seasons that you can make gnomes for. I’ve made Easter gnomes and even Zombie gnomes for Halloween, but they aren’t just for holiday decor anymore!
A lot of these supplies can be found on Amazon or in local craft stores like Hobby Lobby or Michael’s Crafts.
❤ Be sure to check out my favorite Gnome Making Supplies!
Supplies | What Do You Need To Make A Sock Gnome?
To make sock gnomes, you’ll need a few standard materials and then you can add embellishments as you see fit.
- 2 socks (or 1 and some fabric – keep reading!)
- Poly pellets, rice or polyfil
- Wooden bead for a nose
- Poly pellets, rice and/or Polyfil
- Faux fur or other fabric for a beard
Socks | What Kind Of Socks Do You Use For Gnomes?
Before covering the types of socks, you should know that a sock can be used for the body of a gnome, as the gnome hat, or both! We’ll get into this more in a bit!
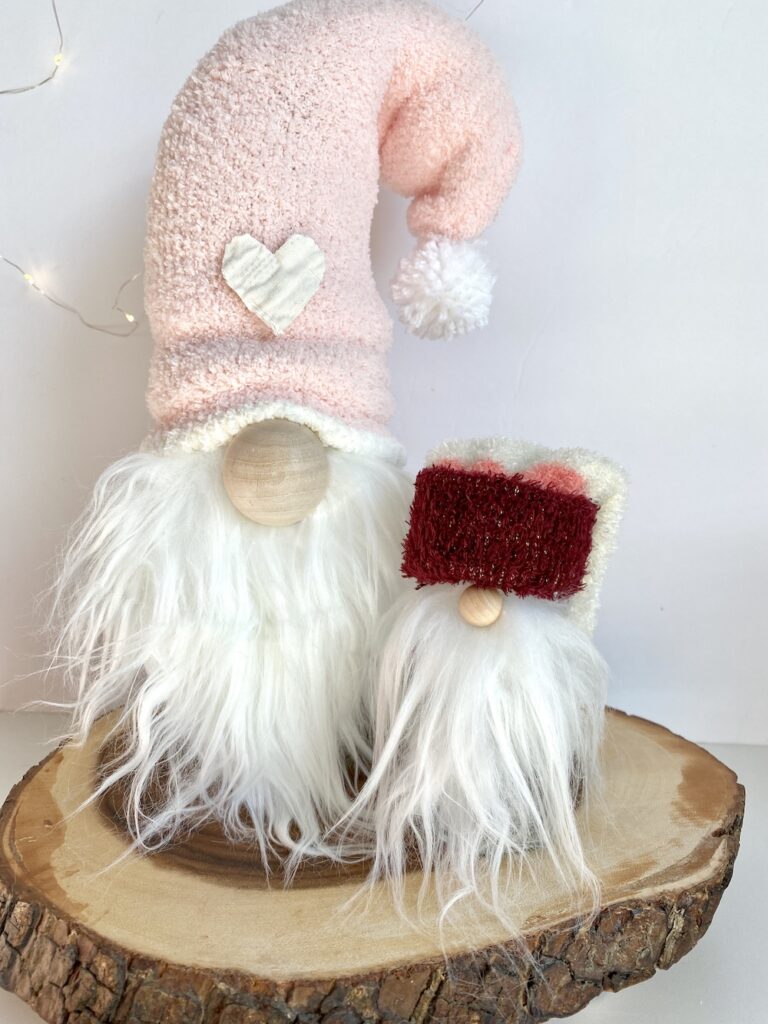
These Christmas gnomes were made using different methods. The gnome on the left was made with a sock as the body and a fabric hat.
The miniature gnome on the right was made without a sock (pattern coming soon so be sure to sign up for my newsletter!)
If you’re using a sock as the hat, make sure you select socks that have a pattern that can be turned upside down, or you may need to do some sewing.
Depending on the type of filler you’re using, tightly woven socks work best for a gnome body. Fillers like poly beads and rice can seep through loosely woven socks.
To make a sock gnome, you’ll need one sock for the body and one for the hat. I like to save my pretty socks for the hat or make a felt hat with my felt gnome hat pattern.
Gnome Body
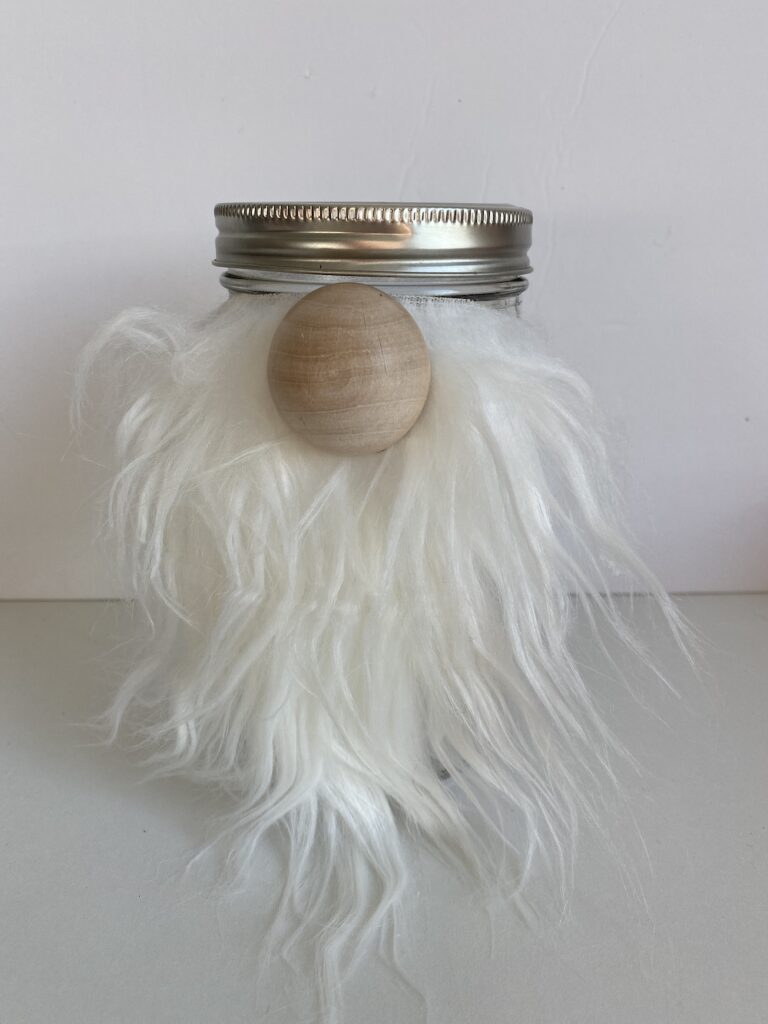
You can use a mason jar, salt shaker, or another glass jar as a body, but using a sock is most popular amongst DIYers.
Rice is a very popular filler for sock gnomes but be aware that they can attract mice and bugs. When making sock gnomes with rice, you can put the rice in a small ziplock bag to help with these issues. This will limit the size of the gnome body but it is an option.
If you make gnomes with rice, be sure to store your seasonal gnomes in an airtight container to help keep pests away.
Polyfil or pillow stuffing can also be used but the gnomes don’t stand up well.
The best stuffing is to use 1/2 Poly pellets (aka poly beads) and 1/2 Polyfil. Poly beads are more expensive but are my preferred filler as they will last the longest.
Sand is another filler but it will also need to be inside a plastic bag so the sand doesn’t seep through the sock.
Gnome Noses
I like to use split wood beads for gnome noses or wood beads without a hole in them.
Other options for gnome noses are pom poms, flesh-colored pantyhose filled with Polyfil, a styrofoam ball, a painted ping-pong ball, or a button. Anything round will work.
Gnome Hat
You can use the second sock for the hat if it’s a color and pattern that you like. Another option is to make a hat out of felt or fabric. Here’s how to make a gnome hat pattern.
If you really want to get creative, you can also use flower pots, funnels, or knit beanies.
To make a hat stand up, you can place a piece of wire inside and shape it accordingly. Make sure the ends of the wire are curled around at the end so the wire doesn’t poke through the sock.
You’ll also need Polyfil to fill up the hat.
Gnome Beard
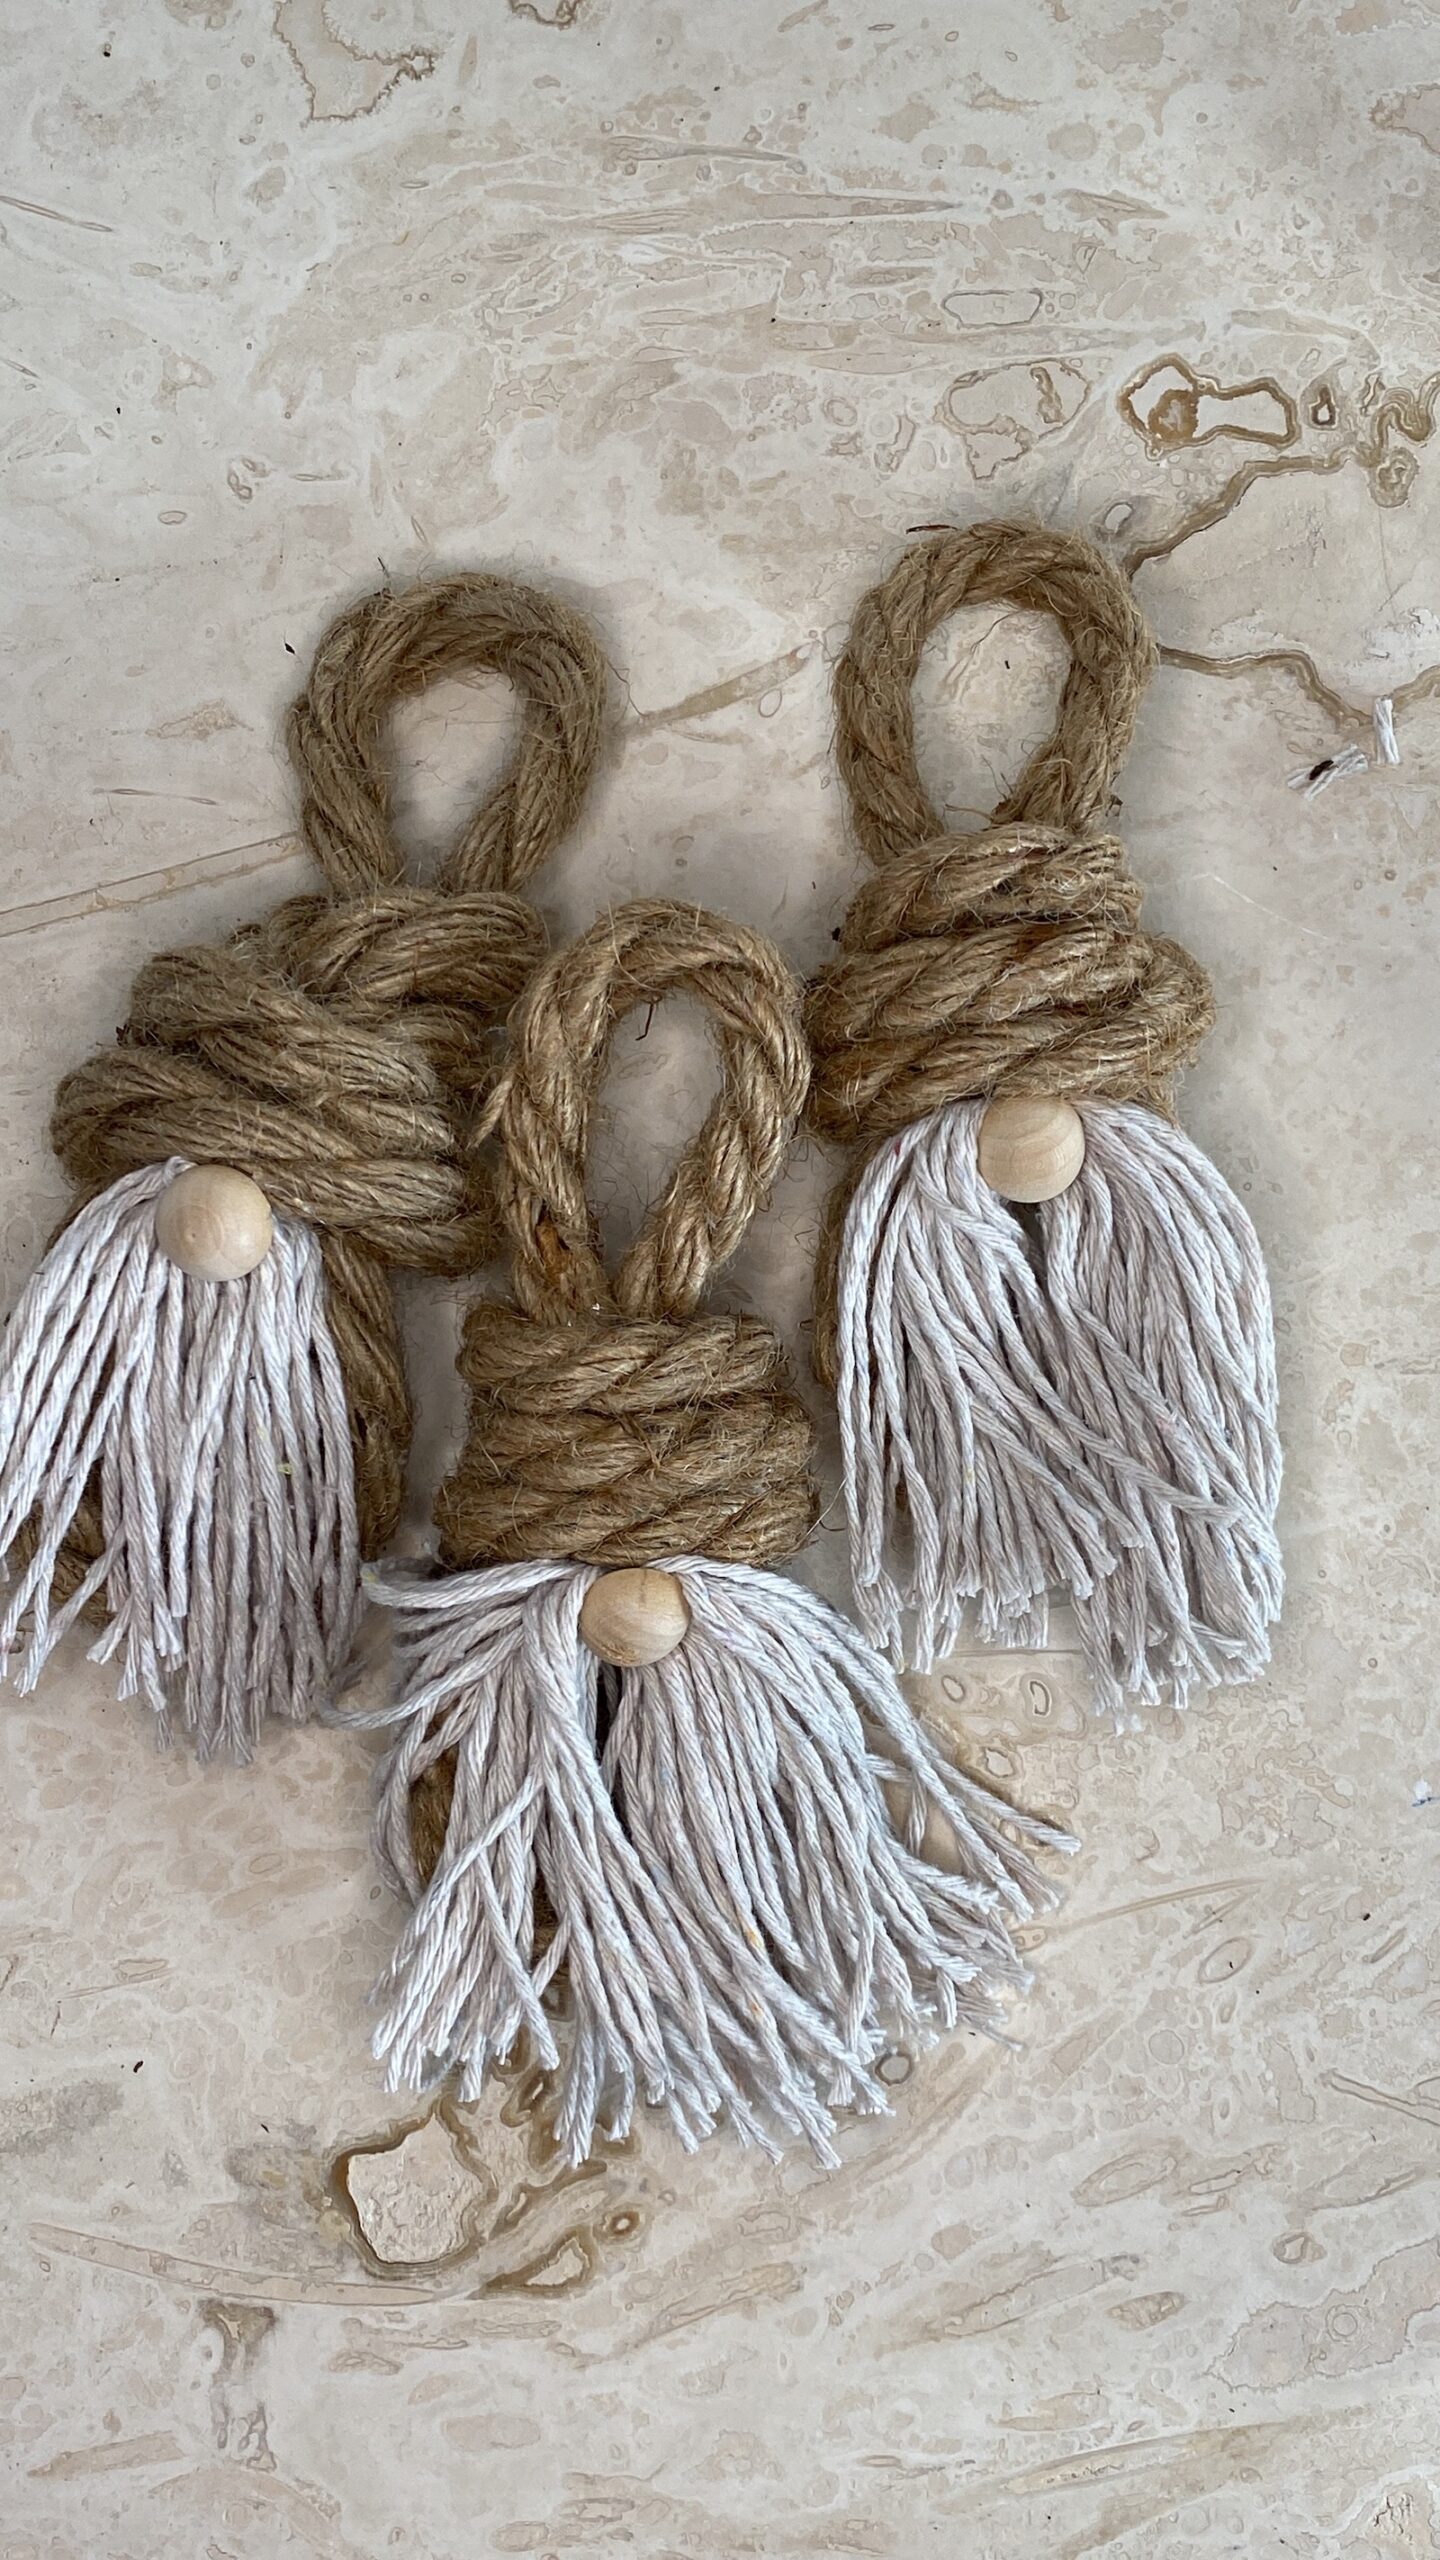
Faux fur is the most popular choice for DIY sock gnomes but you can also make a gnome beard out of yarn or even use a mop to make mop gnomes.
Instructions For DIY Sock Gnomes
So, how do you make a homemade sock gnome? Here are the instructions for how to make a gnome out of socks:
- Make the gnome body. (photos follow)
- Cut and glue the beard in place.
- Glue the nose on top of the beard.
- Make the hat, pull it down to the top of the nose, and glue it in place.
- Decorate the gnome with seasonal items.
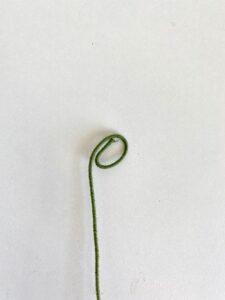
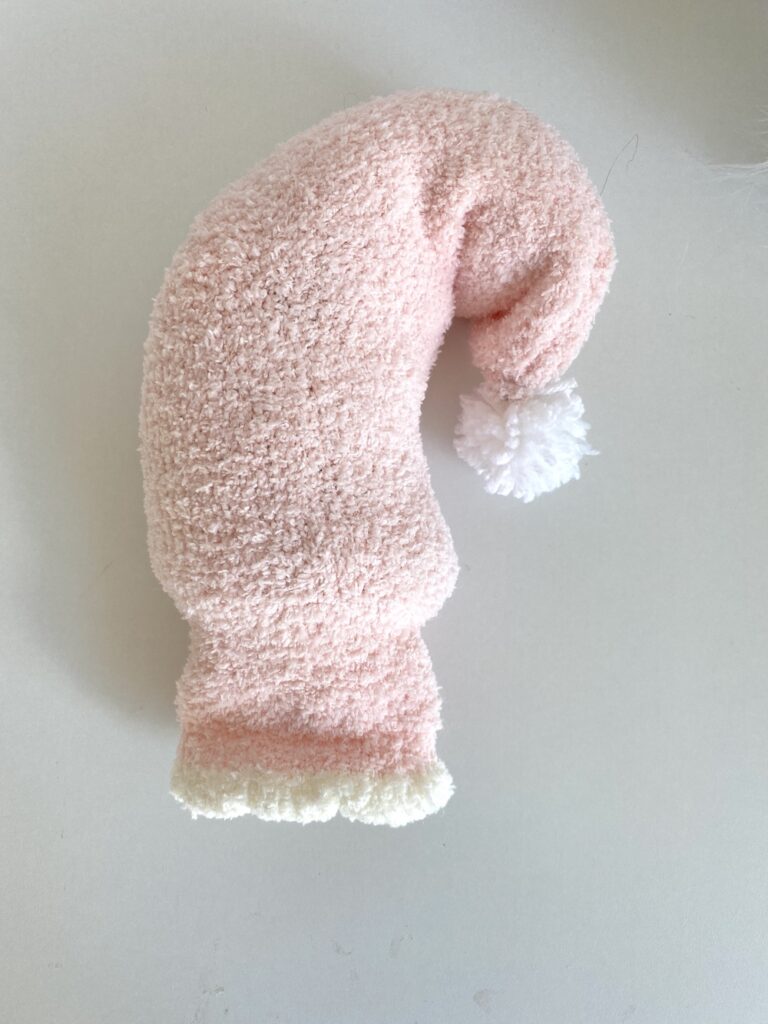
For the sock gnome hat, I didn’t cut or sew the sock at all. I used these fuzzy socks and they worked great. I started by rolling the floral wire at the end as pictured below. This is just so the wire doesn’t poke through the sock.
Alternatively, three pieces of pipe cleaner can be twisted together and used instead of the thick floral wire.
I fed the wire through the sock all of the way to the toe and then stuffed the sock about 3/4 of the way full with polyfill. I squeezed the sock into the gnome hat shape that I wanted.
How To Make A Gnome Beard
Regardless of which method you use, mason jar or rice (more about that later), you’re going to need to cut a gnome beard. I found some pretty faux gnome fur online and I bought several colors. I’m going to make some cute gnomes for every season.
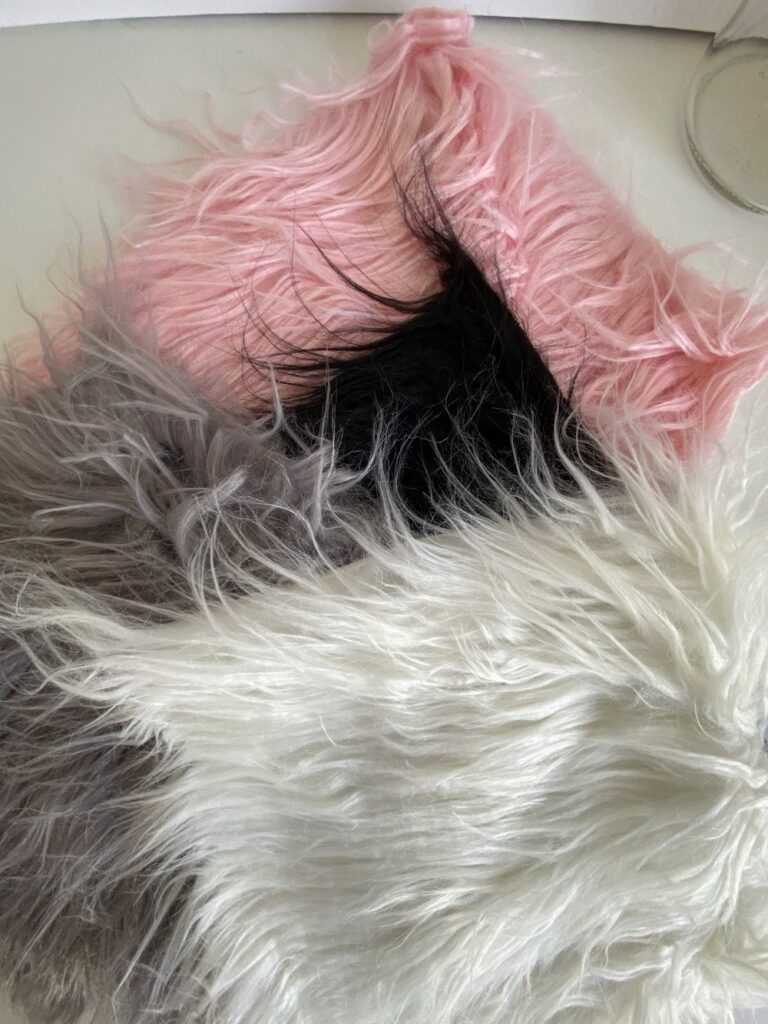
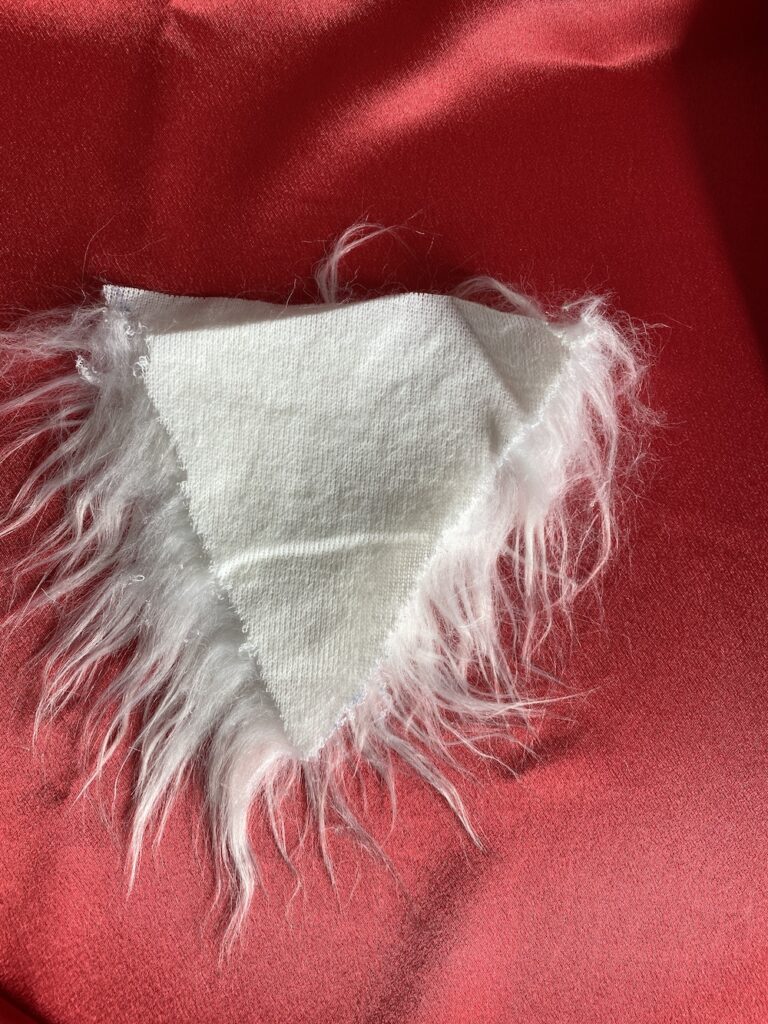
For the beard, I measured from one side of the gnome’s body to the other and made a mark on the back of the faux fur. Then I measured how long I wanted the beard and also made a mark on the back. I drew a triangle and then cut the triangle shape.
There’s a trick to this part so keep reading.
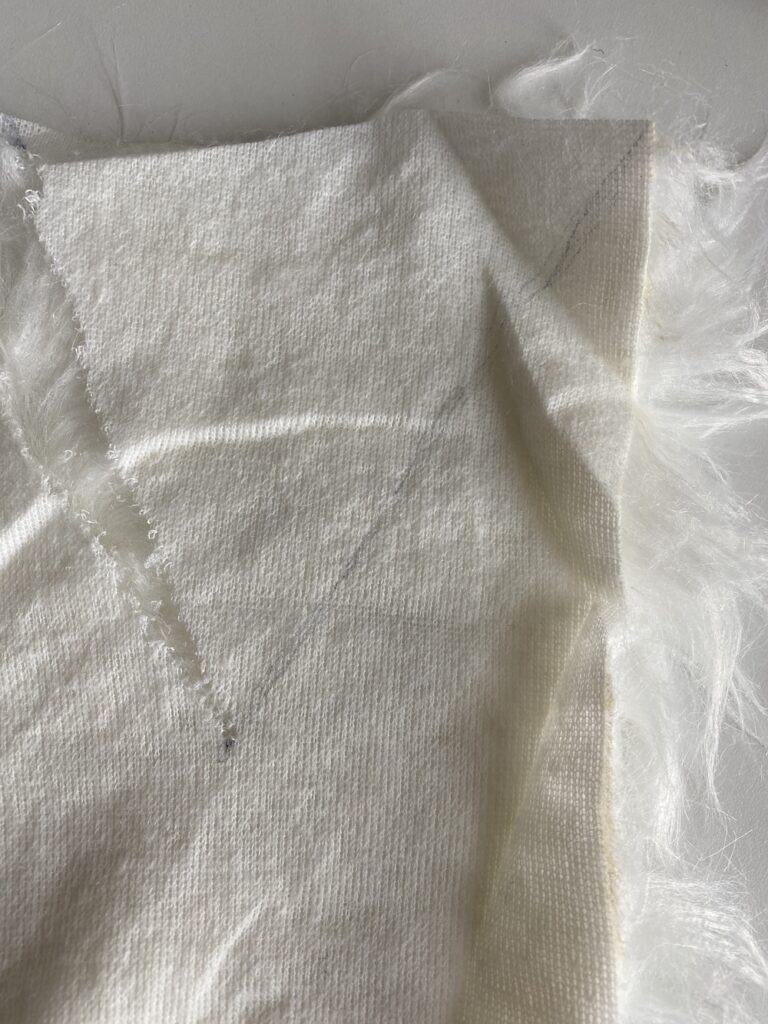
The trick for cutting gnome faux fur is to slide your scissors between the fur and the backing so you’re really only cutting the backing and not the front of the fur at all.
If you can’t slide your scissors under the backing, lay the fur face down (backing side up) on a cutting board and use a razor knife to gently cut out the triangle without going all the way through to the fur. You can also use a razor/exacto knife.
How to Make A Gnome Body With Socks
To make DIY sock gnomes the traditional way, you’ll fill a sock with rice or poly beads to make the body. There’s an easy way to do this.
Put a sock inside a large cup and stretch the sock over the rim. Fill the sock, then remove the sock from the cup and shape it. Tie off the top with string or a rubberband.
Some people cut the excess sock off and then secure the top with glue. I just stuffed the extra sock up into the hat and it worked fine.
Just be sure to secure the sock tightly so the body doesn’t lose its shape. You want a nice firm body that will stand on its own.
Make sure to store rice gnomes in plastic containers to keep mice or other pests from eating them. (another reason I love Mason jar gnomes, keep reading!)
Gnome Nose Ideas
I used a wood bead for a gnome nose, but you can also use a pom pom or cut a circle of fabric and stuff it using polyfill then close it up with a gathering stitch. You could also use a large button or any other round item you have at home.
I love the large wooden beads the most and I use these for other crafts as well so they’re nice to have extras around.
How To Make Easy Mason Jar Gnomes – DIY
DIY mason jar gnomes are so easy to make and you can decorate them for any season. I also made a salt shaker gnome so you can really use any stable container that you have around the house.
One of the mason jars I had at home didn’t have a lid, so I just cut a piece of contact paper and stuck it to the top. This is just to keep the hat stuffing from falling down into the jar. You could probably even glue a piece of paper on top for a lid or use a scrap of fabric and a rubber band.
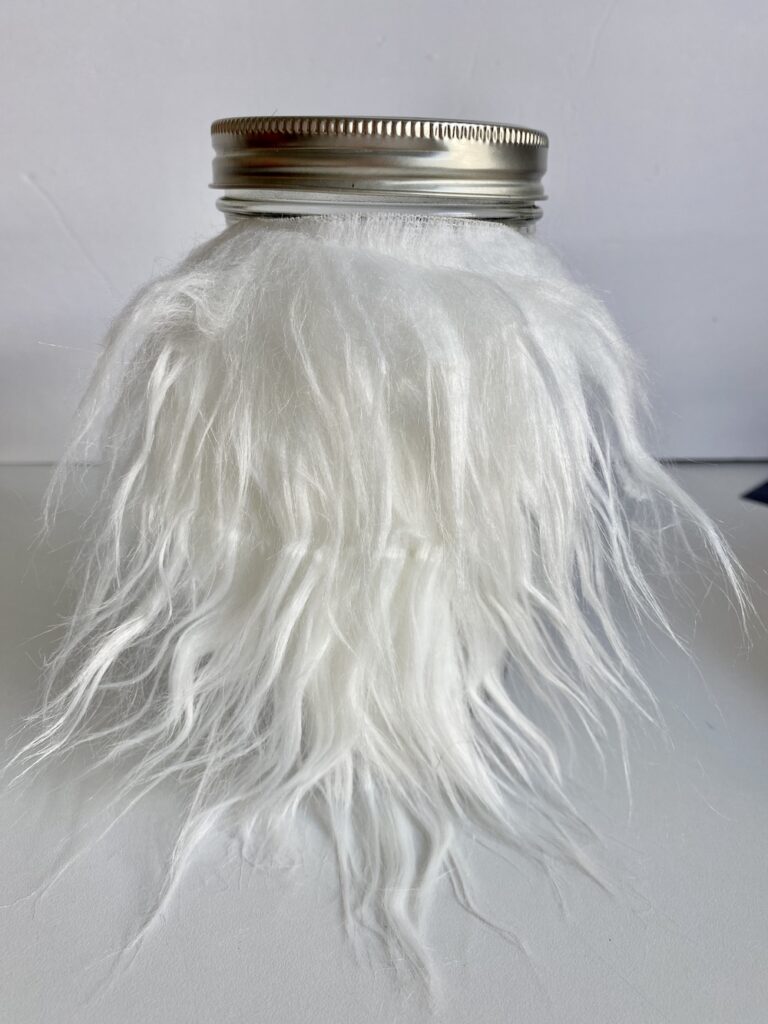
If you’re making a mason jar gnome, glue the beard directly to the jar, just below the lid or rim of the jar. Glue the nose also just below the rim of the jar. Then pull the hat down over the lid. You can glue the hat on if you’d like but I don’t so I can just change the sock color for each season.

One small shoebox container works well to store the hats for your DIY holiday sock gnomes.
How To Make A Light-Up Gnome
As I was making the mason jar gnome, I got the idea to put some fairly lights inside. I found a small battery-operated set of fairy lights to use. I’m not sure how long the batteries will last, so I’ll only turn them on when guests are over.
I’m going to make some light-up Christmas gnomes as well.
How To Assemble A Sock Gnome
If you’re making the mason jar gnome, glue the beard first, then glue the nose on top of the beard and hold the nose in place until completely dry. I used quite a bit of glue here.
Pull the sock hat over the lid of the jar.
If you’re making a rice sock gnome body, I recommend gluing the nose on the sock body first. Then tuck your beard up under the nose and glue it in place. Slide the sock hat down over the body to the top of the nose and secure the hat with hot glue.
Gnome Accessories
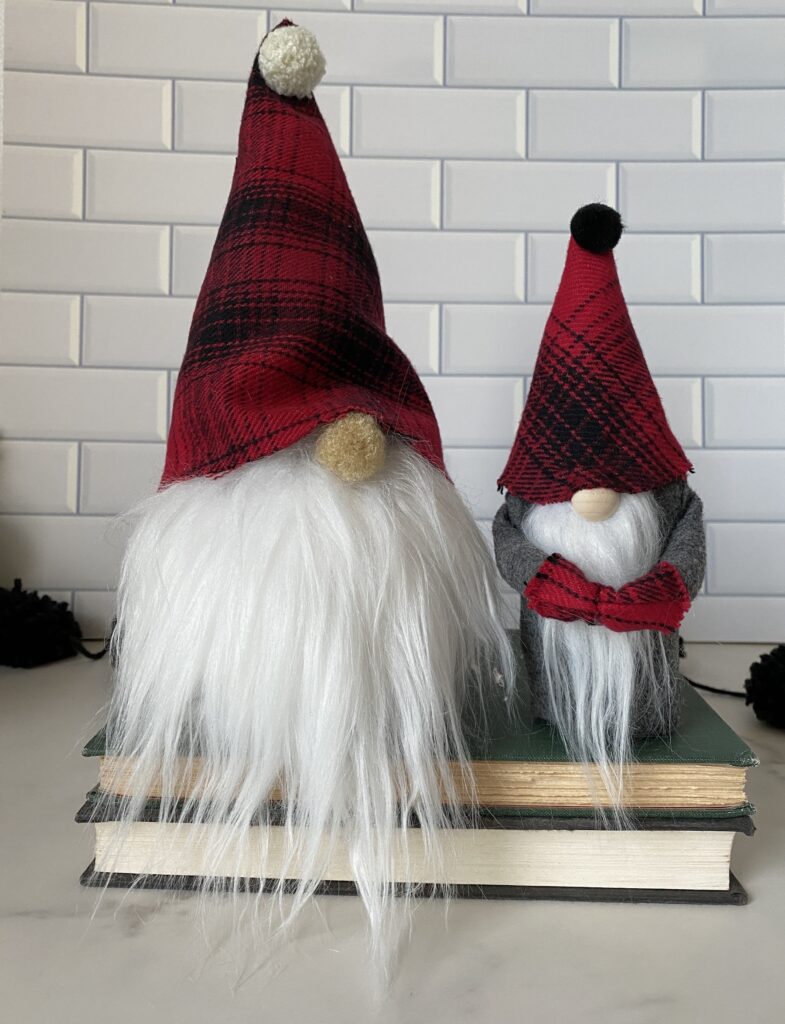
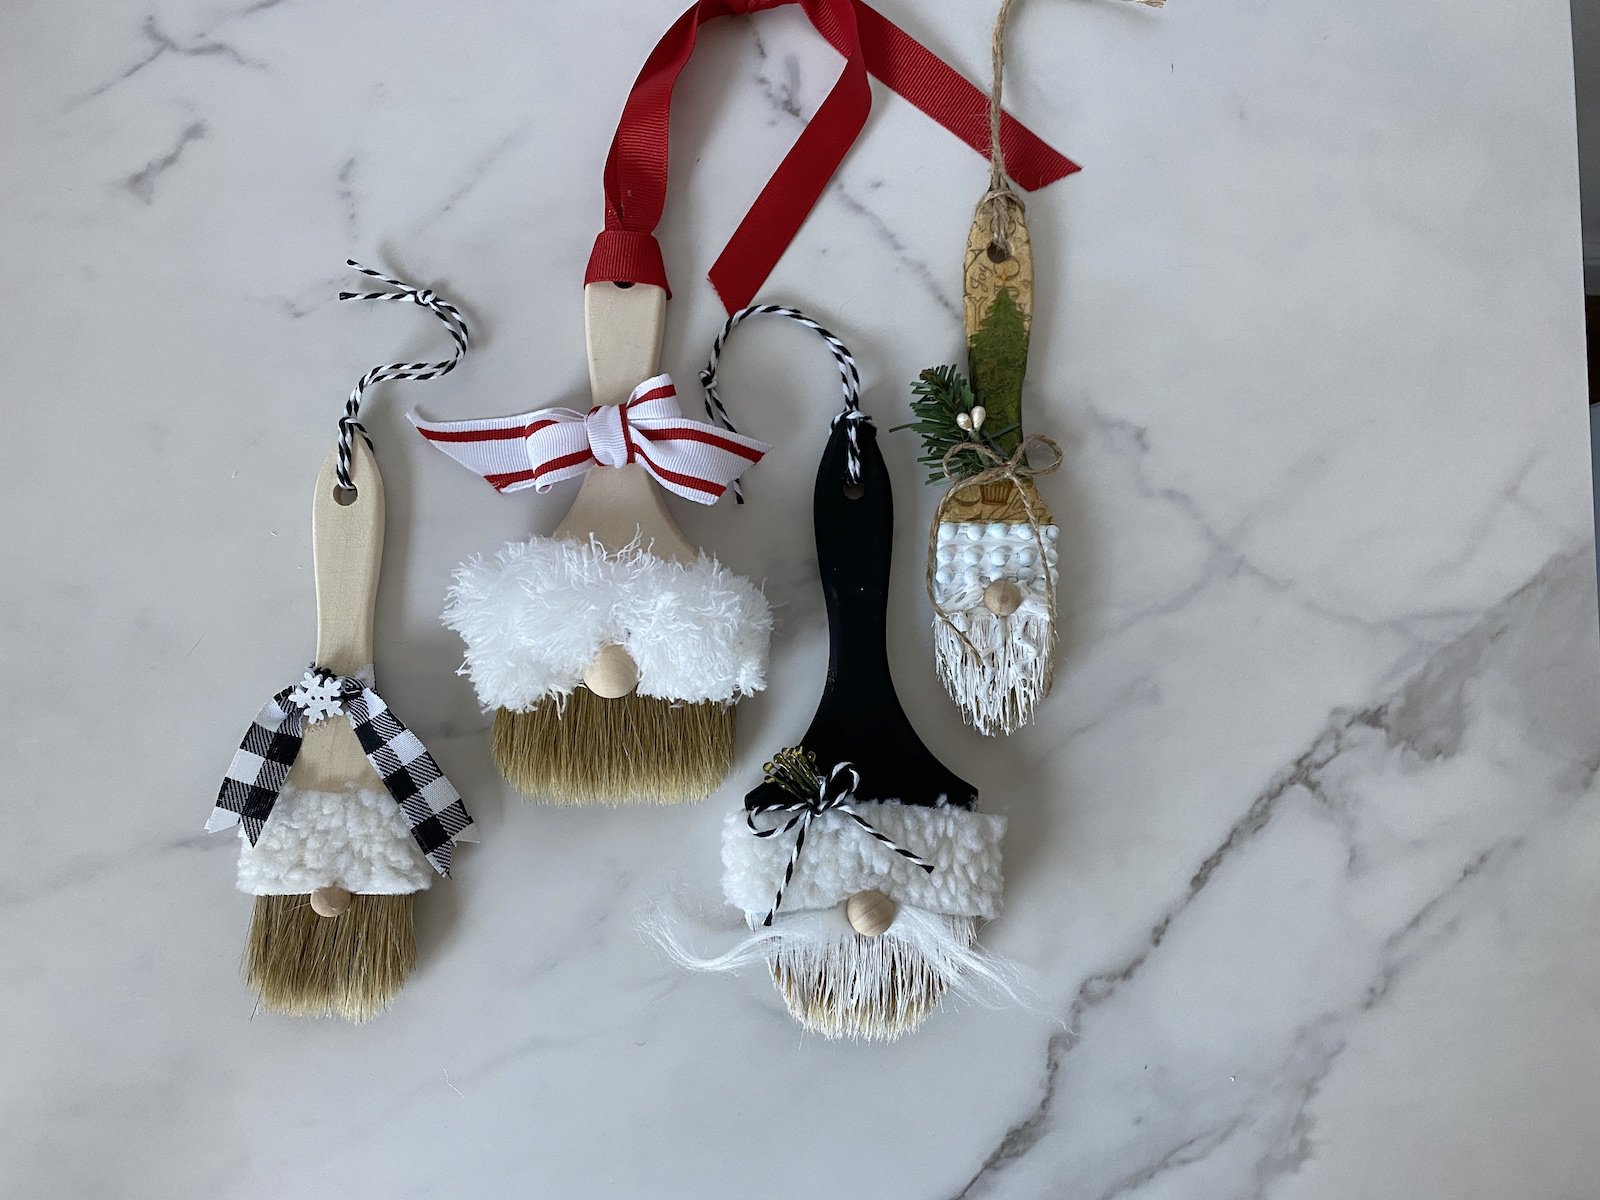
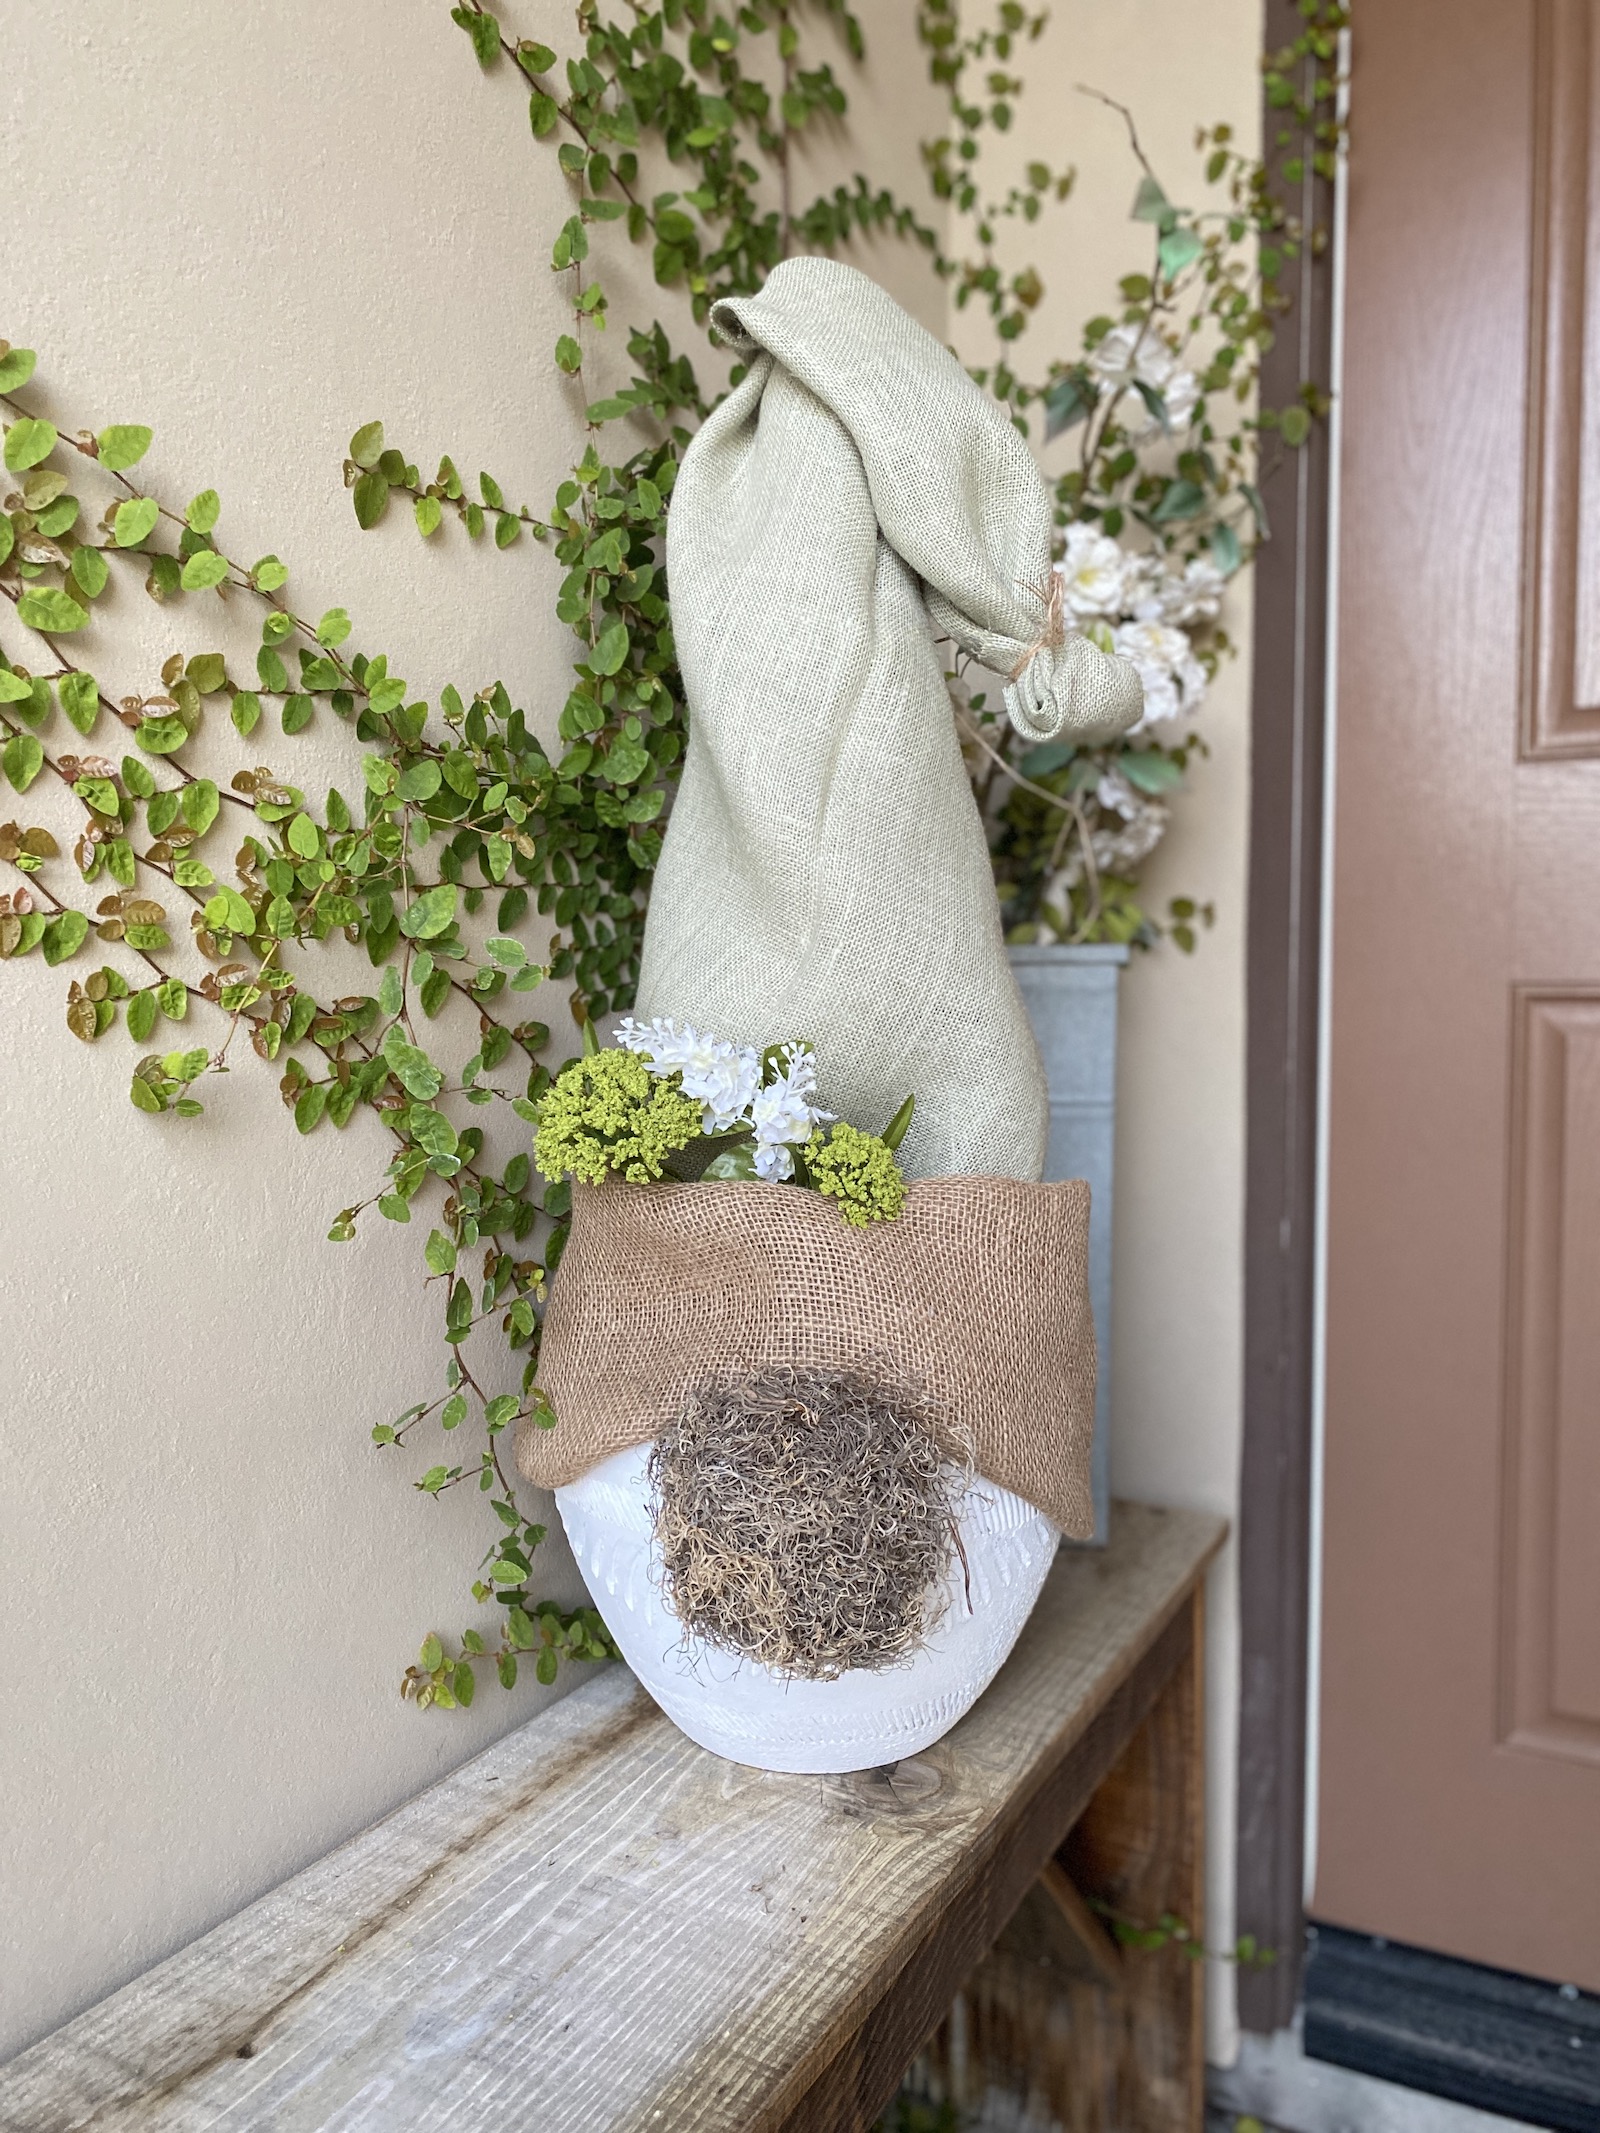
You can accessorize DIY gnomes for any season. I’ve made pom poms to tie to the end of the hats and also cut different shapes of fabric to accessorize the hats for each season. Here are some gnomes I’ve made that will hopefully inspire you to make several holiday gnomes this year!
Don’t forget to Pin your favorite gnome and I’d love to have you follow me on Pinterest!
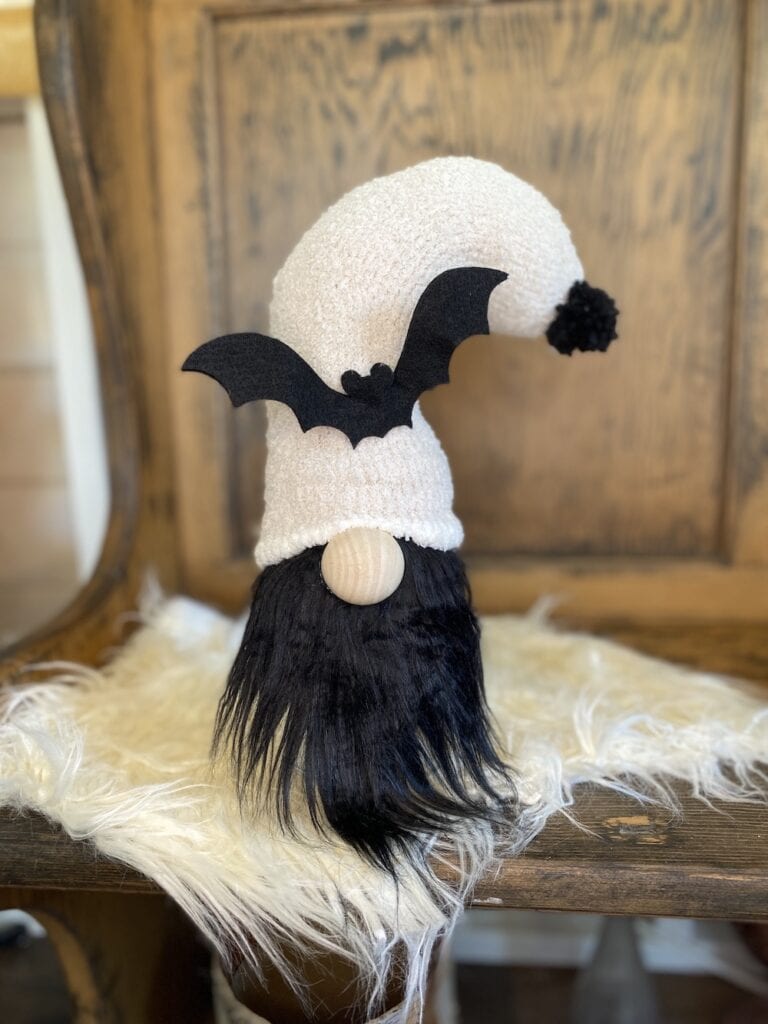
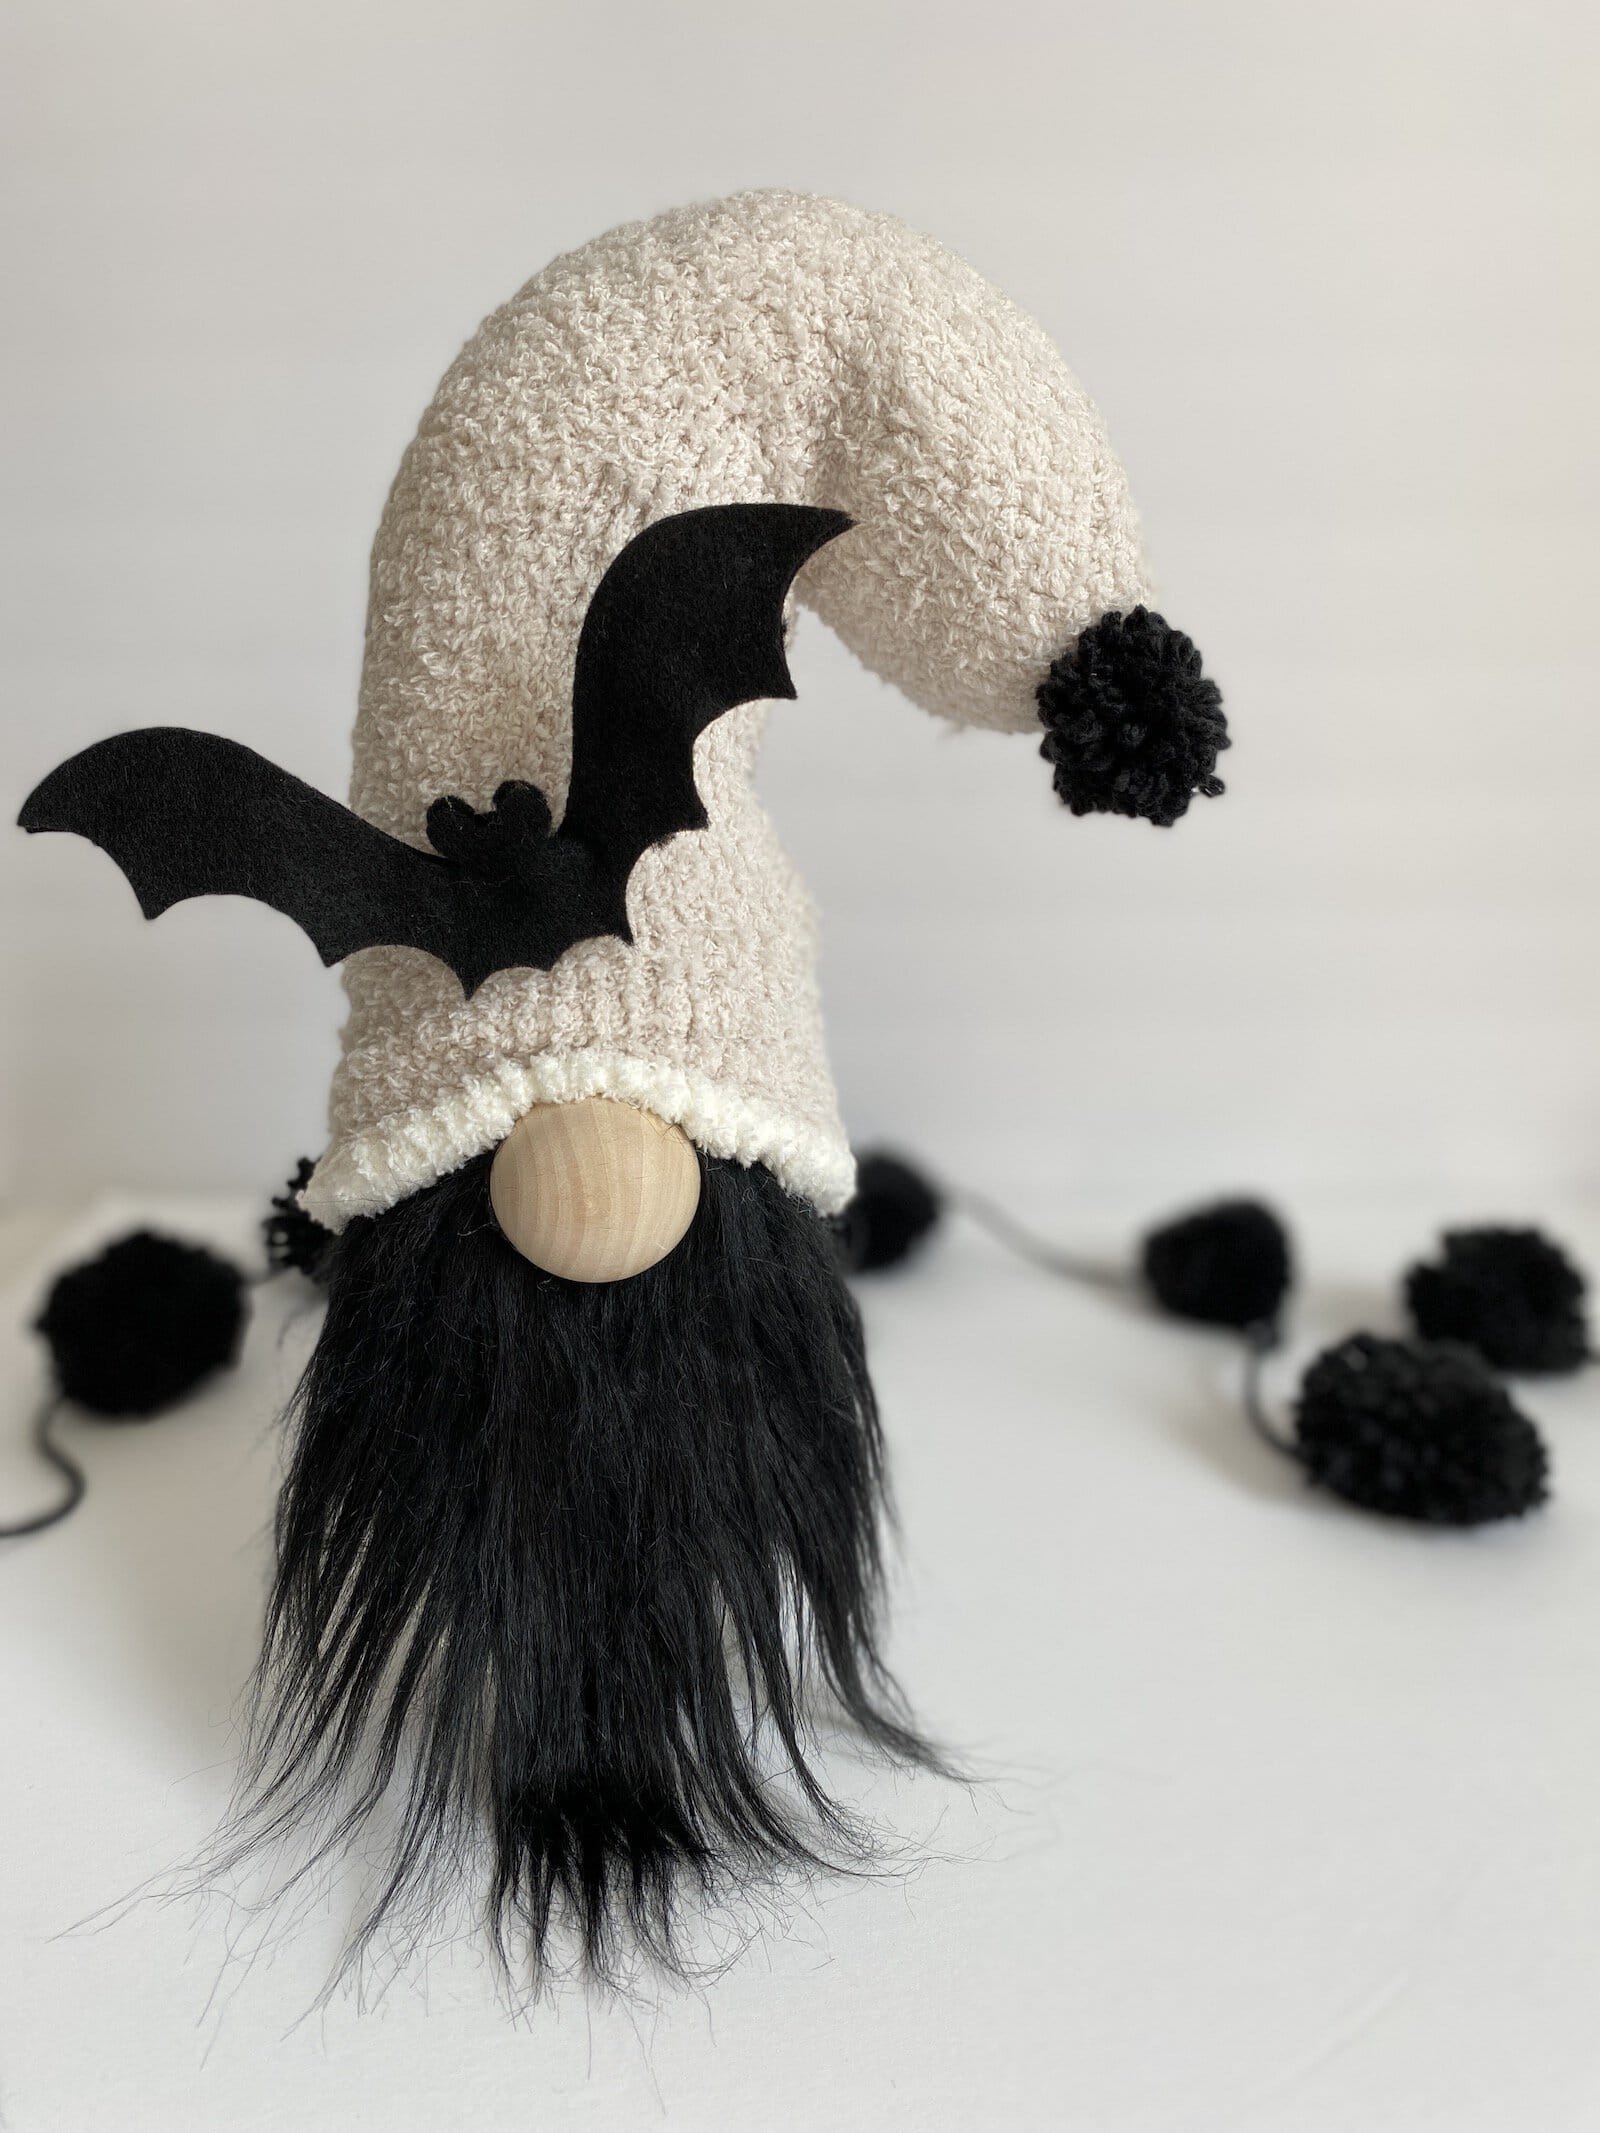
DIY Halloween Sock Gnome
For the Halloween gnome DIY, I just cut two bats from felt. I used an additional piece of floral wire to bend to the shape of the bat wings and glued it between the two pieces of felt. Now the wings are bendable and I can shape them. I got the bat pattern from Canva.
Believe it or not, I have even more DIY Gnomes You’ll Fall In Love With! I also have a cute outdoor gnome for you to see.
xoxo,
Denise


I just love all your DIY gnomes! 💖 They’re so fun to make and the instructions are so easy to follow 🙂 I look forward to seeing more of you’re ideas you have!
Thank you for visiting. I’m so happy to hear you found some things you like!