Make Cute {And Easy} DIY Easter Gnomes With Socks
This post contains affiliate links which means that at no cost to you, I may earn a commission if you purchase using one of my links. For more information view my full disclosures.
~
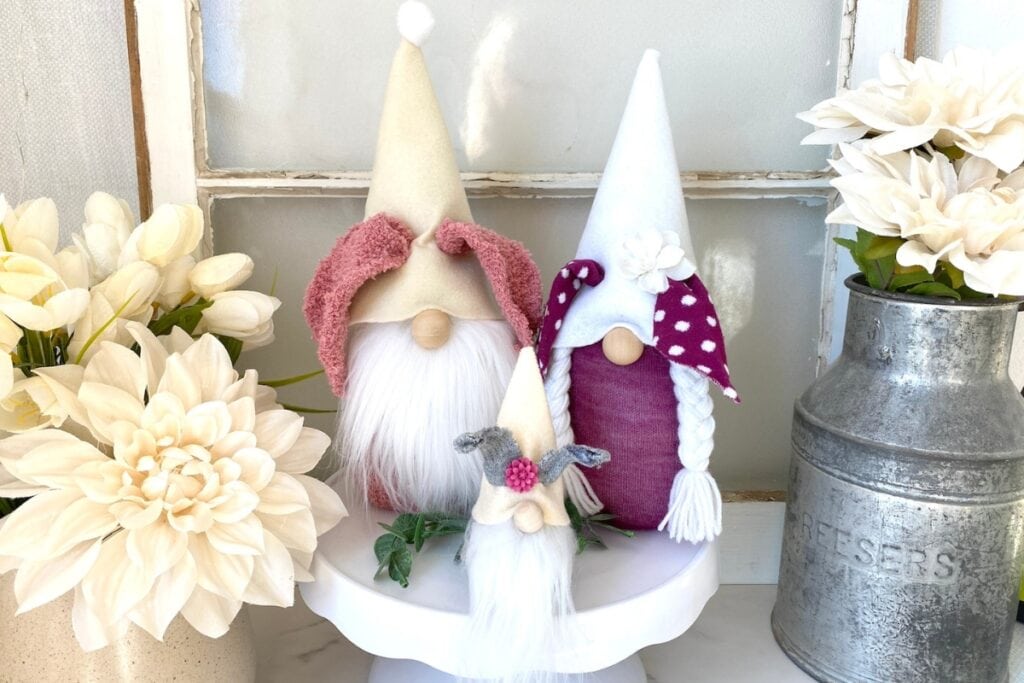
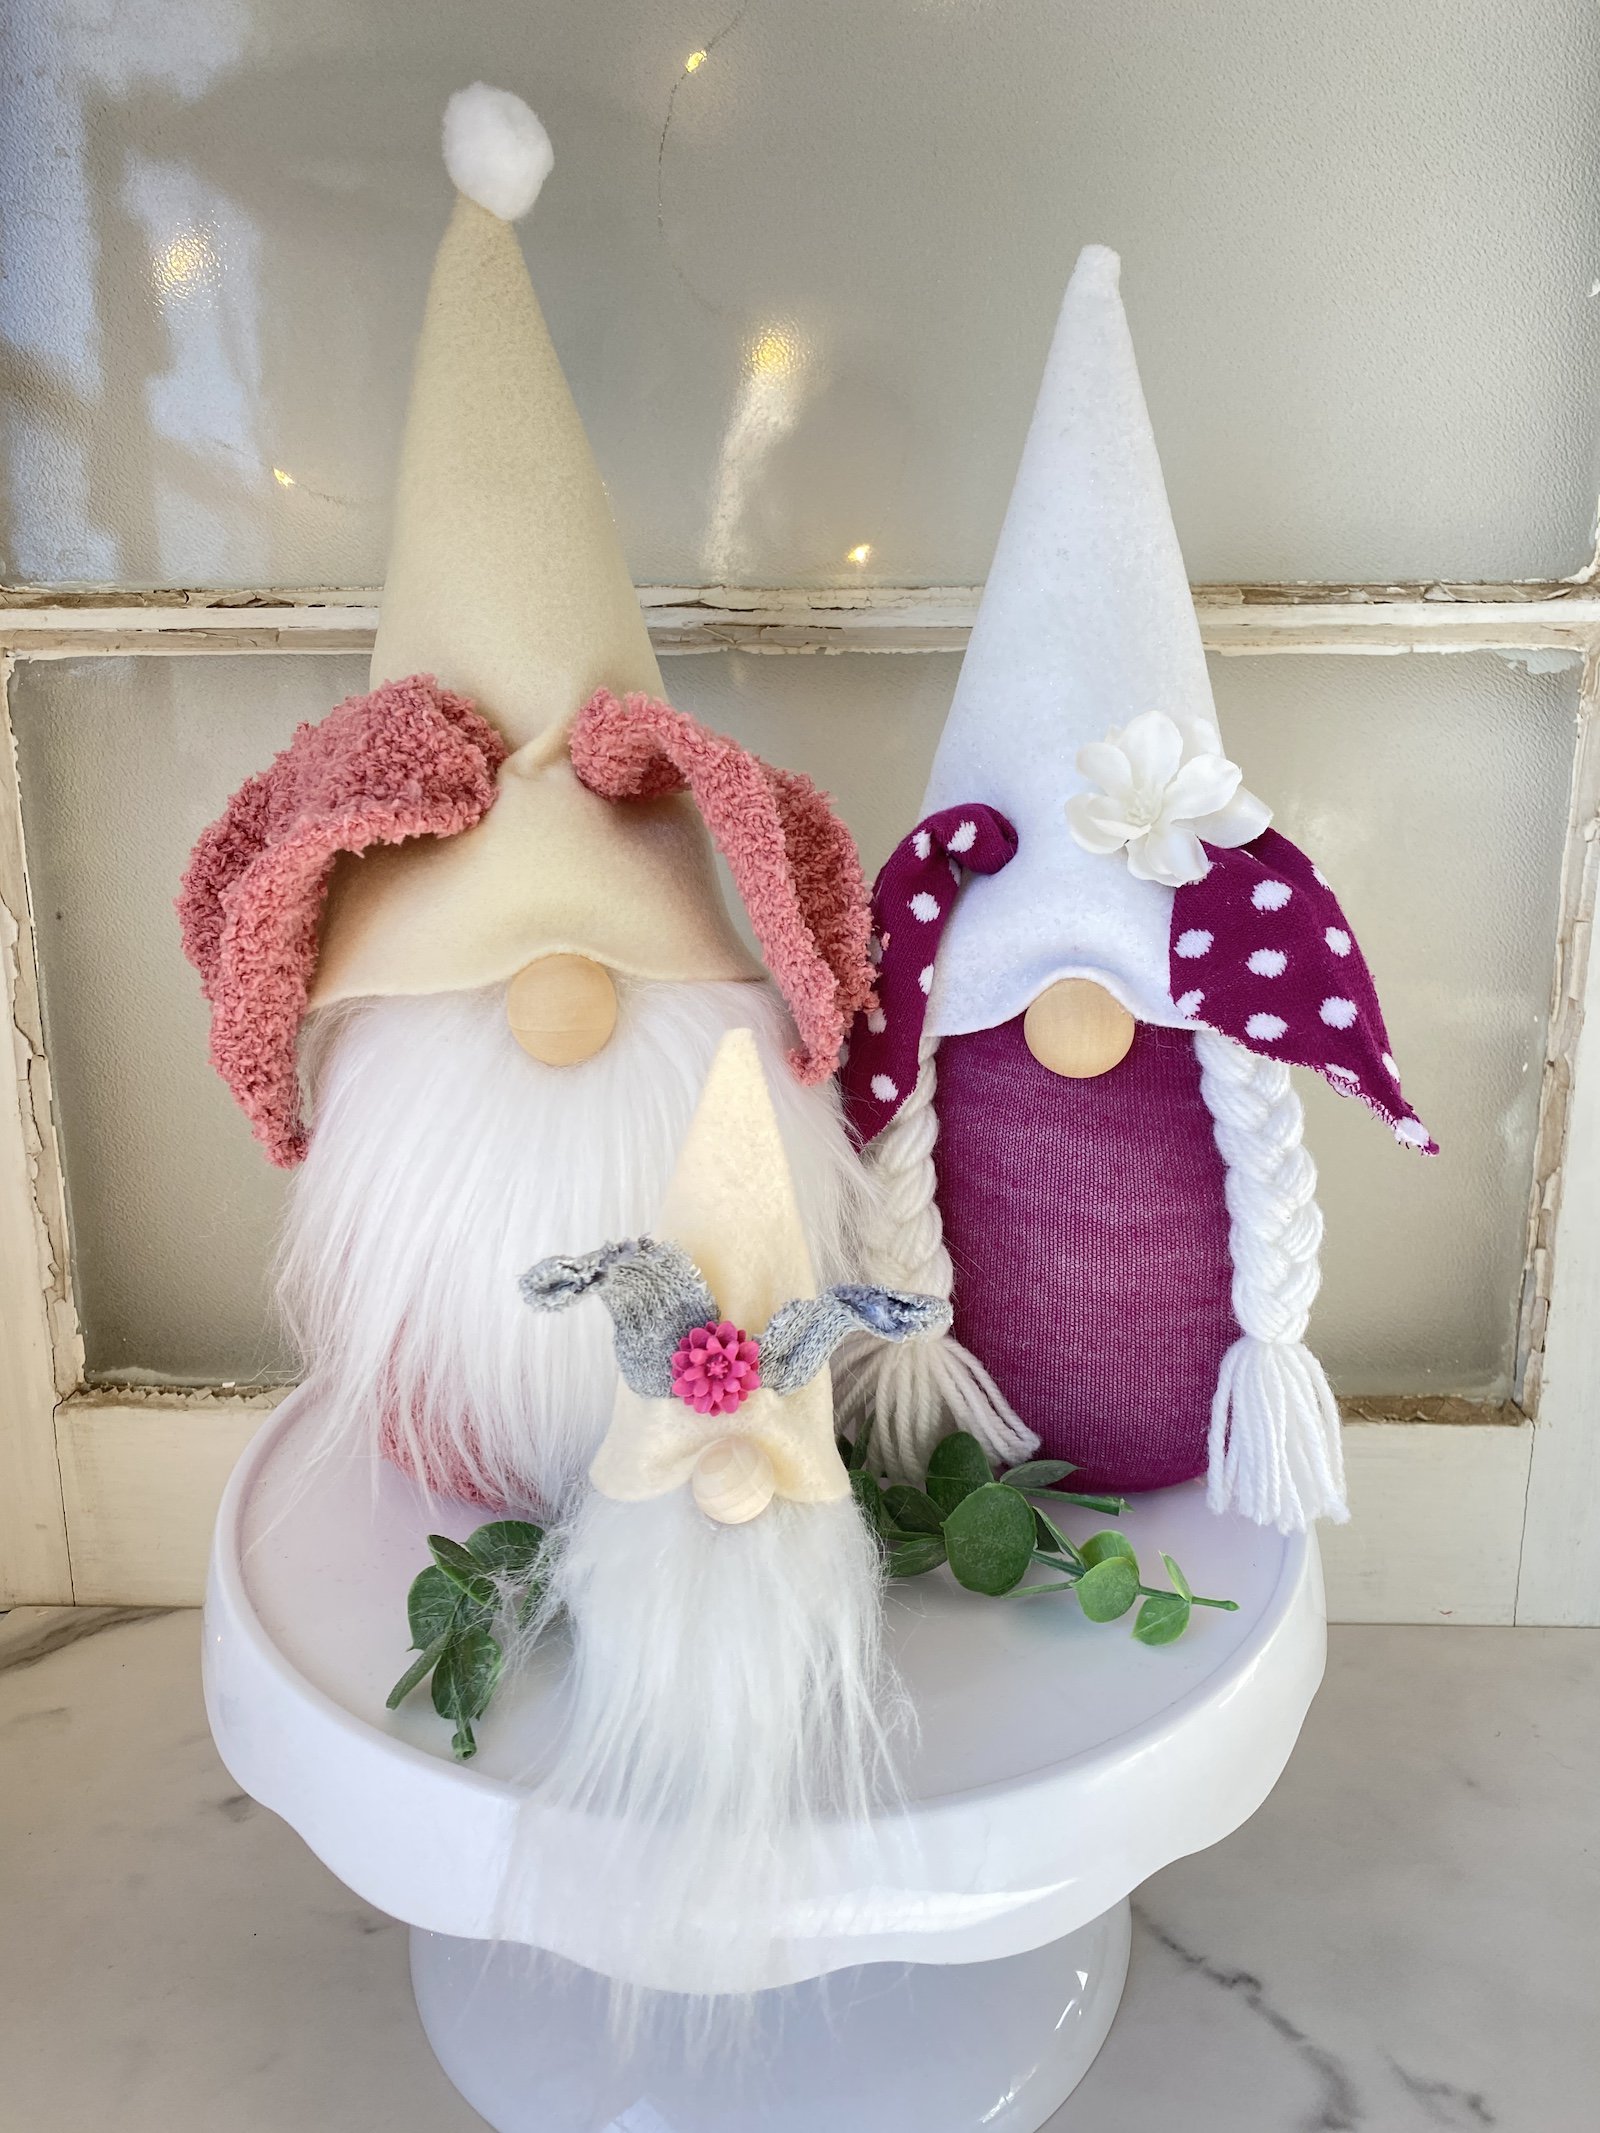
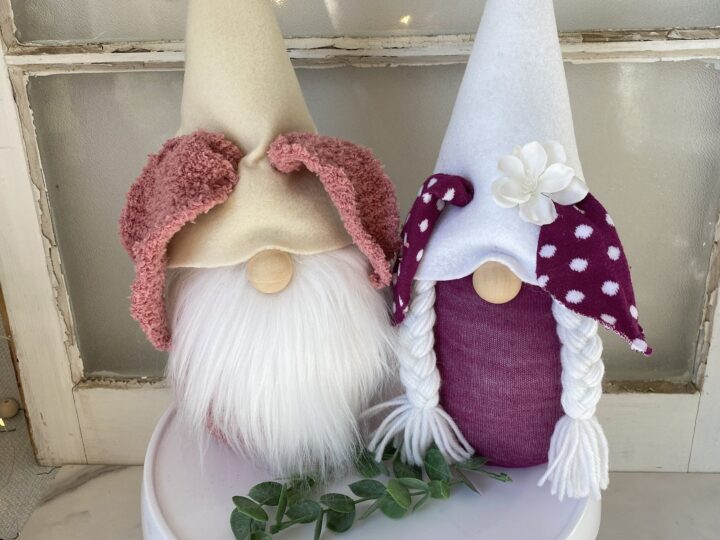
It wouldn’t be Easter without some Easter bunny gnomes here at Hootshack. When making Easter crafts, a gnome is always on my list. What I love about these gnomes is that you can make them in minutes!
Making gnomes is one of my favorite crafts. They are the most popular category on my blog! I had no idea how many people love gnomes until I posted my first one!
You can use these gnomes for Easter, but I also think they would be cute to keep around for the entire Spring and Summer season. Who says bunnies are just for Easter, right?!
Don’t forget to Pin this to your Easter board so you can find it later!
These bunny gnomes are very easy to make. I made all three of them from start to finish in less than a half hour! You don’t need many craft supplies to make them. The supplies can be found at Dollar Tree, Hobby Lobby, and other craft stores.
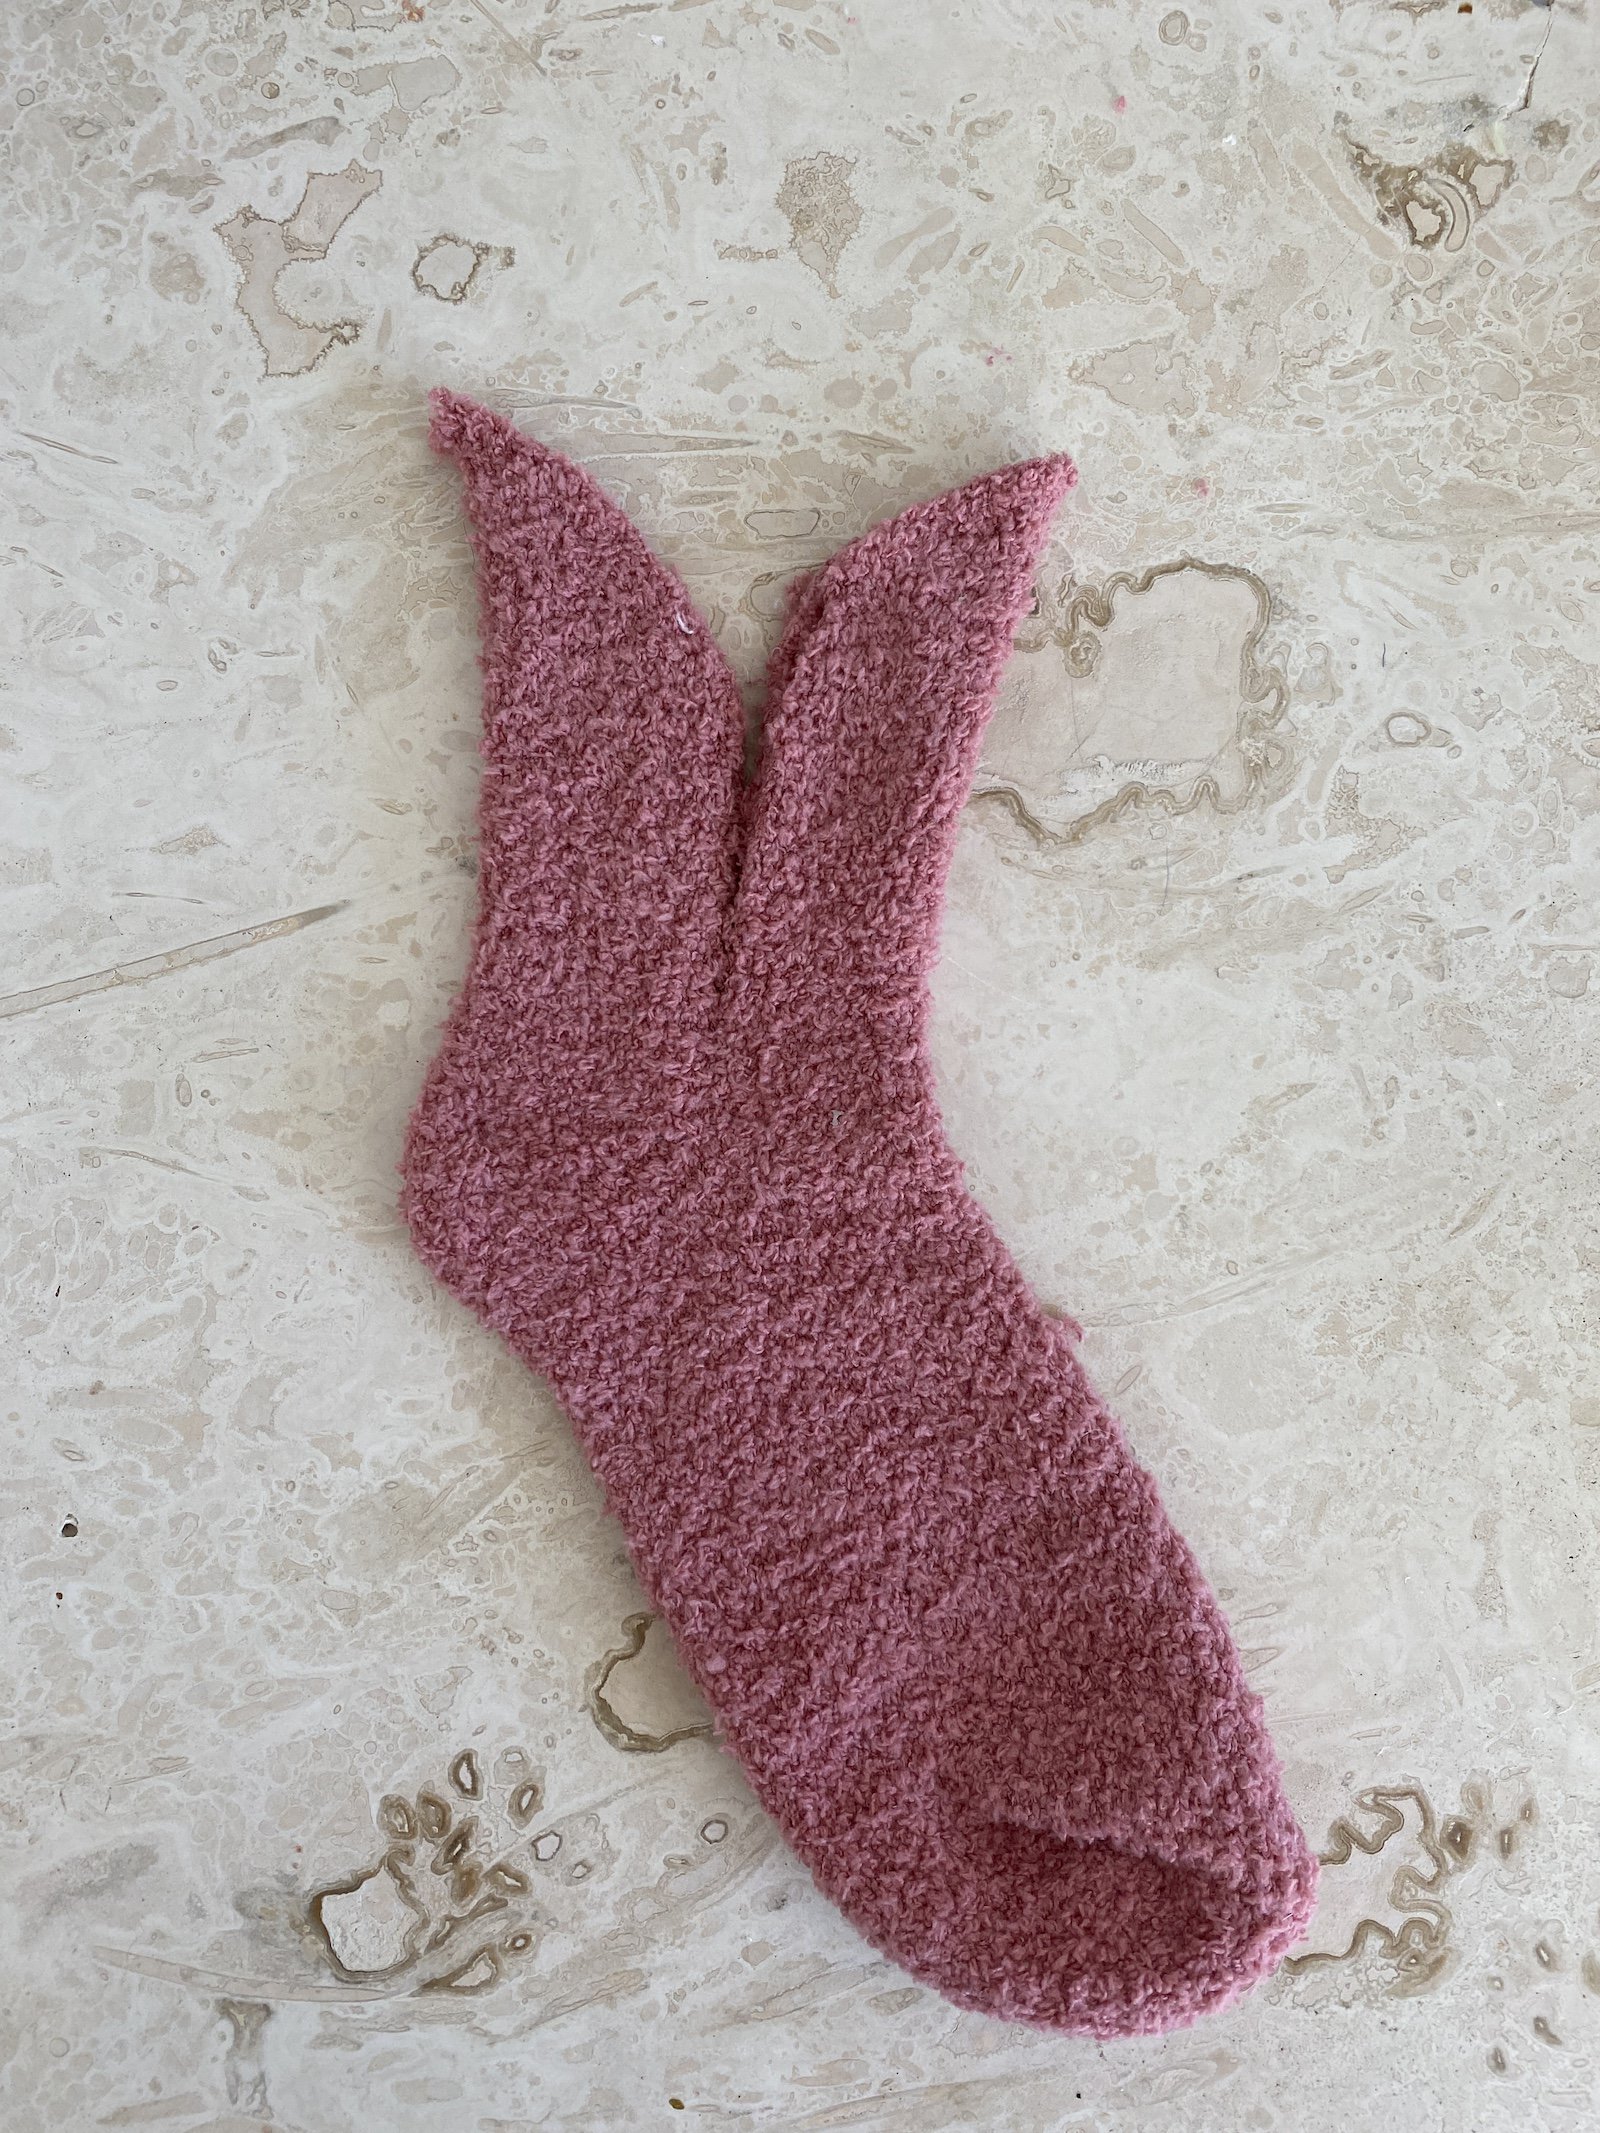
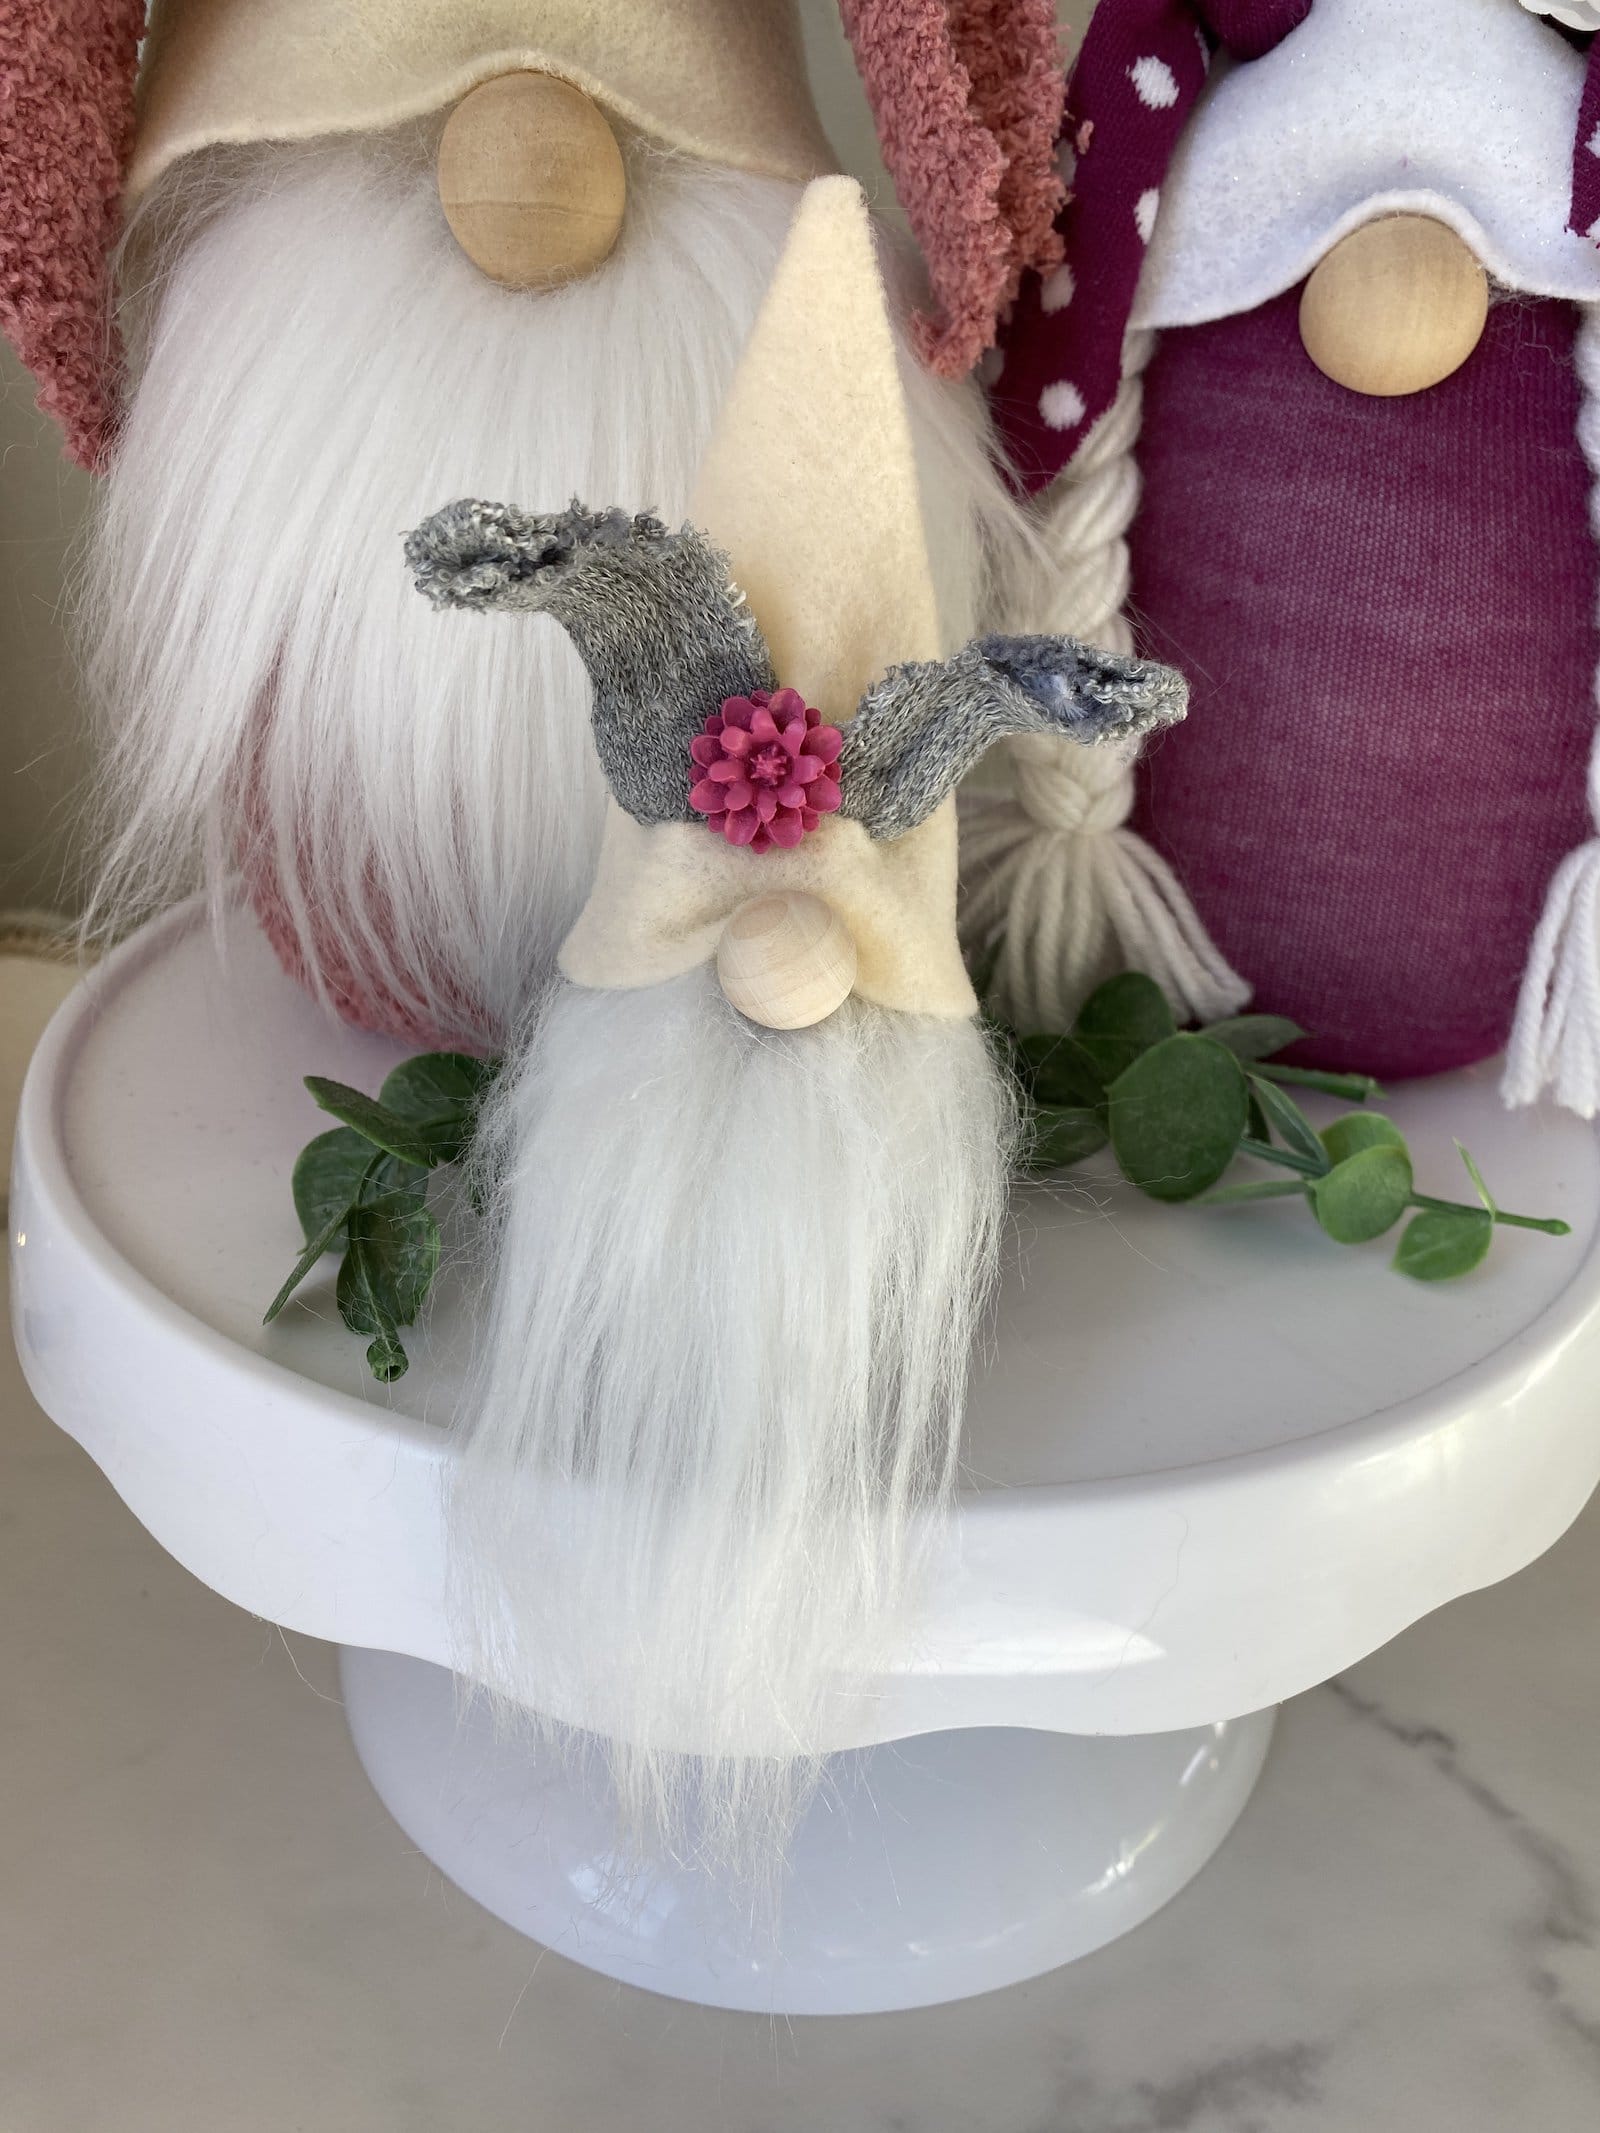
The gnome with the pink ears was made with one of these fuzzy socks, the girl gnome was made with a Dollar Tree sock that had a purple foot and polka-dotted ankle, and the baby gnome was made with a child’s sock
Easter Gnomes Supplies List
If you’re here searching for how to make an Easter gnome with socks and rice, rice is an option. I’m a big fan of Poly Pellets because they don’t attract pests. Choose what works best for you! Here are the supplies I used:
- One sock per gnome
- Felt for the hats
- Wooden bead or pom pom for a nose – I used 1″ split wood beads
- Gnome fur for beards
- Yarn if you choose to make a girl gnome with braids
- Polyfil or other stuffing
- Poly beads or rice, beans, or other weighted item for a filler
- Decorations like faux flowers are options
❤ Be sure to check out my favorite Gnome Making Supplies!
Tools
You’re going to need scissors, a hot glue gun and glue sticks, a rubber band or twine, and a cup or glass.
Instructions For Making Spring Easter Bunny Gnomes
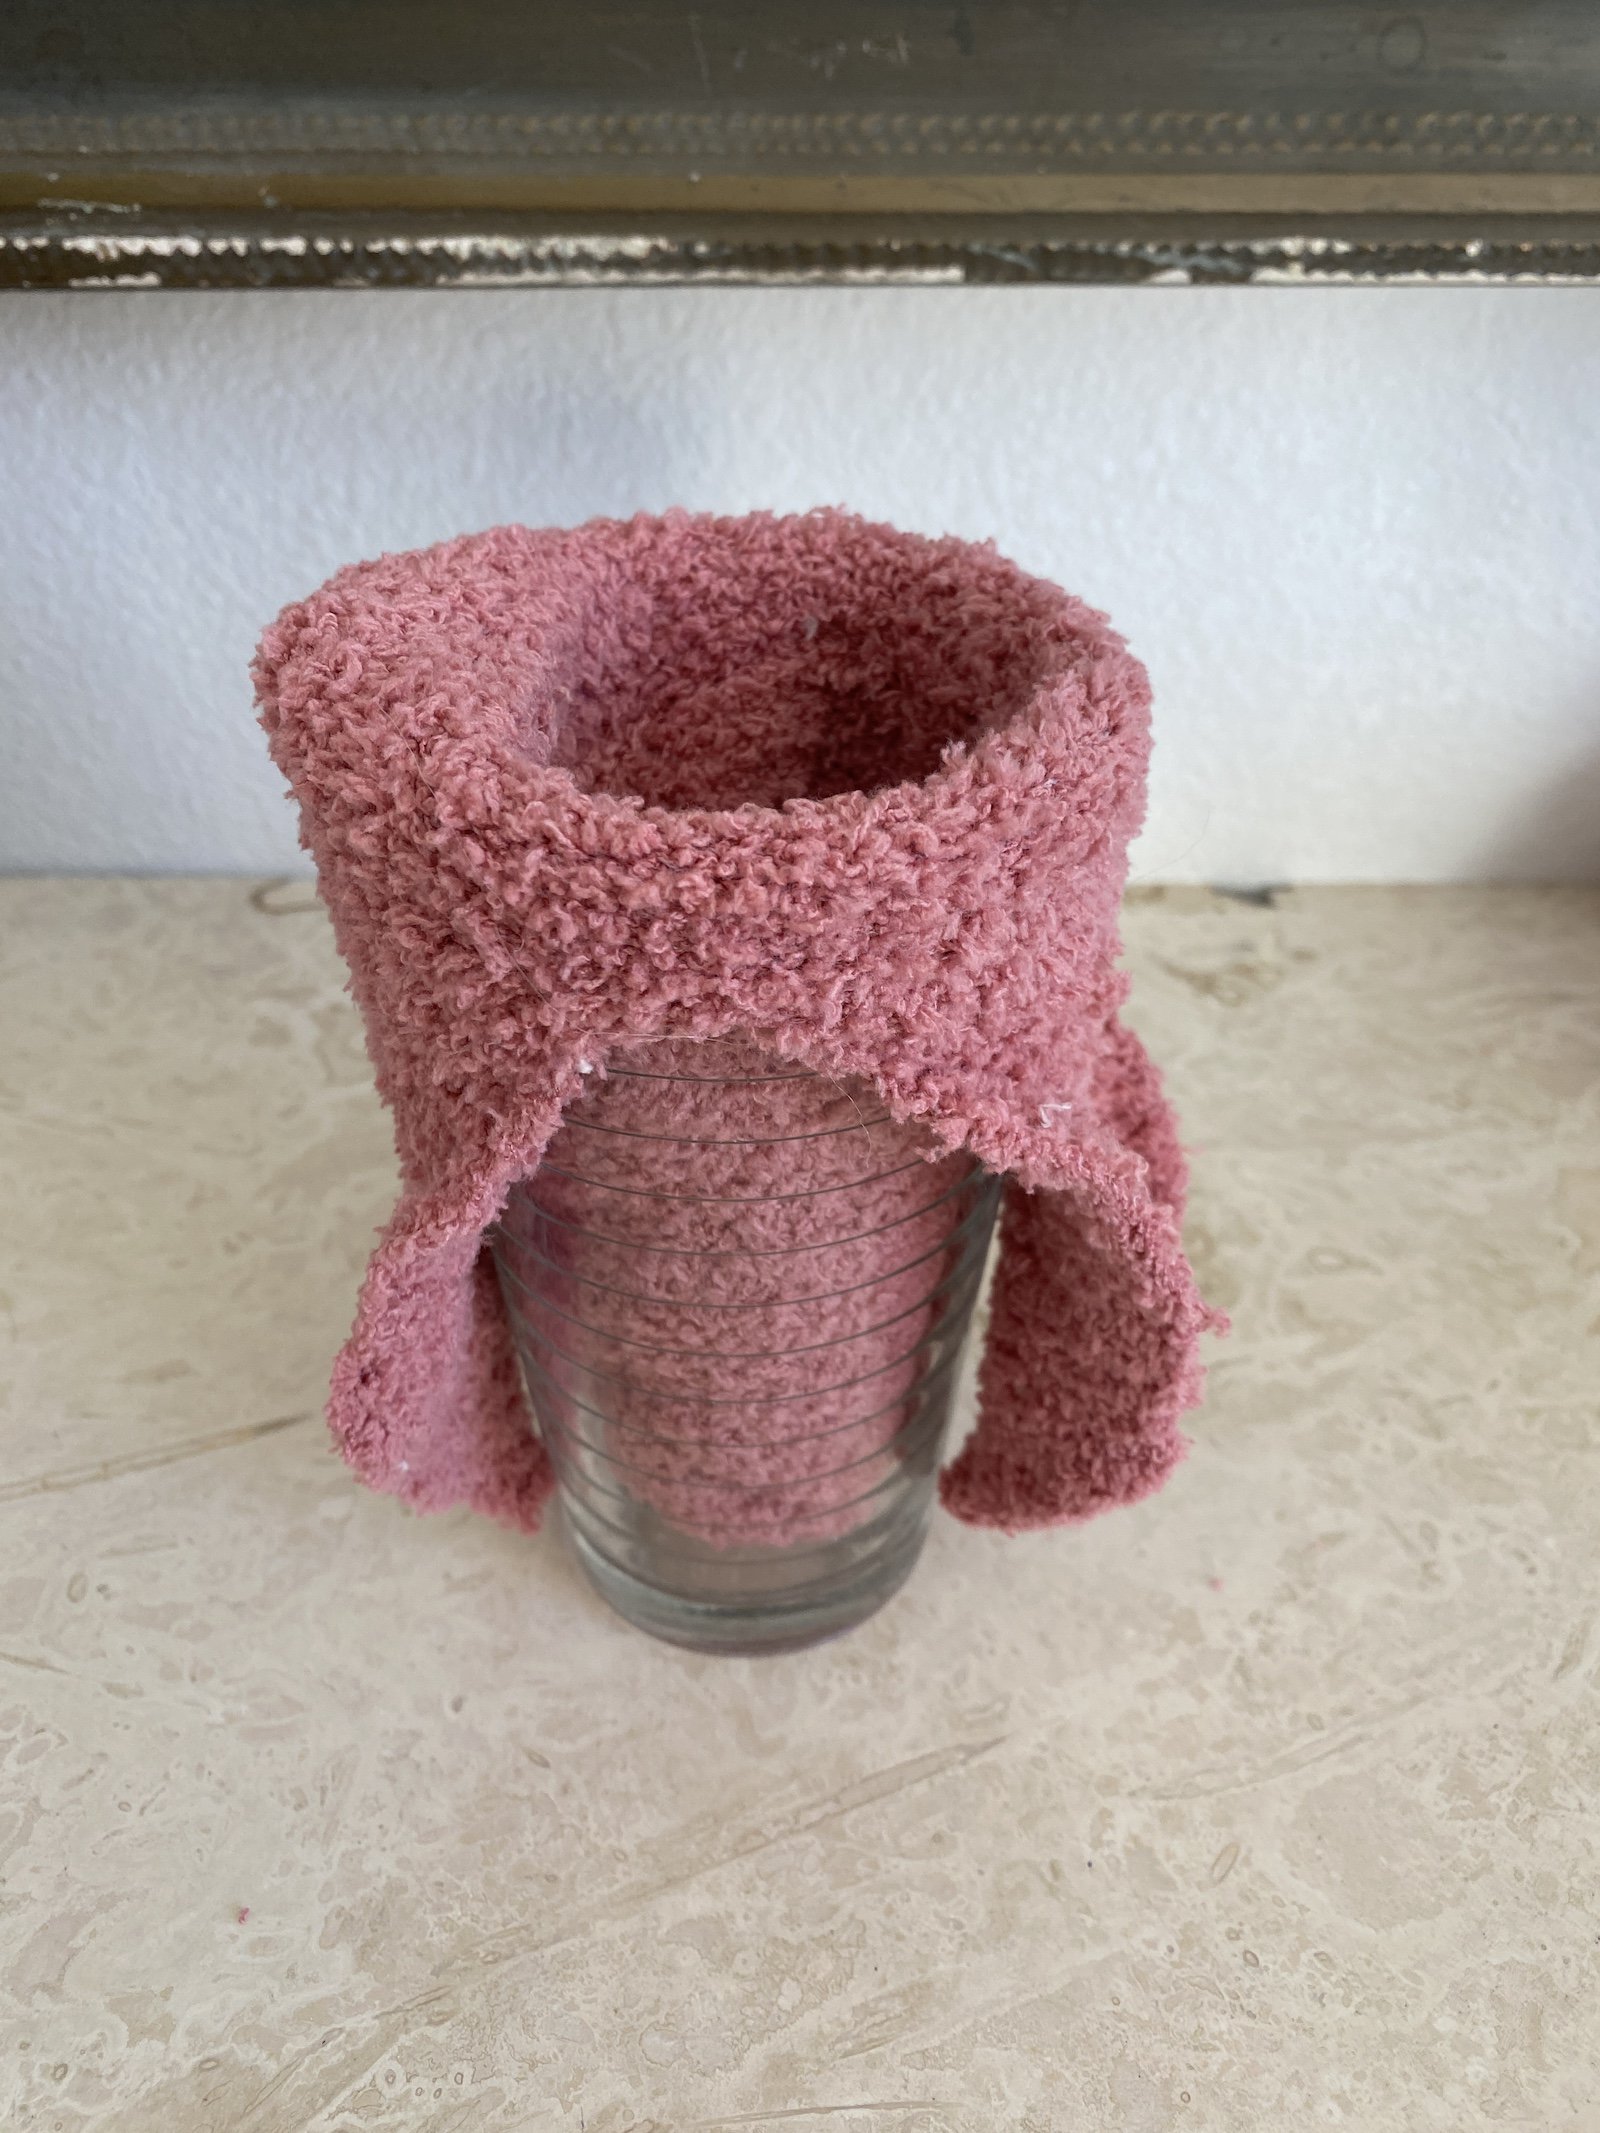
- Cut off the band of the sock then cut the ankle portion almost to the heel of the sock.

- Cut the corners of the insides to form an ear shape. You’ll end up trimming a little more later so don’t cut too much the first time.
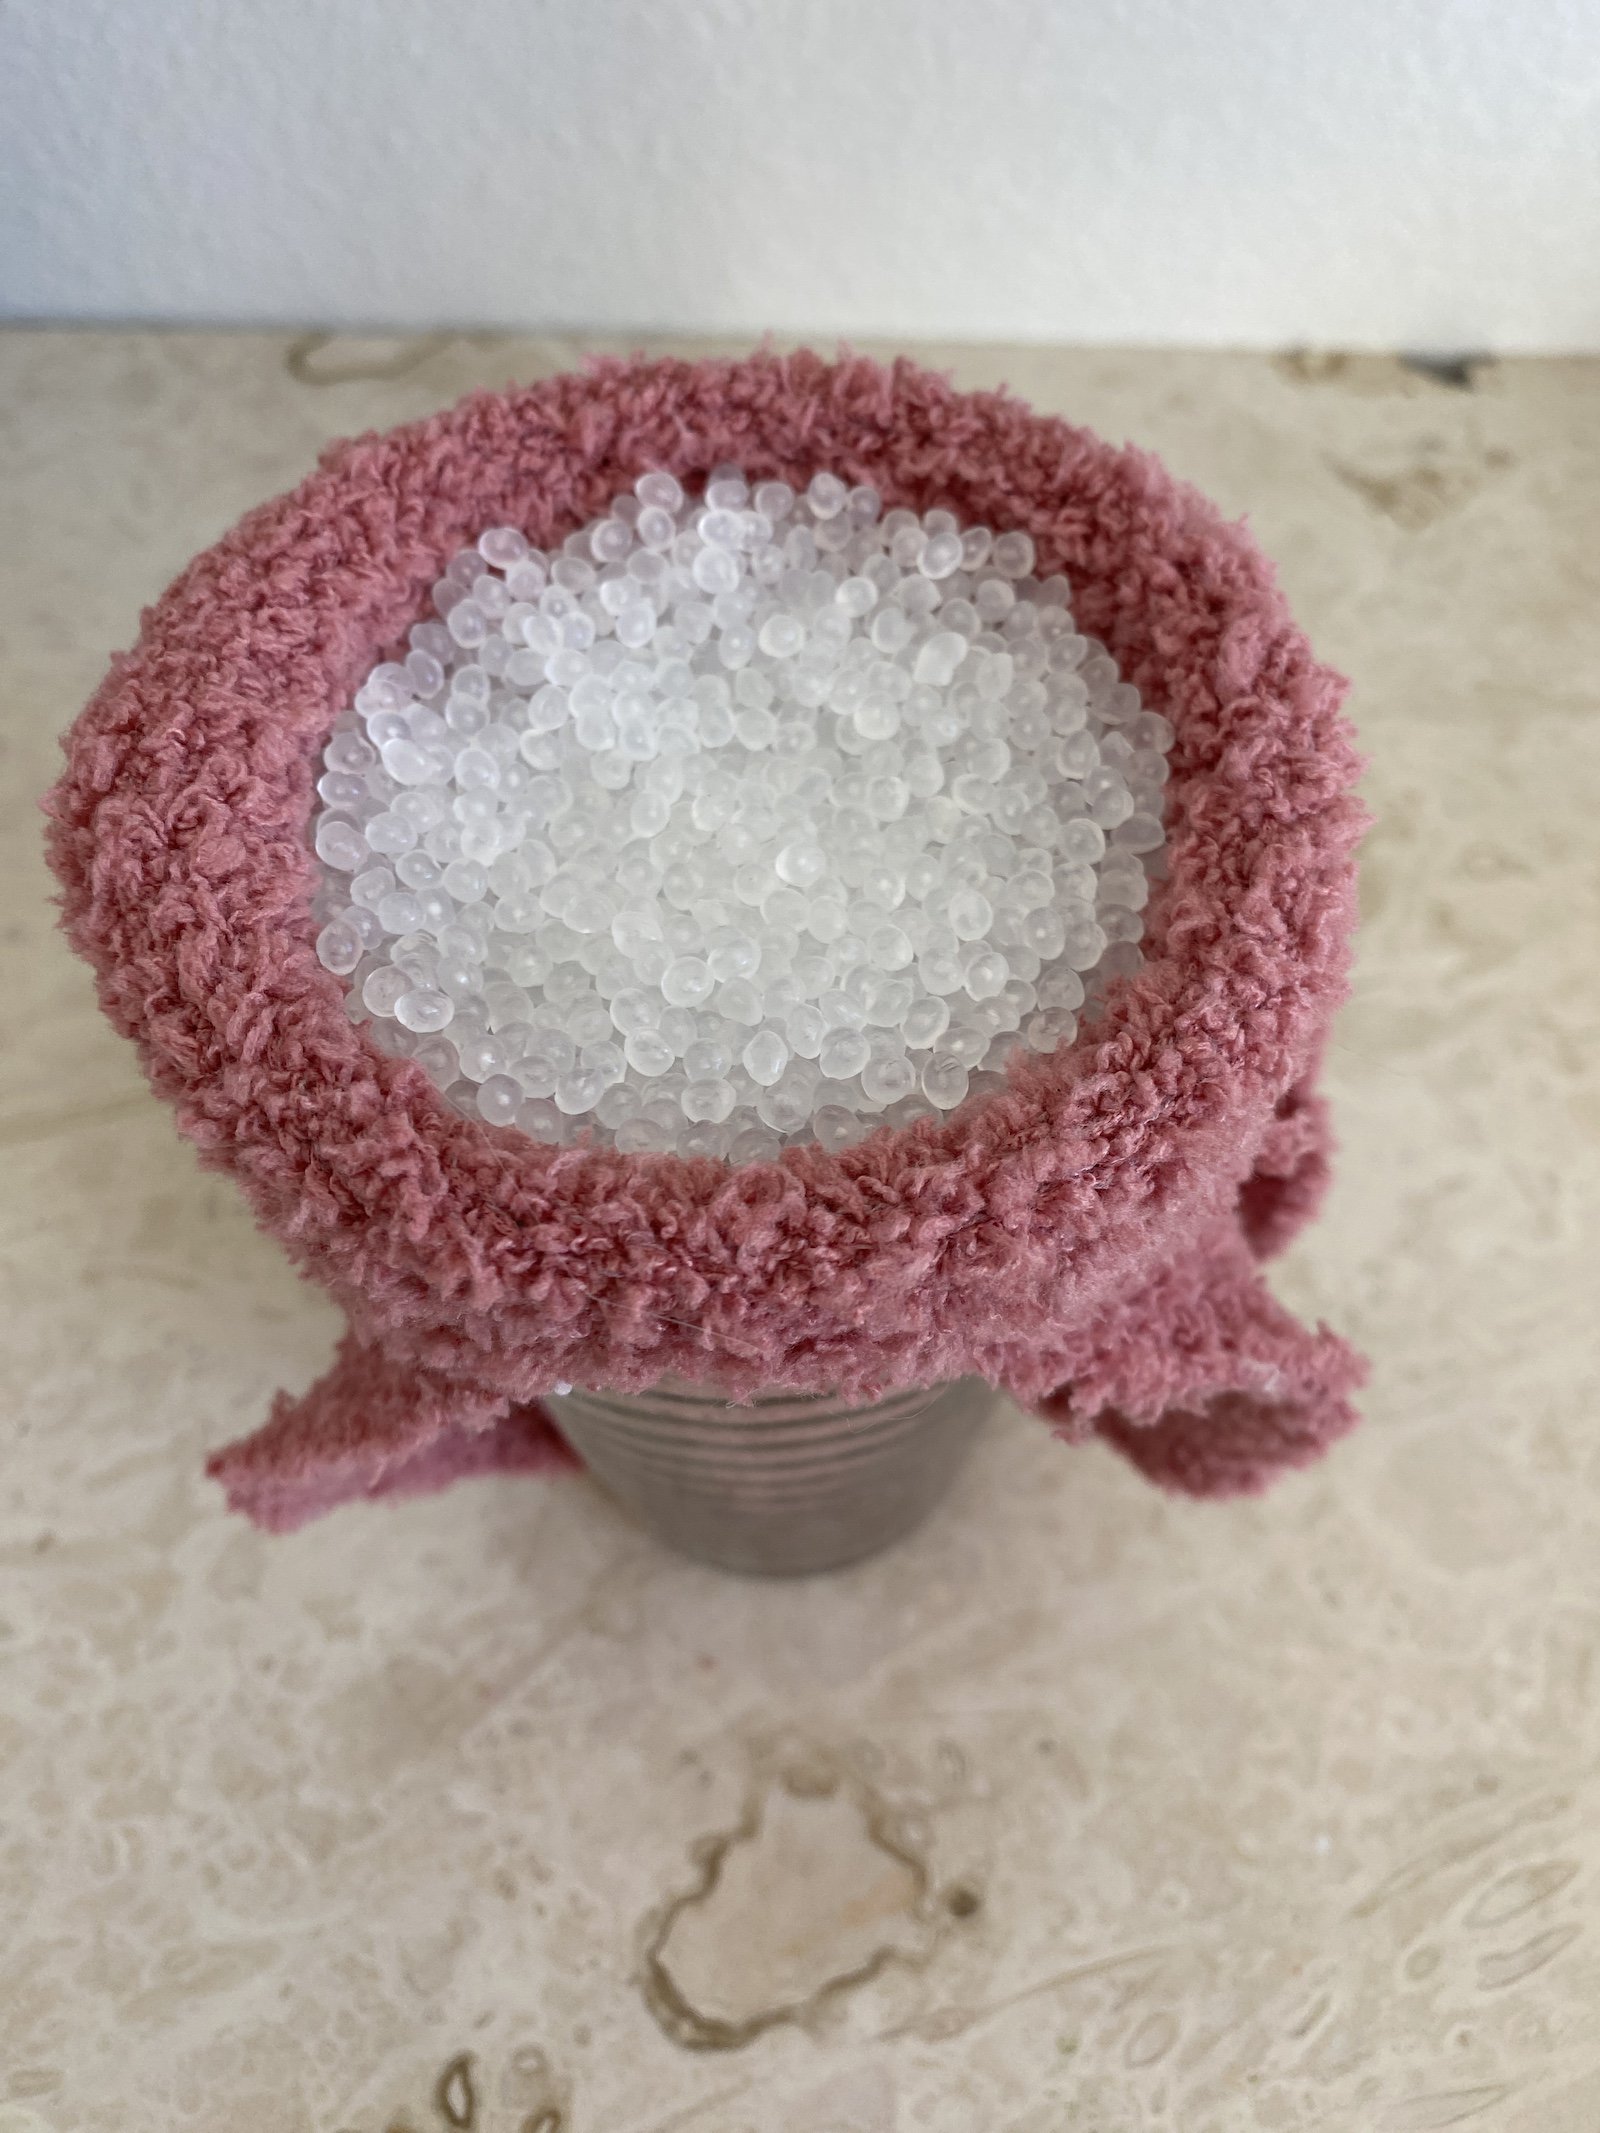
- Put the sock into the cup and stretch the sock over the edge. This makes it easier to get the Poly Pellets of rice into the sock.
- Fill the sock as best as you can. Because the socks are stretchy, I found it easiest to add stuffing to the top. Once your sock is as full as you can get it, you can pull it out of the cup and bounce it to work the beads or rice to the bottom. Fill the sock the rest of the way with Polyfil or another stuffing.
- Shape the gnome’s body and then use a rubber band or twine to tie it off at the top, leaving the ears to flop.
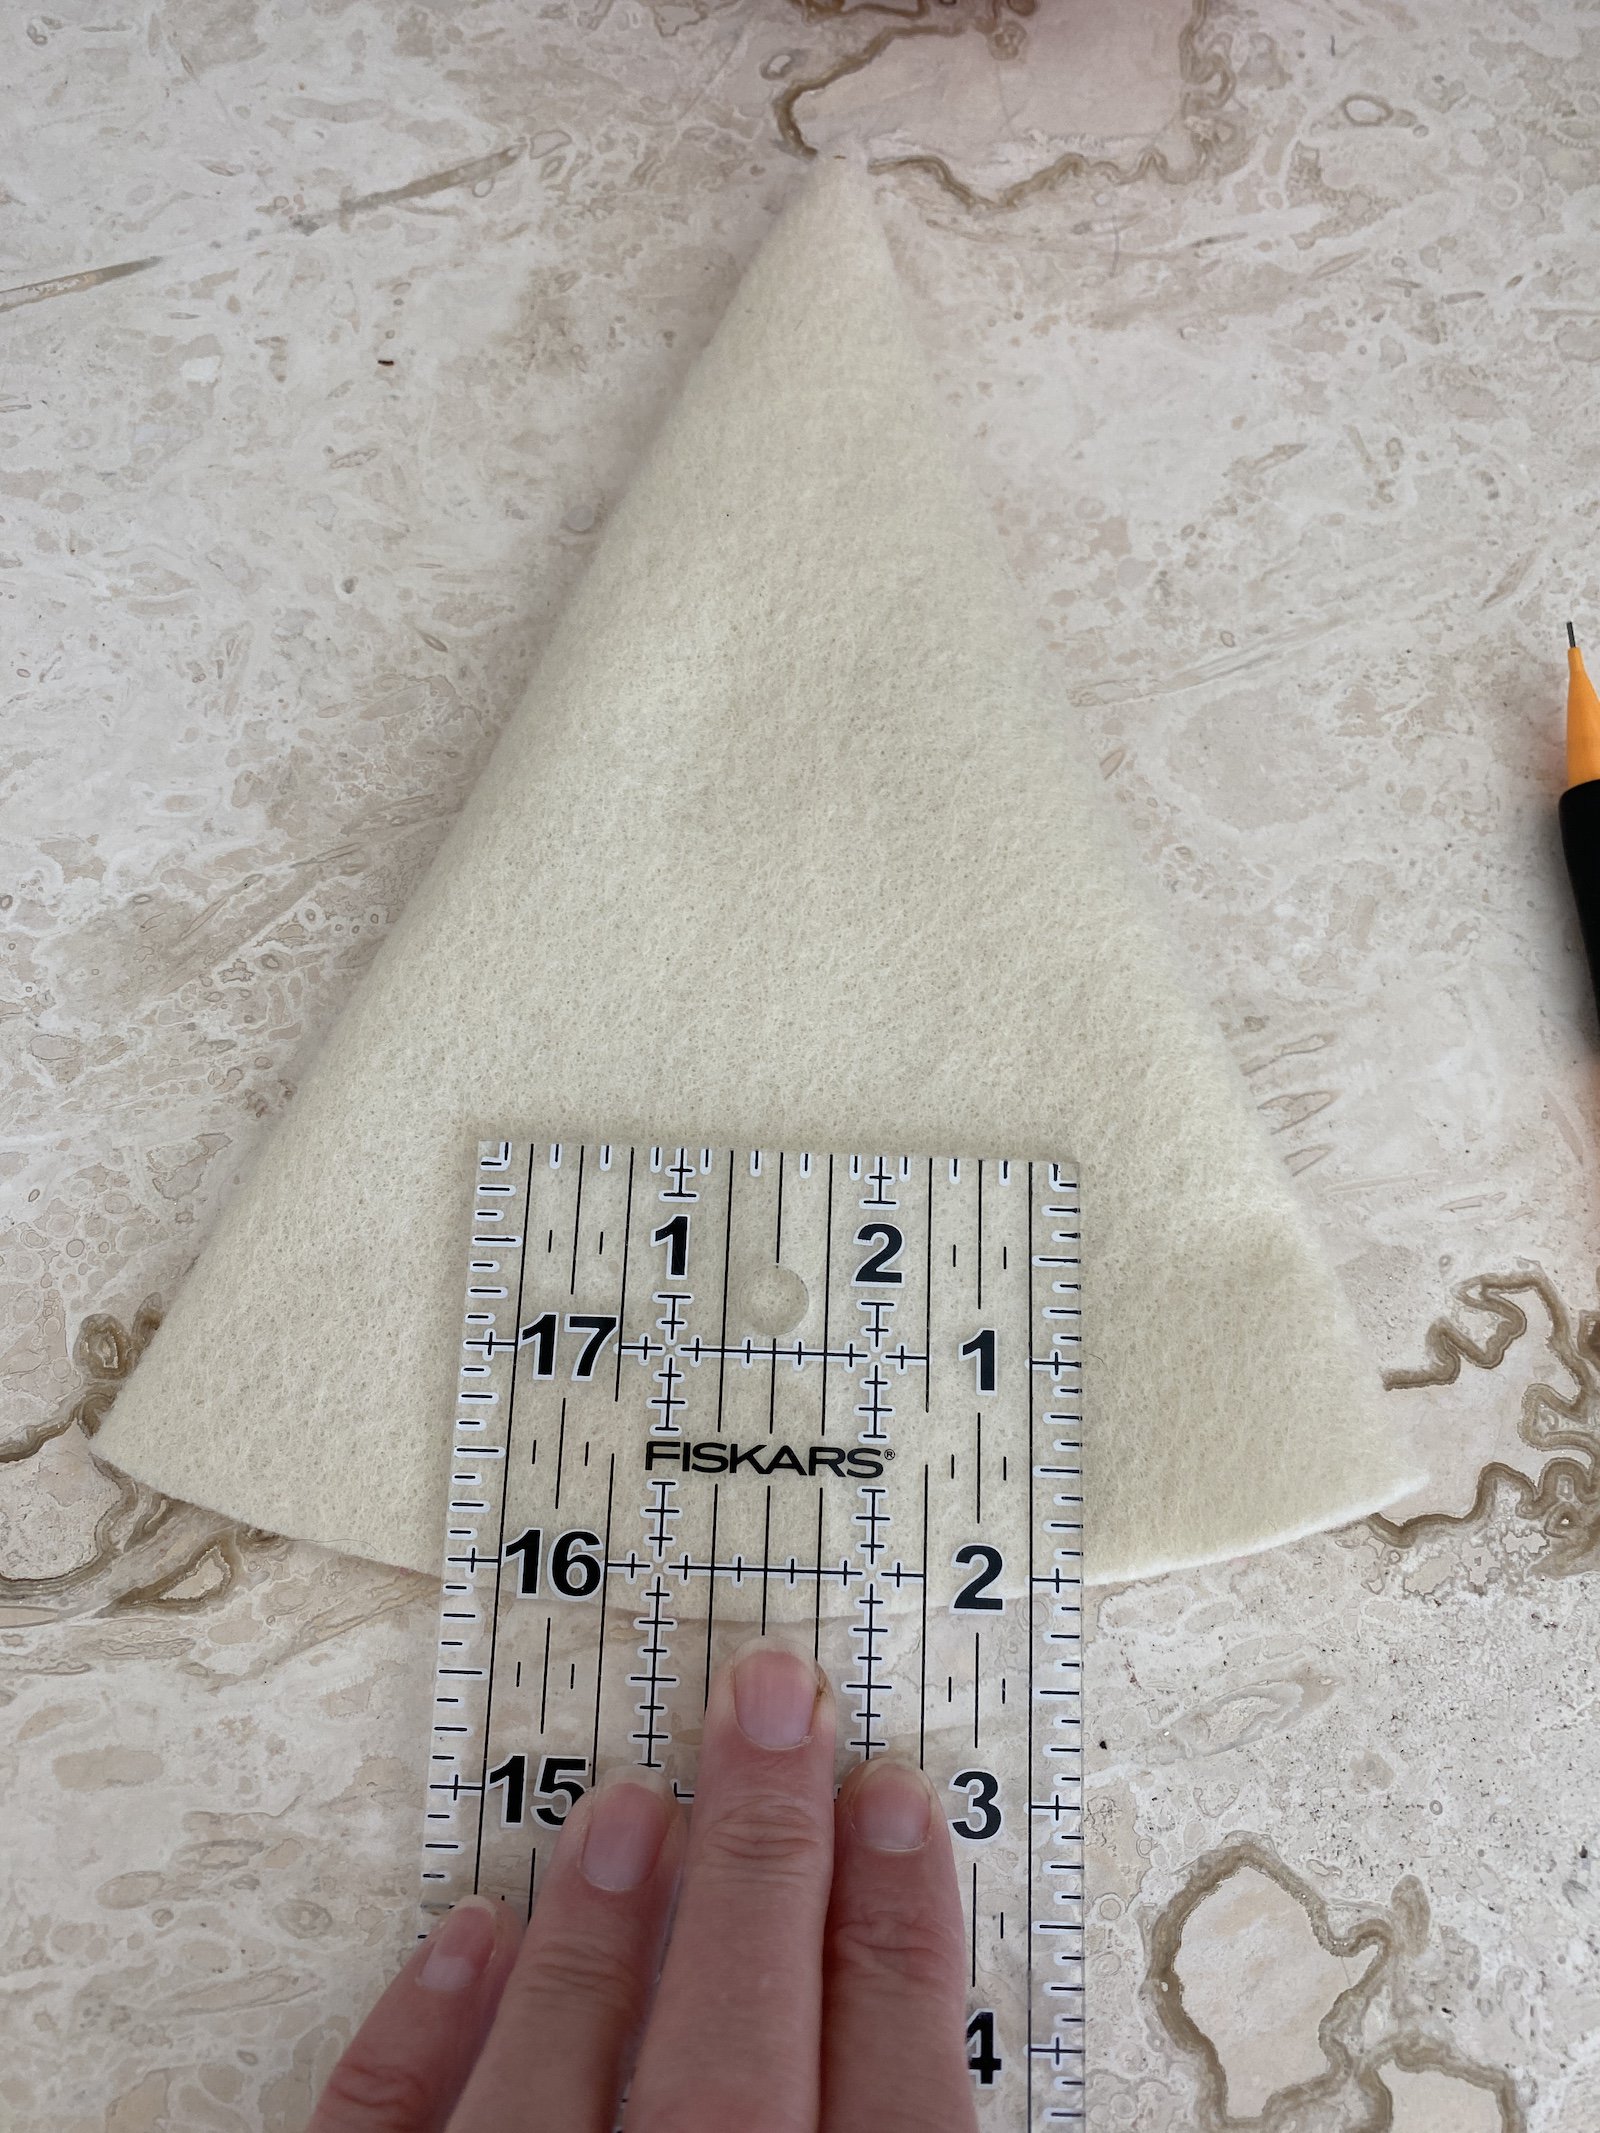
- Make your gnome hat using the sheet of felt. If you don’t know how to make the hat, visit my Felt Gnome Hat Pattern to get the free pattern.
- Make sure the seam is centered in the back and lay your hat flat to mark where the ears will pull through. I put a ruler on top so you can see how I marked the spots. You don’t want the ears too far out to the side. I marked just over an inch from the center on each side.
See the little dots below. Don’t make too big of a mark because you don’t want it to show. - Cut little slits by poking your scissors through the felt on the front side of the hat only. If you cut these too big, the ears don’t look right. Each little slice is only about 1/4″ wide.
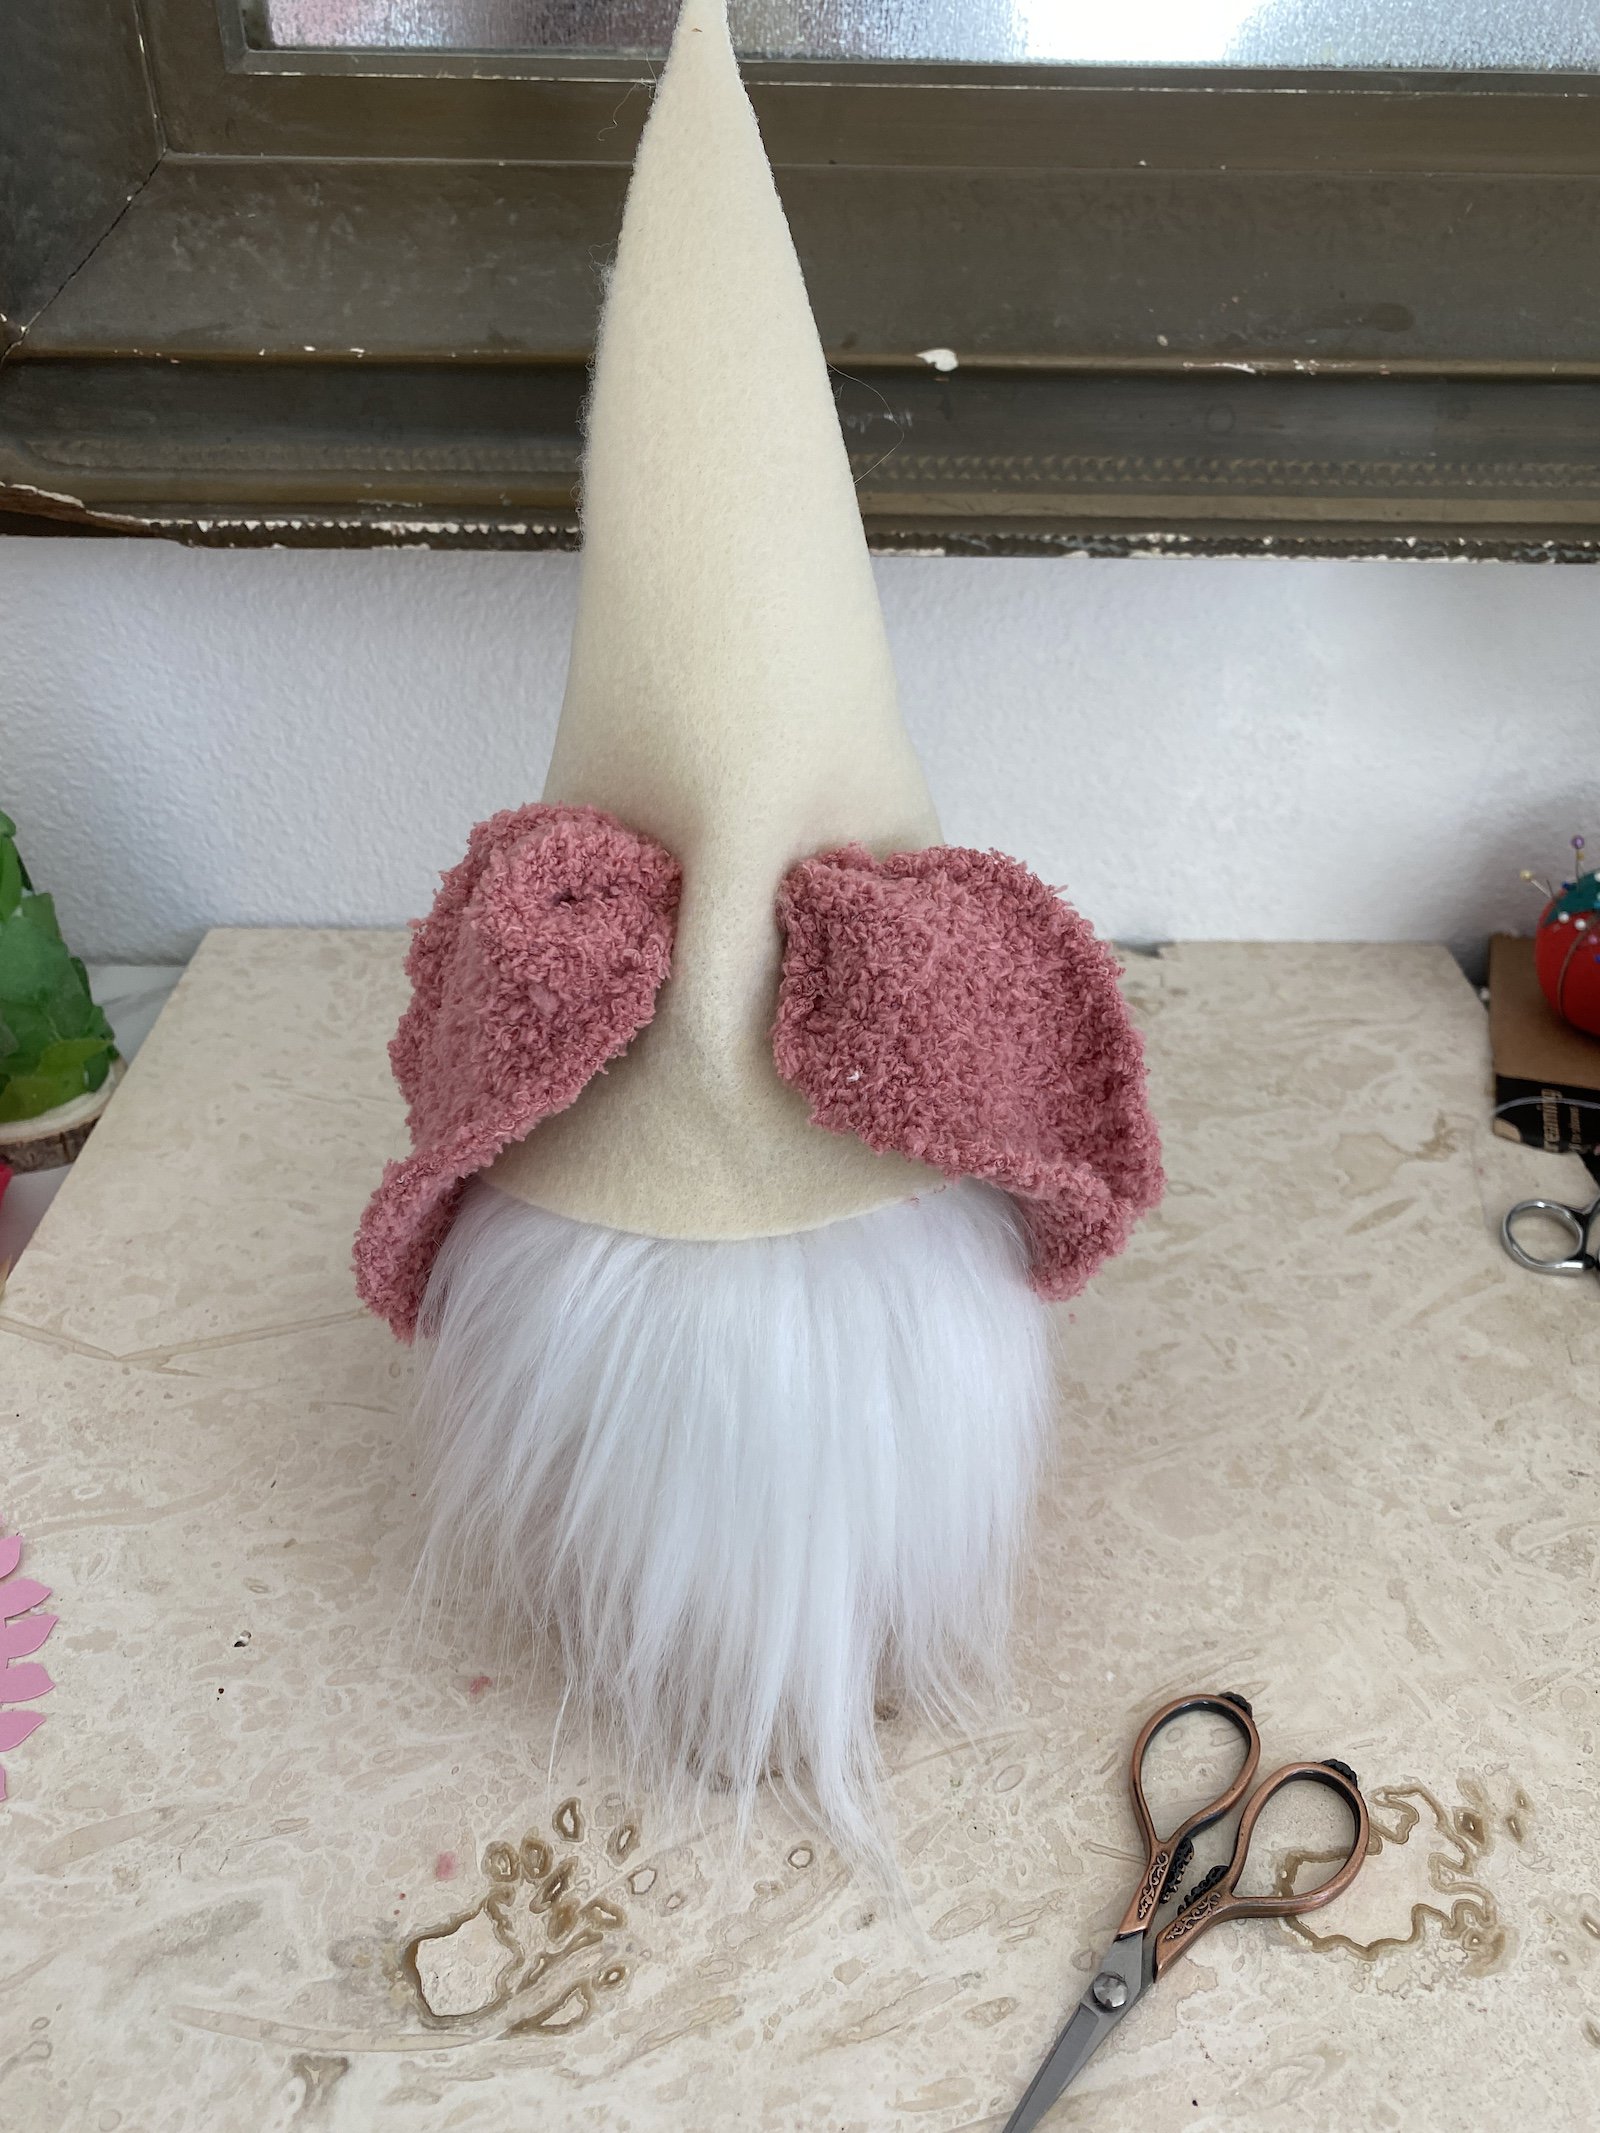
- Cut the beard and glue it in place. If you haven’t cut faux fur before, you just want to cut through the backing of the fur only. Don’t cut the fur itself. You can do this by using a razor knife or just slide your scissors between the fur and the backing to cut the backing only. Make sure your fur is lying in the right direction when you cut. I just cut a triangle of fur.
- Feed the ears through the slits in the hat. I found it easier to do this step first before filling the hat with stuffing. If you fill the hat first, the stuffing comes out of the holes with the ears. Don’t glue the hat in place yet.
- Glue your wooden bead to the fur and then stuff the hat until you get it the way you want it. I missed getting a picture of this step. I like to add a dot of hot glue to the top of the nose and then secure my hat around the top of the nose. You can glue the hat in place now if you want.
- The final step is to glue flowers or decorations and enjoy your finished sock gnomes.
For the baby gnome, I ended up gluing a piece of pipe cleaner in each ear so I could bend them into place. The sock I used was a toddler sock. I believe it was a 2T size.


Easter Gnomes DIY
Make these easy Easter gnomes in minutes with just a few craft supplies!
Materials
- A sock per gnome
- 1 sheet of felt for the hat
- 1 wooden bead or a felt ball for the nose
- Faux fur for the beard
- Poly pellets or rice to fill the body of the gnome
- Poly-fil so the hat keeps its shape
- A piece of twine or a rubber band
Tools
- Scissors
- Hot Glue gun
- A tall cup or glass
Instructions
- Cut off the band of the sock then lay it flat and cut from the top of the sock almost to the middle as shown.
- Place your sock inside the cup and stretch the top of the sock over the edges of the cup.
- Fill the sock with your choice of filler. Remove it from the cup and add Polfil. Tie off the top.
- Make your felt hat and mark and cut the spots for the ears.
- Glue the beard and wooden bead to the sock.
- Feed the ears through the holes in the hat and add Polyfil to the hat.
- Glue the hat in place.
- Add decorations if you'd like.
Recommended Products
As an Amazon Associate and member of other affiliate programs, I earn from qualifying purchases at no cost to you. Thank you for your support!


If you’re interested in other Easter Gnomes that can be used as ornaments or put on top of gifts, be sure to check out these cute yarn gnomes. They can be made in any color for all seasons.

Happy crafting,
Denise